New
#61
ANN: Classic Shell - start menu and other features
-
-
New #62
Hello
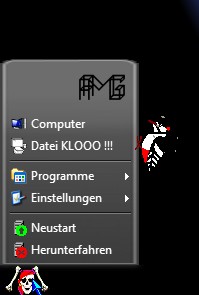
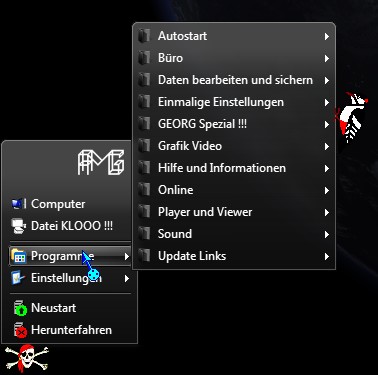
I have installed Classic Shell 1.9.0 its cool !!!


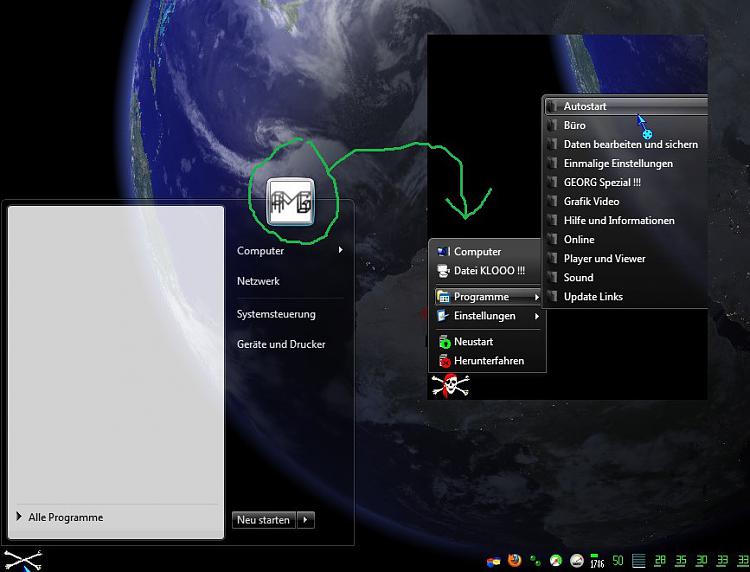
I will the user picture for Win7 start menu in the classic start menu we maked it see screenshot ???


Here is my StartMenuItems.ini settings:
; MAIN_MENU.Items - the structure of the main menu. You can add or remove items here
; REMOVE THE SEMICOLON FROM THE BEGINNING OF THE NEXT LINE TO ENABLE THE CUSTOM MENU STRUCTURE
MAIN_MENU.Items=PROGRAMS, SettingsMenu, SEPARATOR, DisconnectItem, RestartItem, ShutdownItem
; SettingsMenu - the name, icon and structure of the Settings menu
SettingsMenu.Items=CONTROL_PANEL, SEPARATOR, PRINTERS, TaskbarSettingsItem, SEPARATOR, ClassicSettingsItem
SettingsMenu.Name=$Menu.Settings
SettingsMenu.Icon=shell32.dll,330
; And so on. You get the idea.
RestartItem.Command=restart
RestartItem.Name=Neustart
RestartItem.Icon=C:\KOPIER.PRG\XP EXIT + REBOOT\ICON085.ICO
ShutdownItem.Command=shutdown
ShutdownItem.Name=Herunterfahren
ShutdownItem.Icon=C:\KOPIER.PRG\XP EXIT + REBOOT\ICON086.ICO
TaskbarSettingsItem.Command=taskbar_settings
TaskbarSettingsItem.Name=$Menu.Taskbar
TaskbarSettingsItem.Icon=shell32.dll,40
TaskbarSettingsItem.Tip=$Menu.TaskbarTip
ClassicSettingsItem.Command=menu_settings
ClassicSettingsItem.Name=$Menu.ClassicSettings
ClassicSettingsItem.Icon=ClassicStartMenuDLL.dll,103
ClassicSettingsItem.Tip=$Menu.SettingsTip
-
New #63
-
-
New #65
OK, so you want to place the user picture at the top of the main menu.
This is not possible at the moment. However you can modify the skin file to and add a specific image (logo, user picture, whatever) as part of the background.
The downside is that if you change your user image you will have to edit the skin again.
The process takes a bit of patience and requires some skills with Photoshop and Resoure Hacker. Take a look at the skin tutorial first: Classic Start Menu Skinning Tutorial
If you can't figure something out I can help you with it.
-
New #66
Thanks Ivo i have Restorator, Resoure Hacker and Gimp the making is not problem !!!


The Problem is the code in the Smoked Glass.skin file can you help me please ???


-
New #67
OK, let's get started.
1) Extract bitmap #2. It is a 32-bit bitmap with alpha channel. Hopefully GIMP can handle those.
2) Make the bitmal wider. Let's say your image is 48x50 pixels. You have to increase the width of the bitmap by about 48 pixels. You can't just stretch it. You have to preserve the left-most 5 columns and the right-most 5 columns.
3) Place your image near the top-right corner of the bitmap. You may want to make the alpha behind your image more opaque.
4) Add the edited bitmap to the skin file as a new bitmap resource #9. You can't just replace bitmap #2 because it is also used by the sub-menus.
5) Locate the portion of the SKIN resource that says:
[NOT CAPTION]
Main_bitmap=2
Main_bitmap_slices_X=0,0,0,13,2,13
Main_padding=8,6,6,4
Change it to:
[NOT CAPTION]
Main_bitmap=9
Main_bitmap_slices_X=0,0,0,13,2,61
Main_bitmap_slices_Y=63,314,8
Main_padding=8,54,6,4
9 is the ID of the new bitmap
61 is the original 13 plus the 48 new pixels added to the width
63 is the original 13 plus the height of the image (50)
314 is the original 364 minus the height of the image
56 is the original 6 plus the the extra 50 pixels where the image is
Horizontally the background will preserve the first 13 and the last 61 columns, and stretch the middle 2 to fill the space.
Vertically the background will preserve the first 63 and the last 8 rows, and stretch the middle 314.
There will be 54 pixels from the top of the menu to the first item, leaving enough space for your image.
Important:
* If your image is not 48x50, you should adjust the rest of the numbers accordingly
* If you have UAC enabled, make sure you are actually overwriting the .skin file (it is usually in Program Files, which is a UAC-protected folder)
* You may have to tweak the numbers a bit to achieve the desired effect
-
-
New #69
Excellent! I'm glad it worked for you.
-
Related Discussions


 Quote
Quote


