New
#1
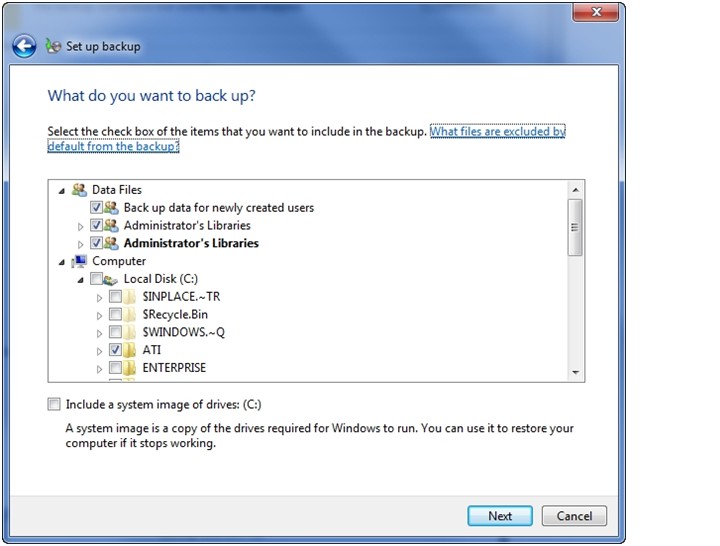
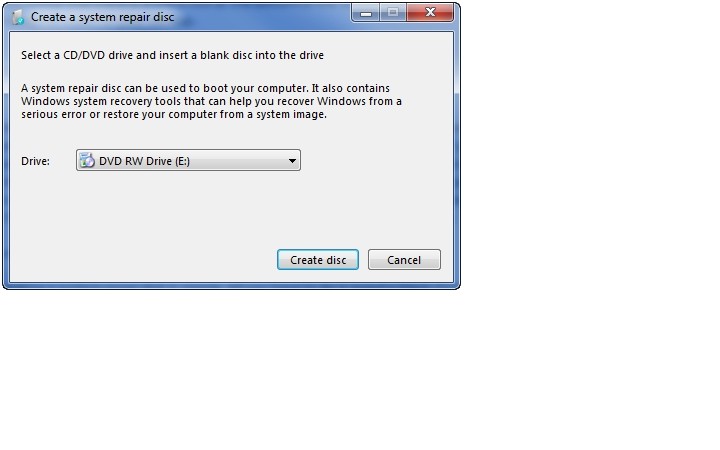
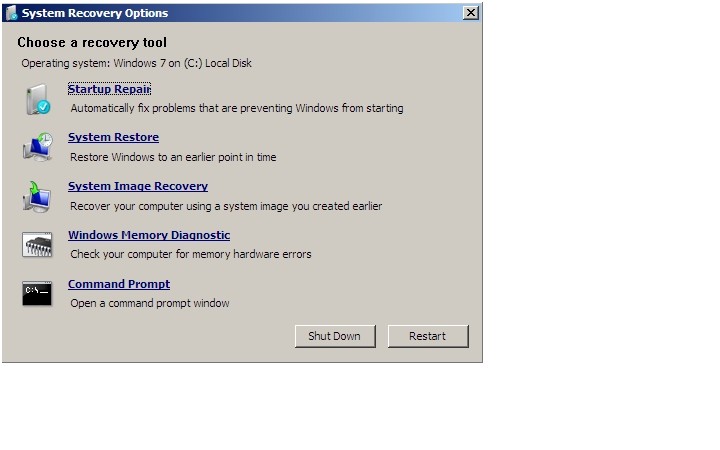
Creating my own install dvd
I apologize in advance if this subject had already been addressed.
As you all know, most new PCs come with a "RESTORE TO FACTORY IMAGE" set of DVDs, so when you are in trouble you use those DVDs and have a brand new system.
However, these "IMAGES" come full of junk.
What I want is to create my OWN IMAGE so, after instaling all my softwares and twicking WIN7 to my taste, if I ever want to reinstall i would get back to MY ORIGINAL image...
can you please help me?
Thanks in advance

 Quote
Quote