Show Us Your Rig [4]


  1. Posts : 9,600
    Win 7 Ultimate 64 bit
       #1031

    First Build, Part Three


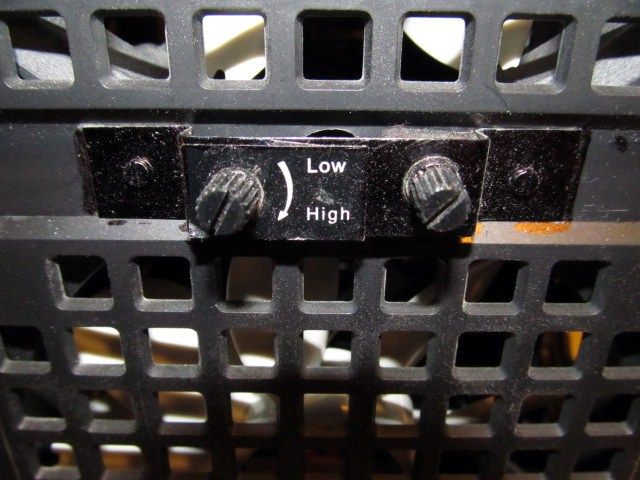
    This shot is of the speed control pot for the left side panel fan. I had to make a bracket to hold it in. You can see a bit of the pot for the exhaust fan.


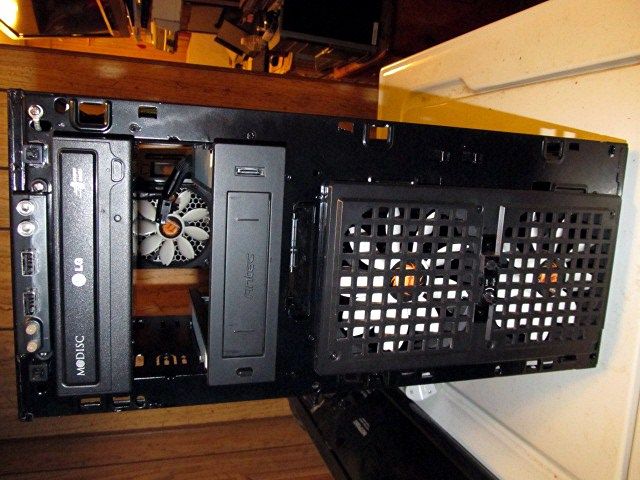
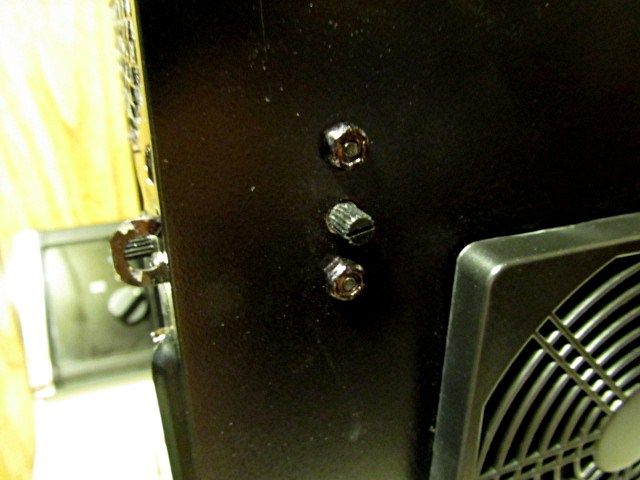
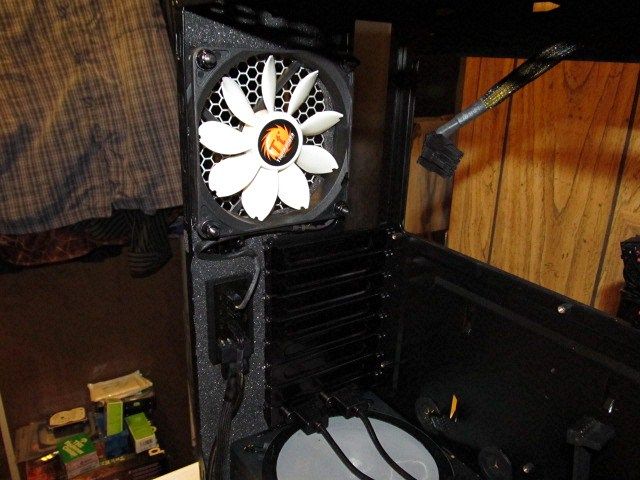
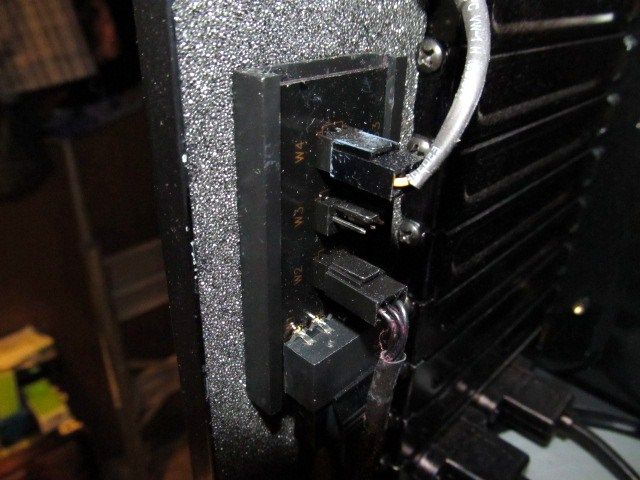
    The next two shots show the hub that feeds the fans. The bottom connector feeds the two front fans (I had to sneak the cable under the PSU to a Y splitter and, from there, to the fans), the center one feeds the side fan, and the top one, the exhaust fan. I prefer to have the case fans running at a constant feed since a constant sound level is easier to ignore than one that keeps changing. The fans are quiet enough, noise shouldn't be an issue anyway. I probably won't use the filter on top of the PSU; it's there for now mostly to keep small parts from falling in (been there, done that, didn't even get a tee shirt).


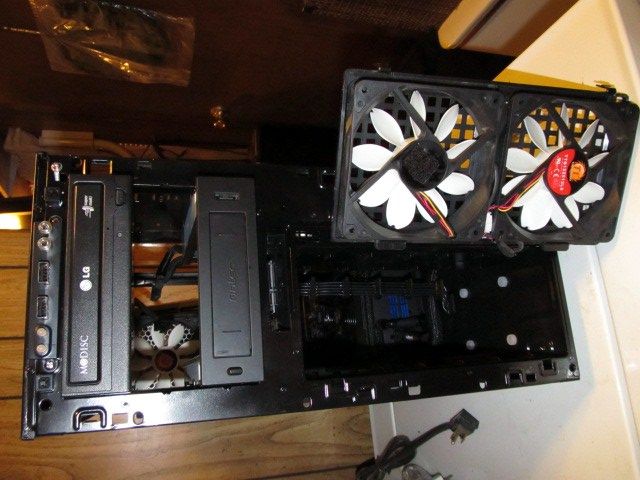
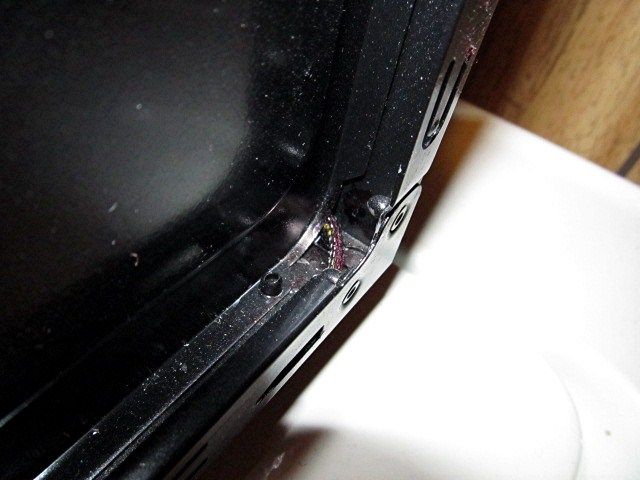
    This photo shows where I "snuck" the front fans cable under the MOBO plate and PSU. I had to take the connector off to pull it off. Whatever works.


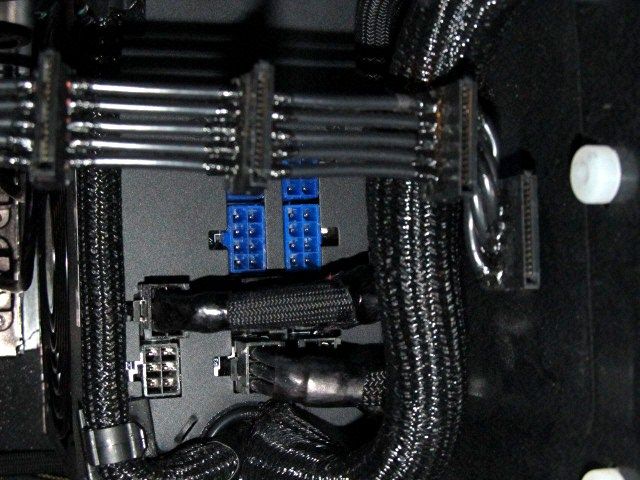
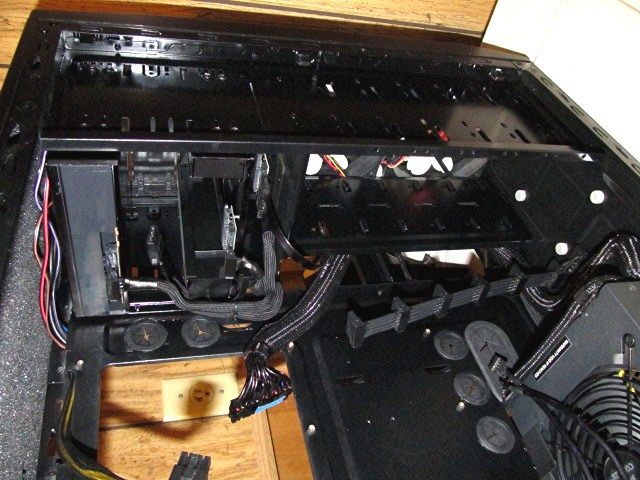
    Below is shot of the PSU and the cables connected to it. Yes, it's upside down. There isn't enough room underneath for it to get enough air and the convoluted botom made opening it up for air and adding a filter impractical. The two cables running across the top of the PSU lead to a pair of USB 2.0 connectors and will connect to a header on the MOBO. The CPU power and 24 pin cables coming out of the PSU had sleeves that were essentially transparent so I used wrap around sleeves on them. The other PSU cables are homemade. One leads to the fan hub. Three are combined into one to make routing easier, then splits back off near their destination. Each of the hot swap bays have their own feed from the PSU (I read in a review that if they didn't have their own feeds, it could cause the other HDDs to momentarily stop when a HDD is inserted in the bay). The third feed goes to the optical drive and has a cable splitting off to a four pin Molex connector to possibly feed a card reader/USB 3.0 hub. You can also see part of the cable supplying power to the SSD and HDDs (the SSD mounts on the floor of the case). That cable was challenging because I used #14 wire to avoid as much voltage drop as possible. I had to strip the wire where the connectors went in order to get them to fit without breaking. Fun.


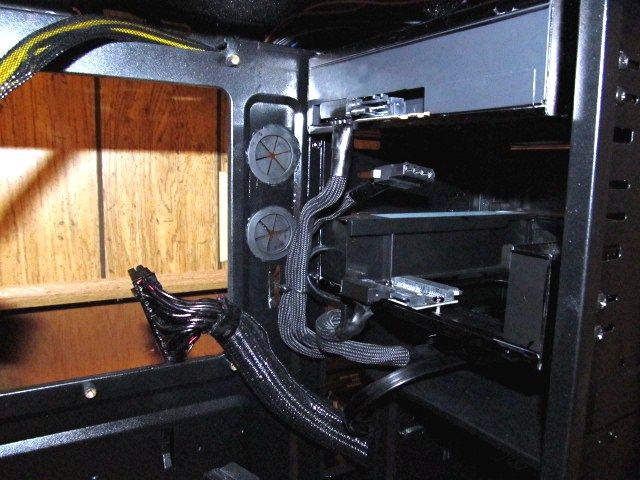
    This shot shows more of the SATA power cable and the cables leading to the shotswap bays and optical drive. I cut a new hole for the front panel cables to go through since the two places provided left them coming up a bit short and/or looked like heck. Now, I have enough length for all of them except the audio connector (I fixed that with an extension). Once the front panel cables are connected to the MOBO, I'll cover the exposed cables at the top of the case with a wrap sleeve. Those white things on the floor of the case are the silicone mounts for the SSD.


    This is a closer shot of the cables going to the hot swap bays and the optical drive. The empty space is where I'll be putting a card reader later on (the one at the top of my list will need that four pin Molex connector floating in there right now). The only SATA data installed right now is for the 2.5" swap bay and I wanted to install it before putting in the 3.5" bay while it was easier to get at.


    Part Four coming up soon.
    Last edited by Lady Fitzgerald; 14 Jan 2013 at 21:02. Reason: Oldtimer's Disease
      My Computer


  2. Posts : 9,600
    Win 7 Ultimate 64 bit
       #1032

    First Build, Part Four


    This shot shows the optical drive, the added 3.5" hot swap bay, the opening for the built in 2.5" hot swap bay, and the front fans.


    This is a close up of the speed control pots for the front two fans. I had to fabricate the mounting bracket.


    This shot shows the fan cover opened up. I had to cut away a cross bar to make room for the wiring for the speed control pot wiring (see Part One to see the cross bar).


    The next two shots are through the front of the case where the fans mount. They give another view of the PSU cables.


    I'll be back later with a list of the goodies going into the case.
    Last edited by Lady Fitzgerald; 14 Jan 2013 at 20:34. Reason: Senioritis
      My Computer


  3. Posts : 11,424
    Windows 7 Ultimate 64
    Thread Starter
       #1033

    Lady Fitzgerald,
    Excellent work in every facet. I especially like the great care in all the wire routing with attention to the cable twist and placing just the right kinks in it to make it look so clean. You can tell when someone has the upgrade bug and my dear you've been bitten by the system modifying bug.
      My Computer


  4. Posts : 537
    Windows 7 Ultimate x64 SP1
       #1034

    Lady Fitzgerald,
    That's some serious, clean, wiring. It looks amazing!
    Keep the pics coming. We want to see the finished product.
    Cheers,
    J
      My Computer


  5. Posts : 7,466
    Windows 10 Home Premium 64bit sp1
       #1035

    Lady Fitzgerald I have that same Lg drive you have it is cheap and really effective it burns my media like no other
      My Computer


  6. Posts : 537
    Windows 7 Ultimate x64 SP1
       #1036

    I have the same LG drive too. It is great.

    @Solar,
    I followed your advice and got an 8320. They were fresh out of 8350s.
    I also got an H100i, a second 7850 and the new mobo arrived, so it's a full rebuild.
    Still waiting for the SSD I RMA'ed some ten days ago.
    Will post pics when I'm done.

    I killed my 8120 when removing the DeepCool heatsink. The mounting bracket had so much pressure on it that when I undid the one sided fastener the whole thing sprang free, bending a whole lot of pins, before giving me time to twist it lose, .
    It wasn't a great thing anyway, but I could have used it for a back up rig.
    Luckily no pins stayed lodged in the socket, so I can still use the mobo.
      My Computer


  7. Posts : 9,606
    Win7 Enterprise, Win7 x86 (Ult 7600), Win7 x64 Ult 7600, TechNet RTM on AMD x64 (2.8Ghz)
       #1037


    I bought two of the LG SuperMulti DVD drives in Dec at Fry's electronics in Phoenix for $ 14.99 each ON SALE

    Working great in the two latest rigs I build
      My Computer


  8. Posts : 7,466
    Windows 10 Home Premium 64bit sp1
       #1038

    Bungee18 said:
    I have the same LG drive too. It is great.

    @Solar,
    I followed your advice and got an 8320. They were fresh out of 8350s.
    I also got an H100i, a second 7850 and the new mobo arrived, so it's a full rebuild.
    Still waiting for the SSD I RMA'ed some ten days ago.
    Will post pics when I'm done.

    I killed my 8120 when removing the DeepCool heatsink. The mounting bracket had so much pressure on it that when I undid the one sided fastener the whole thing sprang free, bending a whole lot of pins, before giving me time to twist it lose, .
    It wasn't a great thing anyway, but I could have used it for a back up rig.
    Luckily no pins stayed lodged in the socket, so I can still use the mobo.
    Sorry to hear that Bungee you will be ok with the 8320 it will clock with in a a few Mhz between the two
    you will see a big jump in all aspects but don't expect your ram MB cycle to increase you will still be held to about 19 to 20,000 mb

    @Doc Brown i think I paid a dollar more for mine back in the summer months 15.99 but when you look at who made it I think they could put a car together and make it work well that is how much trust i have in LG which im not normaly loyal to a particular type of brand but a deal is a deal in my book
      My Computer


  9. Posts : 1,438
    64bit Windows 10
       #1039

    Lady Fitzgerald, looks very good. Eagerly awaiting the rest of the pics.
      My Computer


  10. Posts : 12,177
    Windows 7 Ult x64 - SP1/ Windows 8 Pro x64
       #1040

    Nice work Lady Fitzgerald, looks great.
    Waiting to see the finished pics.
      My Computer


  Related Discussions
Our Sites
Site Links
About Us
Windows 7 Forums is an independent web site and has not been authorized, sponsored, or otherwise approved by Microsoft Corporation. "Windows 7" and related materials are trademarks of Microsoft Corp.

© Designer Media Ltd
All times are GMT -5. The time now is 11:50.
Find Us