

How to Install, Enable, and Disable Windows Virtual PC Integration Features
InformationThe Integration Components package contains integration features, which improve the interactions between the virtual machine (guest) and the physical computer (host).
This will show you how to install, enable, and disable them in Windows Virtual PC. Once you have installed the integration components in a virtual machine, you will be able to enable or disable the integration features at will.NoteAfter the Integration Components package is installed, you can turn some of the integration features on or off by modifying the virtual machine settings. The two exceptions are mouse integration and time synchronization, which are always turned on when the package is installed.
Windows Virtual PC Integration Features:
- Mouse integration - This makes it possible for you to move the mouse seamlessly between the desktops of the host operating system and the guest operating system.
- Time synchronization - This keeps the time in the guest operating system (virtual machine) synchronized with the host operating system (your Windows 7 computer).
- Audio - This setting controls whether audio input and output for the virtual machine is redirected to audio devices in the host, or is managed by an emulated audio device. To improve audio performance, clear the check box for a virtual machine running Windows XP, and select the check box for a virtual machine running Windows Vista or Windows 7.
- Clipboard - You can copy and paste data between the host operating system and the guest operating system. For example, you can copy a URL from the browser in a guest operating system, and paste it to a browser in the host operating system.
- Hard drives - This feature shares the drives you select on the host with the virtual machine so that you can easily access host data from within the virtual machine. This feature also makes it possible to access the host desktop and Documents folder from virtual applications when you select those resources to share.
- Printers - This feature makes it possible to share printers between the host operating system and guest operating system. To share printers when Windows XP is the guest operating system, you must also install the printer drivers.
- USB devices - Printers, storage devices, and smart card readers are automatically shared with virtual machines. Other types of supported USB devices are supported by redirecting them to the virtual machine.
Here's How:
1. Open the virtual machine in Windows Virtual PC.That's it,
2. To Install Integration Components
NOTE: You would only have this option if you have not installed the Integration Components in this specific virtual machine yet. If you have, then you will have the option to either Enable Integration Features or Disable Integration Features instead.
A) Click on Tools on the virtual machine menu bar, and click on Install Integration Components. (see screenshot below)3. To Enable Integration Features
NOTE: You may need to press CTRL+ALT+Left Arrow to move the mouse pointer out of the virtual machine to click on the menu bar.
B) Click on Continue. (see screenshot below)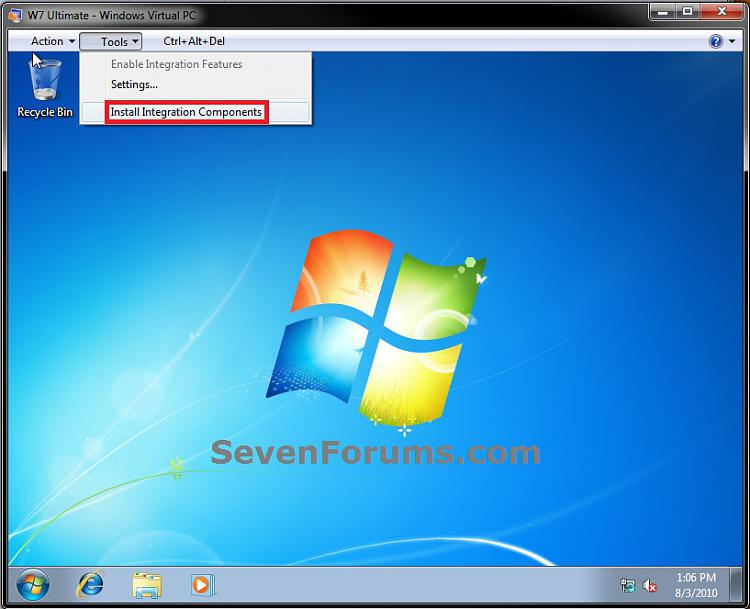
C) Click on Run Setup.exe. (see screenshot below)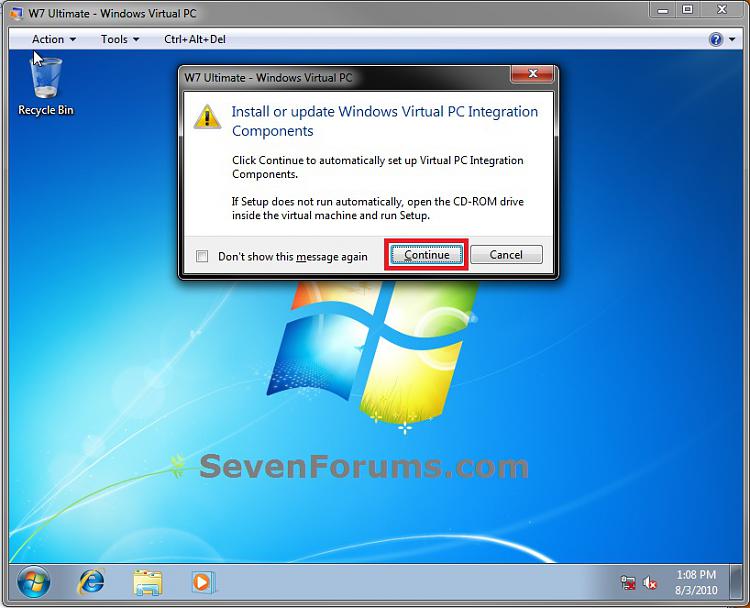
D) Click on Next. (see screenshot below)
E) If prompted by UAC, then click on Yes.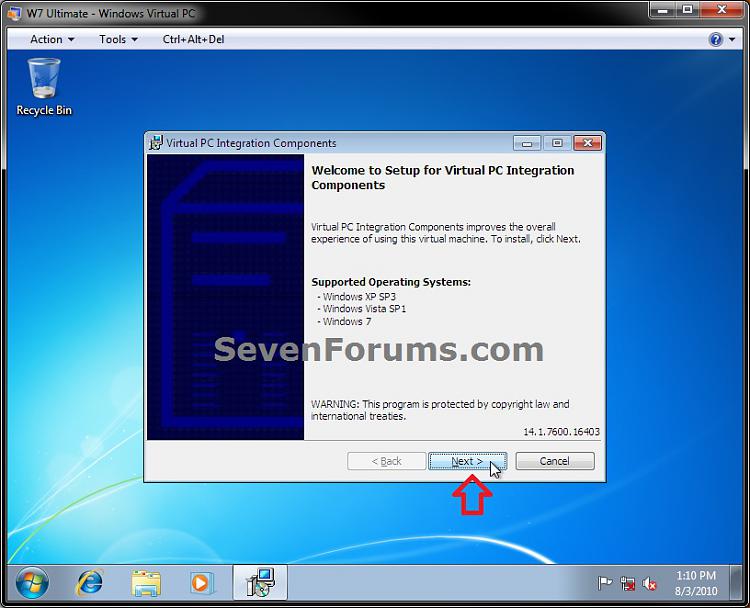
F) When it's finished installing, click on Finish. (see screenshot below)
G) Click on Yes to restart the virtual machine. (see screenshot below)
H) Log on to the virtual machine by typing in your password for the virtual machine and pressing enter. (see screenshot below)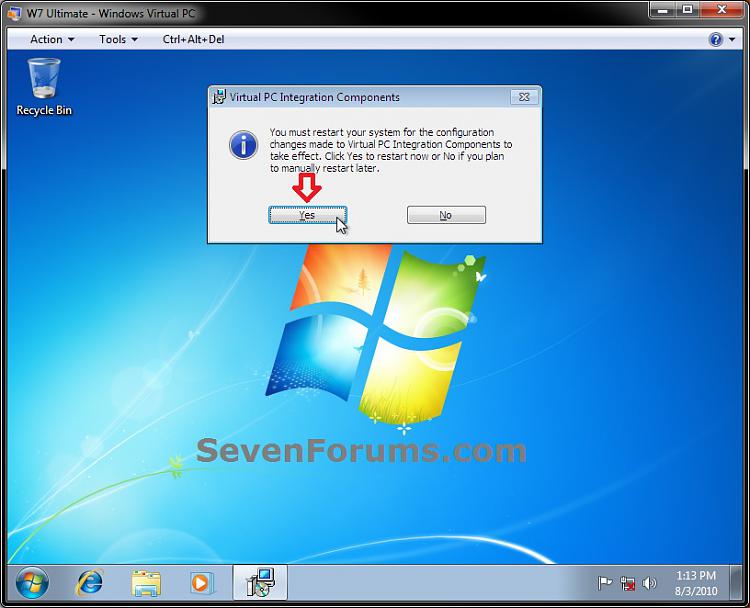
I) You will now need to enable the integration features. Continue to step 3.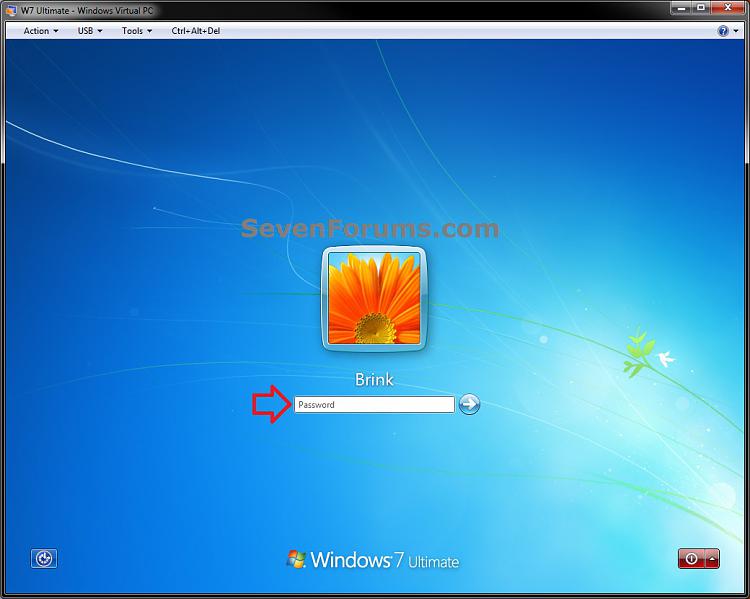
NOTE: You will only be able to enable the integration features if you had already installed the integration components (step 1). After the first time you do this, you will usually only need to do step 3A to enable the integration features.
A) Click on Tools on the virtual machine menu bar, and click on Enable Integration Features. (see screenshot below)4. To Disable Integration Features
NOTE: You may need to press CTRL+ALT+Left Arrow to move the mouse pointer out of the virtual machine to click on the menu bar.
B) Check the Remember my credentials box, and click on Use another account. (see screenshot below)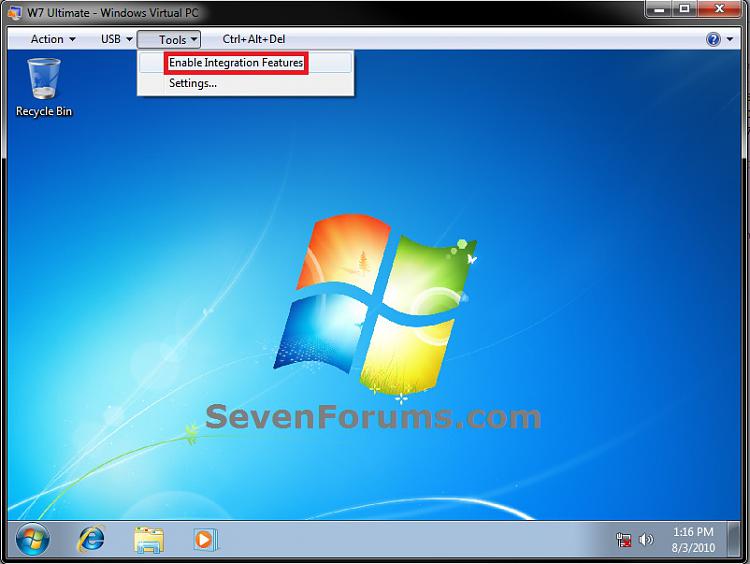
C) Type in your user name and password for this virtual machine, then click on OK. (see screenshot below)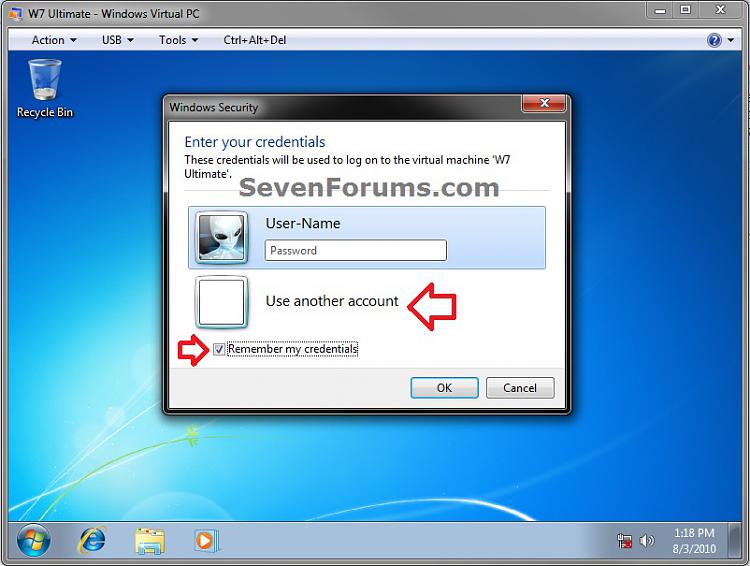
D) Integration features will now be enabled.
A) Click on Tools on the virtual machine menu bar, and click on Disable Integration Features. (see screenshot below)
NOTE: You may need to press CTRL+ALT+Left Arrow to move the mouse pointer out of the virtual machine to click on the menu bar.
B) Log on to the virtual machine by typing in your password for the virtual machine and pressing enter. (see screenshot below)
C) Integration features will now be disabled.
Shawn
Related Tutorials
- How to Create a Virtual Machine in Windows Virtual PC
- How to Install and Setup Virtual Windows XP Mode in Windows 7
- How to Enable the Built-in Administrator Account in Windows XP Mode
- How to Change Virtual Machine Settings in Windows Virtual PC
- How to Create Differencing Disks in Windows Virtual PC
- How to Delete a Virtual Machine Created with Windows Virtual PC
- How to Copy a Virtual XP Machine in Windows 7
- How to Add Limited User Accounts to Windows Virtual PC XP Mode
- How to Extract Files from Windows 7 System Image using Virtual PC
- How to Boot from a CD or DVD in a Windows Virtual PC
- How to Connect Windows Virtual PC to the Network
- How to Select Host Devices to Share with Virtual Machines in Windows Virtual PC
Windows Virtual PC Integration Features - Install, Enable, and Disable
-
New #1
sweet...just made the update! very very NICE. That link I posted, should be updated...stating to make the update like I just did....(in the event some other poor slob has to jump through more than 1 hoop, as I just did)
Thx, take care......DM

Windows Virtual PC Integration Features - Install, Enable, and Disable
How to Install, Enable, and Disable Windows Virtual PC Integration FeaturesPublished by Brink


 Quote
Quote
Related Discussions