

How to Add or Remove a File Type from the Index in Windows 7 and Windows 8
InformationThe Index keeps track of the files on your computer and stores information about the files, including the file name, date modified, and properties like author, tags, and rating. The index is used to make searching for files in Windows much faster. Instead of looking through your entire hard disk for a file name or file property, Windows scans the index, which allows most results to appear in a small fraction of the time that a search without the index would take.
This will show you how to add or remove a file extension type from the index, for the included folder locations, to be included or not in the search results in Windows 7 and Windows 8.
NoteWhen you add a file type, you have the option to have the file indexed by one of the options below.
- Index Properties Only - The metadata for that file will be included in the index. For example, file name, date modified, author, etc... It will basically be what you see when you right click on the file and click on Properties and the Details tab.
- Index Properties and File Contents - The above will be inlcuded as well as the contents of the file itself if available. For example, all text in a Notepad .txt file. Not all file types contain text though.
Here's How:
1. Open the Control Panel (icons view) in Windows 7 or Windows 8, and click/tap on Indexing Options icon.
2. Click/tap on the Advanced button. (See screenshot below)
3. If prompted by UAC, then click/tap on Yes.
4. Click/tap on the File Types tab. (See screenshot below)
5. To Add a File Type to the Index
A) Select and check the box for the listed file extension that you want to add. (See screenshot above)TipIf the file extension is not listed, then in the Add new extension to list box, type in the file name extension (ex: txt) and click on the Add button.
B) Select (dot) if you want this file to be indexed using Index Properties Only or Index Properties and File Contents. (See screenshot below step 4)6. To Remove a File Type from the Index
NOTE: See the note box at the top of the tutorial for more on this.
C) Go to step 7.
A) Select and uncheck the box for the listed file extension that you want to remove. (See screenshot below step 4)7. Repeat steps 5 and 6 if you want to add or remove anymore file extention types.
8. When finished, click/tap on OK. (See screenshot below step 4)
9. Click/tap on OK. (See screenshot below)
10. After a moment, you will notice the index being rebuilt. Click/tap on Close. (See screenshot below step 2)
That's it,
Shawn
Related Tutorials
- How to Search in Windows 7
- How to Add or Remove Index Locations in Windows 7 and Windows 8
- How to Change Location Where Index is Stored in Windows 7 and Windows 8
- How to Pause the Index in Windows 7 and Windows 8
- How to Rebuild the Index in Windows 7 and Windows 8
- How to Change or Restore the Default Windows 7 Search Options
- How to Create a Search Shortcut in Windows 7
- How to Create a Indexing Options Shortcut in Windows 7
- How to Create a Search and Indexing Troubleshoot Shortcut in Windows 7
- How to Enable or Disable the Search Index in Vista and Windows 7
- How to Have More Accurate Search Results in Windows 7 and Vista
Index - Add or Remove File Types
-
New #1
Nice post!
Could you advise if there is a way of removing an extension that you have added from the list of file types entirely?
I wanted to add the file type 'LIB' but inadvertently added 'lib'. The searches appear to be case sensitive as regards file extensions, so my *.LIB files are not included in searches. However, I can't add the 'LIB' extension to the list of file types as 'lib' is now in the list.
I seem to have snookered myself! Is there a way around this? I can't see a restore defaults option.
Any help much appreciated
-
New #2
Hello 31djpar, and welcome to Seven Forums.
Searching is not case sensitive, so that would be odd for it to not find *.LIB vs *.lib results. By default, it is .lib in the registry, so that's how it's listed here as well.
Do you have the folder locations that the .lib files are in included in the index as well?
Index Locations - Add or Remove
-
New #3
Hi Brink,
Thanks for taking your time on this.
Just to answer the point you raised:
Yes, the folder is included in the index locations.
If I rename the files from *.LIB to *.lib then the contents of the files are searched and I can locate the pattern that I am searching for. If I don't make the name change then the search always returns nothing.
So, I have a work around in that I can rename the files before and after I run a search, but obviously this is a bit of a pain.
Cheers
-
New #4
Odd. This is the same search results I get below when I search C using *.lib and *.LIB. Notice in the search results how the file extension's case varies.
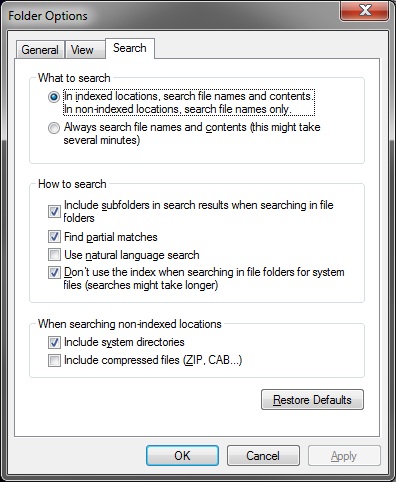
This is how I have my search options set in Folder Options. You might test with yours set as the same.
-
New #5
Hi Brink,
I've just tried it again and teh searches are working on the contents of files with both the 'lib' and 'LIB' extensions.
I don't know what I was doing wrong first time round!
Many thanks for your help and sorry to have wasted your time on a false alarm.
-
-
New #7
adding a file type to the set associations list
In the explanation of how to do this in the forum, it says to click add file type at the bottom of the list.
It has a screen shot of the list and the button, below the list
Unfortunately on my computer there is no add file type button visible.
Any suggestions?
-
New #8
Hello Shayneval, and welcome to Seven Forums.
Could you post a screenshot showing this to see if it may help ID the cause? :)
-
New #9
As requested, screen shots re the set associations list. As I mentioned in my last post, there is no add file type button at the bottom of the list. We want to add the .sch extension and link it with schematics, but there is no buttons or other method visible, above or below the list, for adding an extension which is isn't already there.
Thanks
As requested, I have attached views of the set associations list. As I mentioned in my last post, there are no buttons to add extensions visible above or below the list. We want to add .sch for use by schematics.
Thanks!

Index - Add or Remove File Types
How to Add or Remove a File Type from the Index in Windows 7 and Windows 8Published by Brink


 Quote
Quote

Related Discussions