


How to Do a Custom Installation of Windows 7
InformationThis will show you how to do custom installation of Windows 7 to have a new clean install of Windows 7, but with everything from your current Windows installation backed up into the Windows.old folder during this custom installation. After the custom installation, you can copy any files you wanted back from within the C:\Windows.old folder back into your new installation of Windows 7 and delete the Windows.old folder when finished.
Like with a clean install, you will need to install all of your drivers and programs again after doing a custom install of Windows 7.WarningWindows 7 Minimum Hardware Requirements:
NOTE: See also: Windows 7 system requirements
- 1 GHz 32-bit or 64-bit processor
- 1 GB RAM for 32-bit Windows 7 OR 2 GB RAM for 64-bit Windows 7
- 16 GB available disk space 32-bit Windows 7 OR 20 GB for 64-bit Windows 7
- Support for DirectX 9 graphics with 128 MB memory (in order to enable Aero theme)
- DVD-R/W Drive, or bootable USB port with Windows 7 USB flash drive
- Internet access (to download the Beta and get updates)
Here's How:
1. To Install from Within Current Windows Installation
A) Place your Windows 7 installation DVD into the DVD drive and click on the Run setup.exe option in the AutoPlay window from within Vista SP1. (See screenshot below)2. To Install from Boot
NOTE: If the AutoPlay window does not open, then open the drive folder in Computer and run the setup.exe file.B) Go to step 3 below.A) Boot the computer from your Windows 7 installation DVD.3. Click on the Install Now button to start the installation. (See screenshot below)
NOTE: Make sure that the CD/DVD drive is selected first in the boot order in the BIOS.
B) When prompted, press any key to boot from the installation DVD. (See screenshot below)
NOTE: You will only have about 8 seconds to press this key. If you miss it, you will have to restart the computer.C) Select your language preferences and click on the Next button. (See screeshot below).4. If you did step 1, then uncheck the I want to help make Windows installation better box (unless you want to), and click on the Go online to get the latest updates for installation option. (See screenshot below)5. If you did step 1, Windows 7 will now check online for and install any available installation updates. (See screenshot below)6. Check the I accept the license terms box and click on Next. (See screenshot below)7. Click on the Custom (advanced) option. (See screenshot below)8. Select the hard drive or partition for the currently installed Windows installation that you want to install Windows 7 on and click on the Next button. (See screenshot below)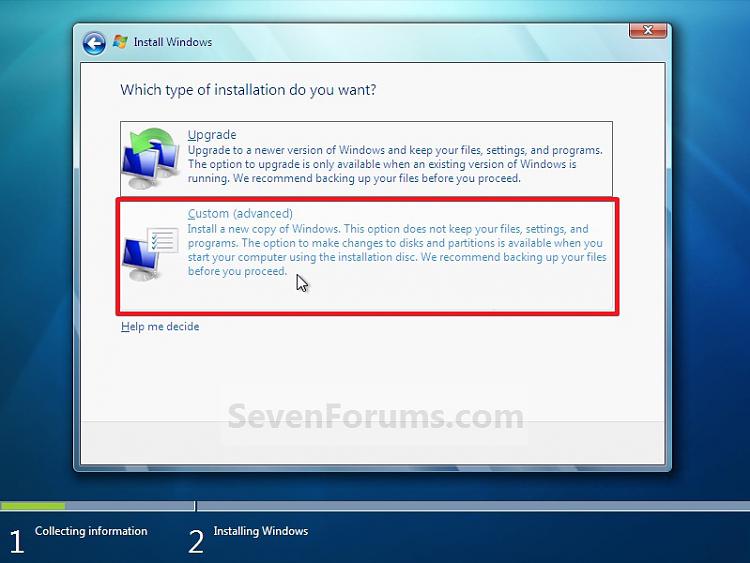
NOTE: If you have a RAID setup, then connect your USB key with the RAID drivers on it, click on Load Driver, select the folder on the USB key that contains the RAID drivers to install them. Afterwards, your RAID drives will be available to select from to install Windows 7 on.
WarningDO NOT click on the Drive options (advanced) link and Format or Delete this partition. That would be for a clean install of Windows 7 instead of a custom install for what this tutorial is for.9. Click on OK. (See screenshot below)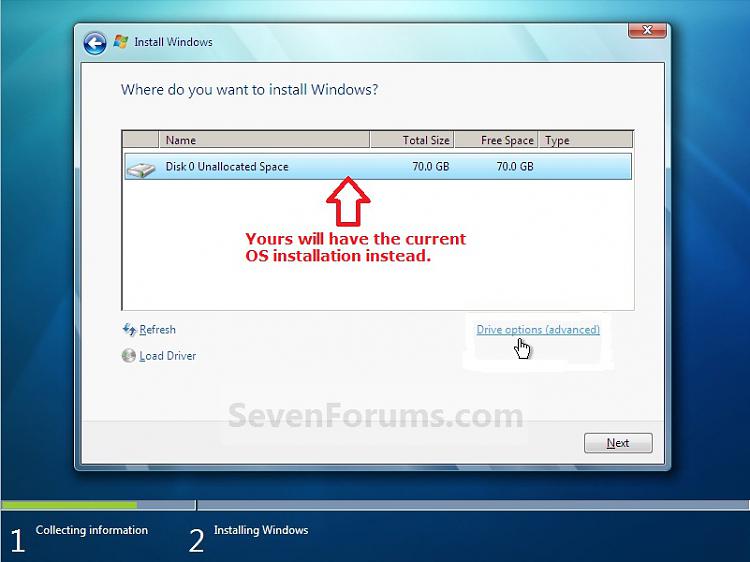 10. The installation of Windows 7 will now begin. (See screenshot below)
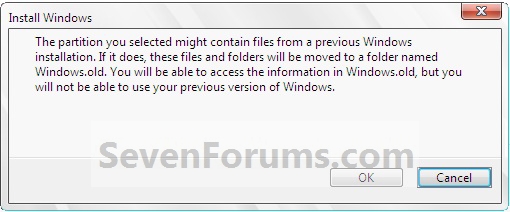
NOTE: During the installation process, your screen may flash and computer will restart a few times.11. After the final restart, you will see this screen for a moment. (See screenshot below)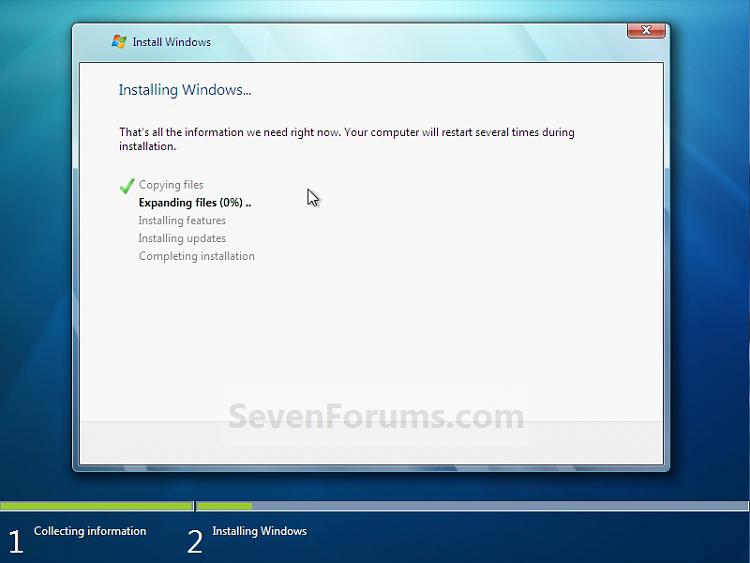 12. Type in any user name that you want for your default administrator account and any computer name, then click on the Next button. (See screenshot below)
 13. Type in a password you want for your default administrator account. Type it in again to confirm it, then type in a hint for your password. Click on the Next button. (See screenshots below)
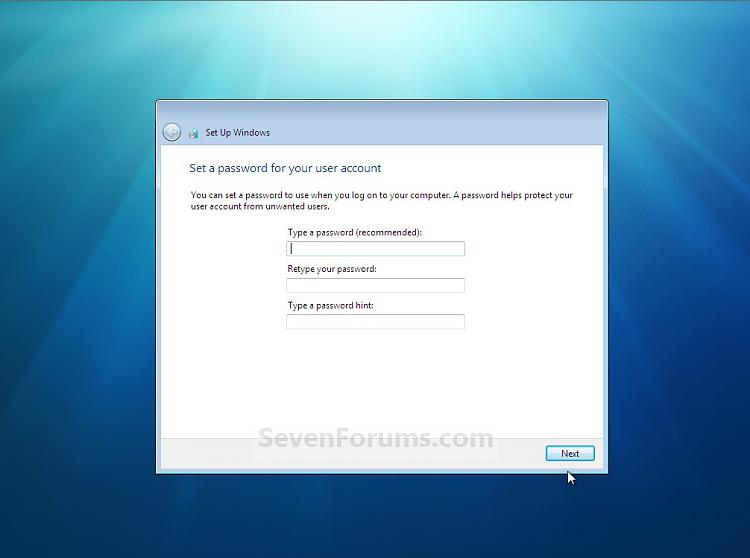
WARNING: The password will be case sensitive. The hint will be seen by all users on the computer, so do not type your password as the hint.
NOTE: If you do not want your your user account password protected at this time or do not want to have to type in a hint, then leave this blank and click on the Next button. You can create a password later for your user account in the Control Panel User Accounts after installing Windows 7 without having to type in a hint.14. Type in your Windows 7 product key number. (See screenshot below step 15)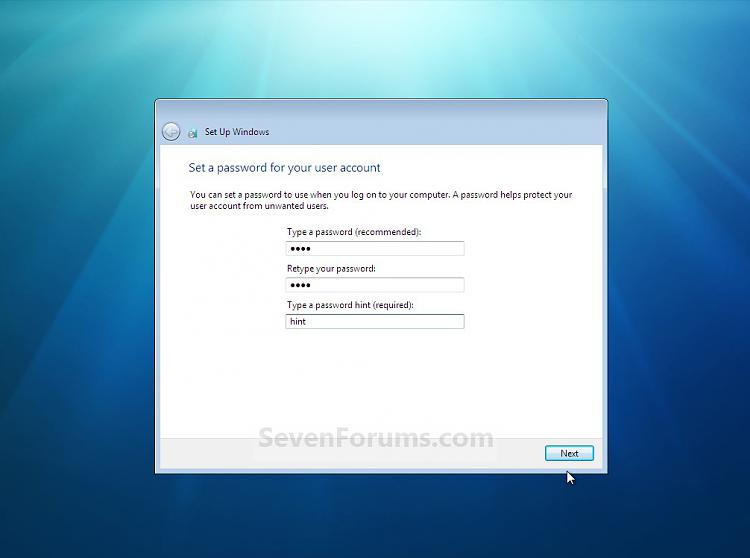
15. Uncheck the Automatically activate Windows when I'm online box unchecked, then click on the Next button. (See screenshot below)
NOTE: You can activate Windows 7 later after you make sure it is running properly. (See step 23 below)
If you chose to automatically activate Windows 7 online when you set up your computer, automatic activation begins trying to activate your copy of Windows three days after you log on for the first time.16. Click on Use recommended settings to allow automatic Windows Updates and proper security settings. (See screenshot below)
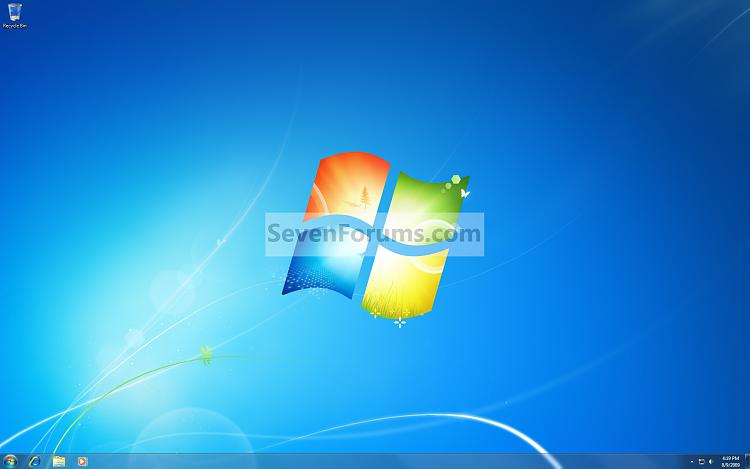
NOTE: For more information about these recommended settings, click on the Learn more about each option link in this window.17. Select your time zone and set your time and date settings, then click on the Next button. (See screenshot below)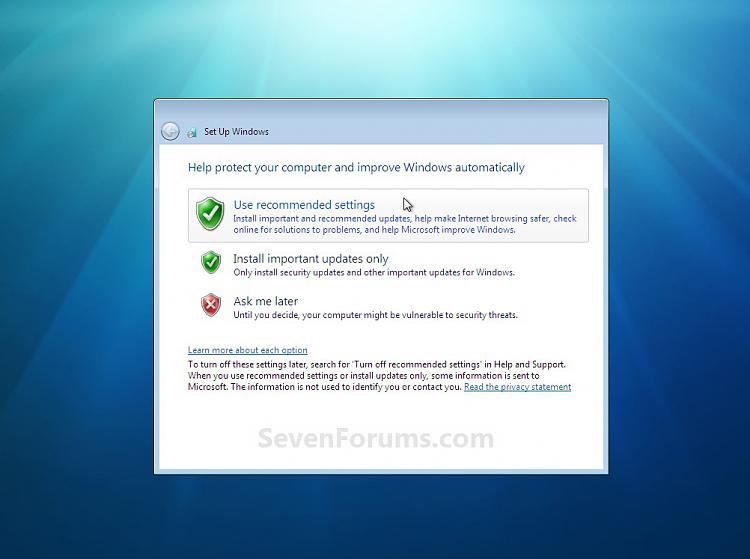 18. Click on your computer's correct network location type location to select it and have the settings for that location automatically applied. (See screenshot below)19. Windows 7 will now prepare your desktop to startup. (See screenshots below)
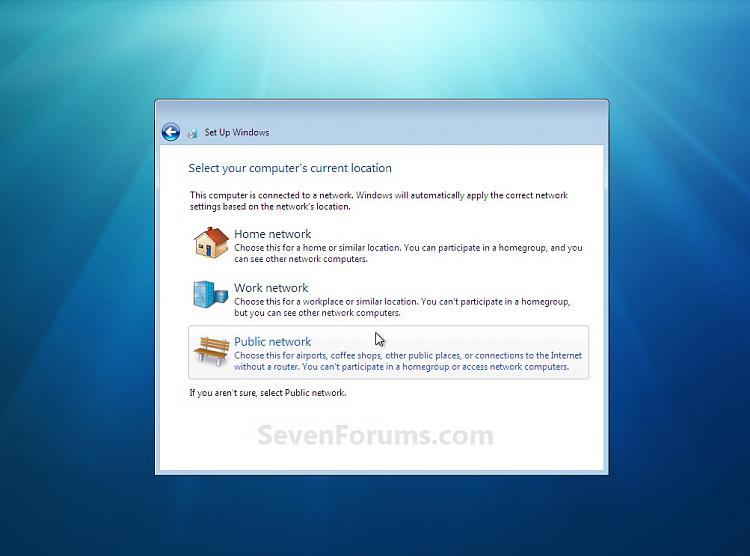 20. Install all of your device drivers, Windows Updates, and programs.
21. Refresh your Windows Experience Index (WEI) score.
22. Copy anything you want back from inside the C:\Windows.old folder back into the new installation. (See screenshot below)
NOTE: When done, you can delete the Windows.old folder to save hard drive space.23. When done, all you will need to do is to activate Windows 7. (See screenshot below)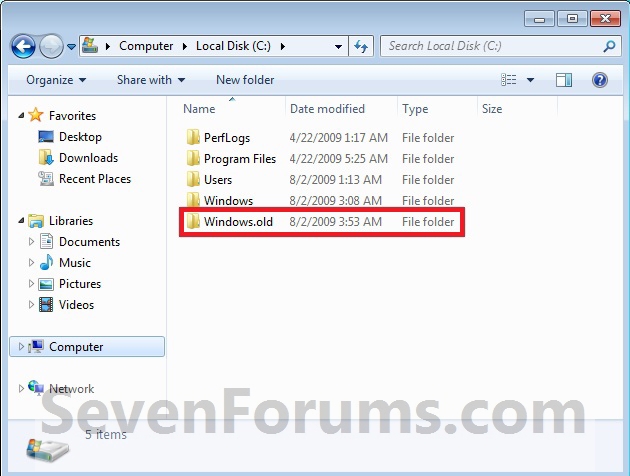 That's it,
Shawn
Related Tutorials
- How to Delete the Windows.old Folder in Windows 7
- How to Restore your Windows.old Folder into a New Installation
- How to Do a Clean Installation with Windows 7
- How to Do a Upgrade Installation with Windows 7
- How to Setup Windows 7 to Boot from a VHD (Virtual Hard Disk)
- How to Do a Repair Install to Fix Windows 7
- How to Create a Windows 7 Installation USB Key
- How to Install Windows 7 from USB Pen Drive Using Grub4Dos
- How to Setup a Dual Boot Installation with Windows 7 and Vista
- How to Setup a Dual Boot Installation with Windows 7 and XP
- How to Install Windows 7 FAST without a DVD or USB Device
- Install Windows 7 Without Using Any External Device
- How to Do a Clean Install with a Upgrade Windows 7 Version
- How to Partition the Hard Drive in a Windows 7 Install
- How to Install Windows 7 on Computer with Less than 512MB RAM
- How to Slipstream Windows 7 SP1 and Updates to Create a Bootable USB, Installation DVD, or ISO File
Custom Install Windows 7
-
New #1
do i need to back up drivers so i can use aero or should i just run a windows update when all is said and done?
-
New #2
Hello Wii Master,
I would recommend to download and save all of the latest driver installation files for your devices instead. This way you will have them handy to install after the custom Windows 7 installation. :)
-
New #3
ok, so what you're saying is to basically back up my current driver installation and have them at hand for when it's time to install? sorry for all the questions, im just easily confused i guess you could say.
-
New #4
You would want to save the files that you used to install your drivers with. After installing Windows 7, you will need to reinstall your drivers.
-
New #5
you mean, there's files that install drivers? I didn't know that... I was just gonna use drivermax to reinstall them, then do windows update.
-
New #6
Yes, every device manufacturer will usually have a set of driver installation downloads on their website for that particular device. :)
-
New #7
i was talking about drivers to run aero, my bad! do i need to back THOSE kind of drivers up? i really want to use aero, or else it's just not windows 7.
-
New #8
Aero is a theme in Windows 7. In order to be able to run a Windows Aero theme, you will need to have your latest graphic card drivers installed and to meet all of the requirements in the red warning box towards the top of the tutorial below.
Window Color and Appearance - Change
Hope this helps. :)
-
New #9
ok, i have the upgrade advisor beta, and it says my machine can run aero with the drivers currently installed. can i get these drivers (or better ones) through windows update in windows 7? I have nvidia graphics by the way.


 Quote
Quote
Related Discussions