GeForce Experience - A Beginner's Guide
InformationThis tutorial is designed to give new users a look into GeForce Experience's UI and its features, and includes tips to optimise the user's experience and keep their machine 'clean'.WarningNot all features of GeForce Experience are compatible with all nVidia GPUs, please check this list for compatibility with your nVidia card.
INTRODUCTION
List of Contents
Part One: What is GeForce Experience?
Part Two: Games & Optimisation
Part Three: ShadowPlay
Part Four: Drivers
Part Five: General Preferences
PART ONE
What is GeForce Experience?
GeForce Experience is a free piece of software available to all owners of qualifying nVidia graphics cards. It offers a range of features including a driver update manager, gameplay and desktop recording, game settings optimisation and more.
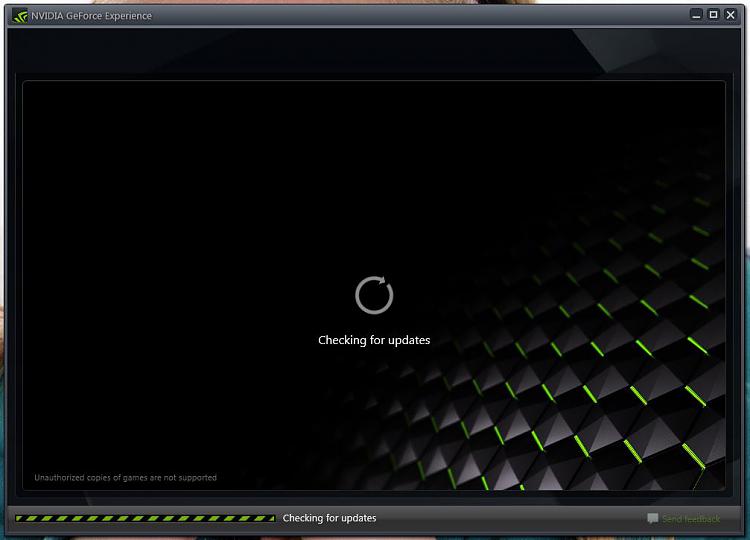
Once your card is installed you'll need to download the GeForce Experience software from here. Upon running the program for the first time it will scan for updates, if it finds any package components that supercede your installed components it will list them, whereas if your components are up to date you will land on the home page.
TipIf Experience discovers drivers that need updating, please follow the driver installation section later in the tutorial.
PART TWO
Games & Optimisation
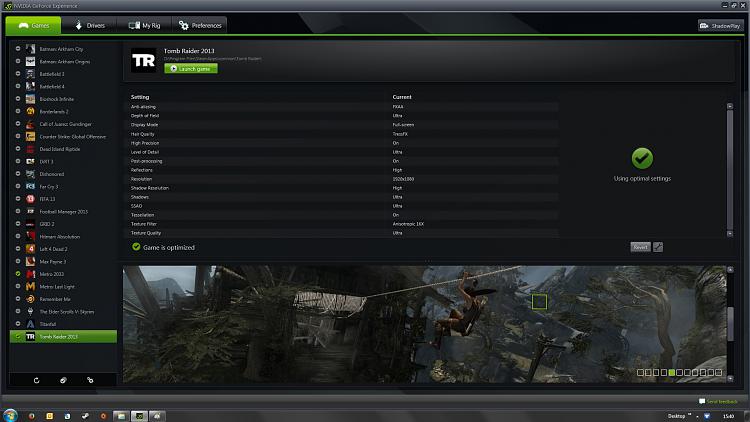
Once you're up and running and everything is up to date you can scan your system for installed games. Experience is a very handy tool when it comes to your graphics settings for games as it will recommend optimised settings for your graphics card for every supported game you have installed. This negates the need for constantly balancing eye candy against performance for your games.
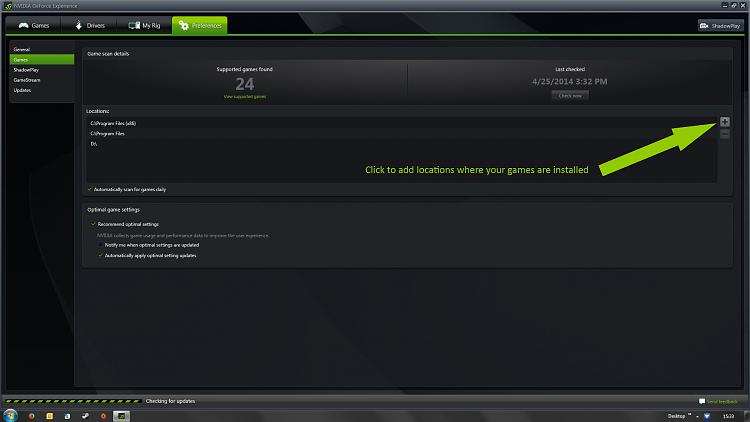
Firstly you will need to specify which locations on your system Experience should scan for supported installed games.Click on the Preferences tab then select Games from the left hand menu. Manually navigate your system via the Windows Explorer pop up and add as many locations as you need to.
NoteC:\Program Files is set to default.Once the scan is complete and your supported games have been added to your library you can then check on the recommended settings for your graphics. Click on the Games tab from the top menu and you will be presented with your supported library. By clicking on each game you can then see the recommended settings for that game that will best suit your installed GPU.
TipSet up your preferred settings here for automatically scanning for games, recommending optimal settings and automatically apply optimal settings.
On the left hand side you will see your current settings for that game with the recommended settings on the right hand side. You can easily optimise your settings by clicking the button above the graphics pane.Once your settings are optimised Experience will let you know.
PART THREE
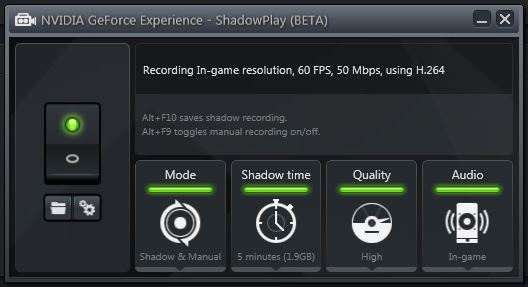
ShadowPlayShadowPlay offers the ability for you to record your gaming sessions without using a separate program. ShadowPlay is built into Experience and simply needs activating, click on the button at the top right of the UI to open the ShadowPlay control panel. Once the panel is open, flick the 'On' switch, then select your settings.
TipShadowPlay can be set to allow desktop capture. This can be extremely useful for recording videos for tutorials or showing specific methods in more depth than is possible with screenshots.
From the initial control panel you can set four options for your video capture:
- Shadow & Manual: Switch between auto recording or manual
- Shadow time: Set the length of your recording from 5 minutes to 20 minutes in 5 minute increments
- Quality: Low, Medium, High or Custom (Resolution, frame rate and bit rate)
- Audio: In-game, in-game & mic, off
Once your base settings are sorted you can then set your preferences and save locations. Click on the Preferences tab then click on the ShadowPlay tab on the left.
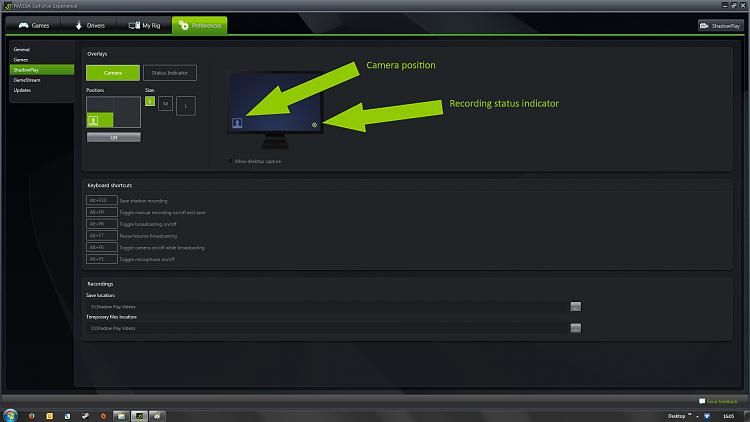
ShadowPlay allows you to display your camera on screen if you have one, the camera image can be displayed in either of the four quadrants of your screen with a choice of three different sizes: small, medium and large. Alternatively you can switch the camera display to off.
There is also a recording indicator which can be displayed in either of the four quadrants of your screen, an empty indicator shows that ShadowPlay is ready for recording. While recording is in progress the indicator is filled with a green LED.You can also set the location for your recordings and temp files to be saved to. Click on the button to the right of each setting and choose your location.Here is some footage of the Titanfall beta I recorded using ShadowPlay (i5-4670k & GTX780) to give you a feel of what the software is capable of. Results will vary with differing hardware setups.
WarningDepending on your settings, video files can reach considerable sizes. If you have a smaller capacity hard drive, a small C: partition or an SSD it's recommended to point your save files to a drive with a large amount of storage.
PART FOUR
Drivers
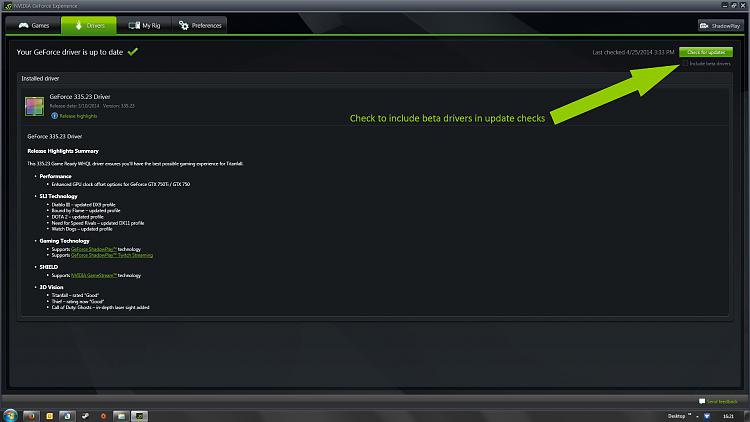
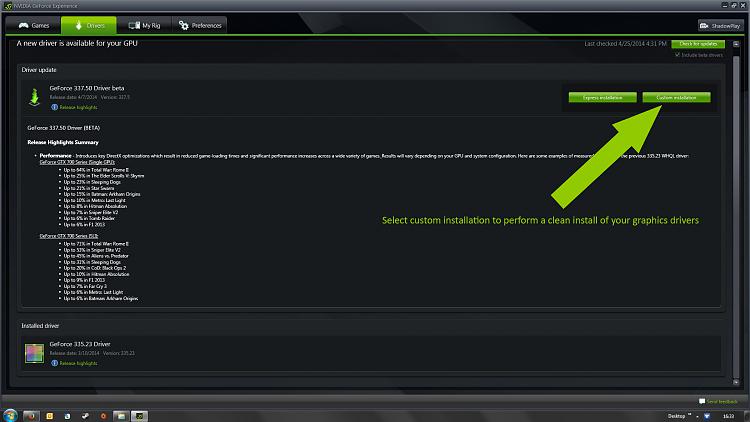
Experience is a great way to keep on top of your drivers. You can easily check for any updated drivers with a single click, go to the Drivers tab and click on the 'Check for updates' button at the top right. If there are new drivers available for your GPU Experience will let you know and open the installation start screen.When you are taken to the update screen you will be given the option to use Express Installation or Custom Installation.
TipCheck the Beta Drivers box if you are interested in receiving beta drivers as and when they're available.
'Express Installation' will install the newly downloaded drivers without removing the existing ones. This can cause conflicts in some instances as drivers become stacked. It will also install all components in the package that are deemed in need of upgrading, not all of these components are obligatory so only choose the components you need.Option OneExpress Installation
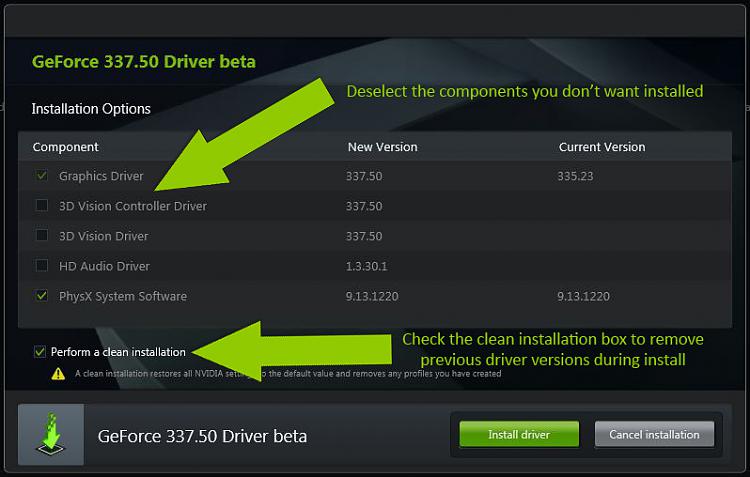
The Custom Installation option will give you the option to perform a 'Clean install' which will remove your existing drivers before installing the new ones, you can also choose which components of the package you want to install. This is the best possible option to keep your graphics drivers clean.Option TwoCustom Installation
PART FIVE
General Preferences
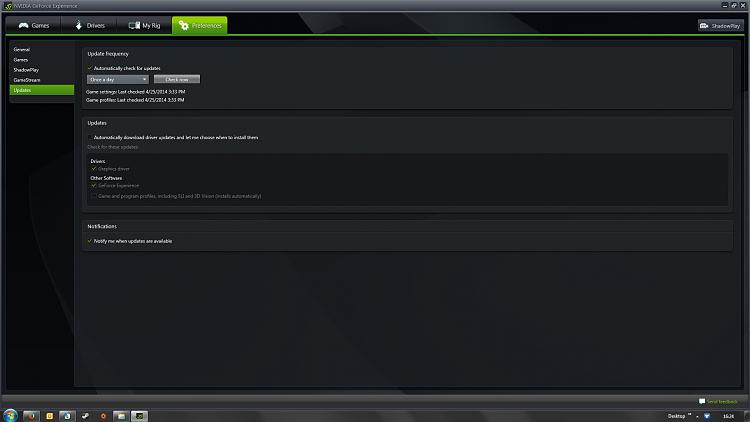
You can set Experience to check for updates as often as you like, and set it to check for whichever features or updates you like and whether or not to notify you when they're available.In all GeForce Experience is a great way for users new to nVidia cards to manage their drivers, record their gameplay and optimise their games for their particular card. It does have a streaming feature but unfortunately it was unavailable at the time of writing.
That's it,
Gav.
NVIDIA GeForce Experience: A Beginner's Guide
-
-
-
New #3
Hi, boozad, read your tutorial informative. But , why nvidia in the control panel wrongly show the connector, ad hdmi -tv amd dvi-pc, even when i connected both the hdmi to pc and tv, with the help of a splitter. There is no dvi port in my pc monitorLast edited by jraju; 25 Mar 2021 at 03:04.
Related Discussions





 Quote
Quote