
How to Do a Repair Install to Fix Windows 7
Information
This will show you how to do a repair install (aka: in-place upgrade install) to fix your currently installed Windows 7 and preserve your user accounts, data, programs, and system drivers.
Note
Do a Repair installation if:
- A System Restore did not help fix your Windows 7.
- There is no other easier option left that can fix your Windows 7.
- You DO NOT want to do a Clean reinstall of Windows 7.
- You DO want to preserve your user accounts, data, programs, and system drivers.
Tip
ITEMS THAT WILL BE RESET TO DEFAULT OR AFFECTED:
- Sounds
- Services
- Visual Effects Settings
- Device Drivers - Be sure to have these handy to reinstall. They do not always remain after the repair (upgrade) install.
- You may lose the ability to sign on to MSN Messenger, to solve this problem have a look at this thread Unable to sign in to WLM.
- You may lose your custom themes due to not having permisions set on the old themes. Go to the hidden themes folder at C:/Users/(User-Name)/AppData/Local/Microsoft/Windows/Themes, then Take Ownership of the themes folder and you will now have all your themes back.
- It has been reported that you may also lose your Media Center gadget after doing the repair install.
- Windows Updates will need to be checked and reinstalled again.
Warning
- You can only do a repair install with the same edition Windows 7 installation disc for the same edition of Windows 7 that you have installed.
- You cannot use a OEM Windows 7 "Factory" Restore/Recovery type of installation disc that came with or created from a store bought computer to do a repair install with. These can only be used do a clean install instead.
- You can do a repair install on a factory OEM installation with the latest official Windows 7 with SP1 ISO file here: Microsoft: Windows 7 Direct Download Links, and use Windows 7 USB-DVD Download Tool to create a bootable DVD or USB flash drive with the ISO to do the repair install from within Windows 7.
- You can use a retail OEM Windows 7 installation disc to do a repair install with.
- You can use a retail (full or upgrade) Windows 7 installation disc to do a repair install with.
- You cannot do a repair install with a System Repair Disc. A System Repair Disc is not a installation disc, and will only boot to the System Recovery Options screen.
- If you have a 32-bit (x86) Windows 7 currently installed, then you must use a 32-bit Windows 7 installation disc to be able to do a repair install with.
- If you have a 64-bit (x64) Windows 7 currently installed, then you must use a 64-bit Windows 7 installation disc to be able to do a repair install with.
- You can use a retail Windows 7 SP1 installation disc (ex: Technet (available), MSDN (available), or retail (when available)) to do a repair install with on a currently installed Windows 7 SP1.
- You can use a Windows 7 SP1 installation disc (ex: Technet (available), MSDN (available), or retail (when available)) to do a repair install with on a currently installed slipstream Windows 7 SP1.
- You cannot use a slipstream Windows 7 installation disc to do a repair install with on a currently installed Windows 7 SP1.
- You cannot use a slipstream Windows 7 installation disc to do a repair install with on a currently installed slipstream Windows 7 SP1.
- You can only do a repair install from within Windows 7.
- You cannot do a repair install at boot or in Safe Mode.
- You must be logged into Windows 7 in a administrator account to be able to do a repair install.
- You must have at least 8.87 GB + what is currently being used of free space (more if you have a larger installation) on the hard drive/partition Windows 7 is installed on to do a repair install.
- If you changed the default location of a user account's profile folder, then you will need to change it back to the default C:\Users location first.
- If you moved the default location of a user folder, then you will need to change it back to the default C:\Users\(user-name) location first.
Here's How:
NOTE: Be sure to back up anything that you do not want to lose first to be extra safe.1. Start Windows 7, and log on to an administrator account.
2. Disable any 3rd party firewall, antivirus, or other security program to avoid it from possibly preventing the repair in-place upgrade installation of Windows 7.
3. Do either step 4, step 5, or step 6 below depending if your retail Windows 7 installation ISO/DVD/USB has SP1 or not, and if your currently installed Windows 7 has SP1 installed or not.
4. Repair Installed Windows 7 SP1 using Windows 7 with SP1 ISO
Note
If you do not have a Windows 7 with SP1 ISO, then you can download an official ISO with your retail product key from Microsoft at the link below.
:ar: Microsoft Software Recovery
You can also download the latest official Windows 7 SP1 Media Refresh (SP1 U) ISO file at the link below, but this link is not always available for download.
:ar: Microsoft: Windows 7 Direct Download Links
:ar: Microsoft Software Recovery
You can also download the latest official Windows 7 SP1 Media Refresh (SP1 U) ISO file at the link below, but this link is not always available for download.
:ar: Microsoft: Windows 7 Direct Download Links
B) Using the program (ex: 7-Zip) from step 1, extract the Windows 7 SP1 ISO file to a folder on a partition or HDD other than the current Windows 7 partition. (see screenshot below)
NOTE: For example with 7-Zip, right click on ISO, click on 7-Zip, Extract files, browse button, select where you want to extract to, and click on OK twice.

C) While in Windows 7 SP1, open the folder that you extracted the ISO into, and run the setup.exe file.
D) Go to step 7 below.
5. Repair Installed Windows 7 SP1 using Windows 7 with SP1 DVD/USB
Note
If you do not have a Windows 7 with SP1 ISO, then you can download an official ISO with your retail product key from Microsoft at the link below.
:ar: http://www.microsoft.com/en-us/software-recovery
You can also download the latest official Windows 7 SP1 Media Refresh (SP1 U) ISO file at the link below, but this link is not always available for download.
:ar: Microsoft: Windows 7 Direct Download Links
Afterwards, you can use Windows 7 USB-DVD Download Tool to create a bootable DVD or USB flash drive with the ISO to do the repair install from within Windows 7 using this step.
:ar: http://www.microsoft.com/en-us/software-recovery
You can also download the latest official Windows 7 SP1 Media Refresh (SP1 U) ISO file at the link below, but this link is not always available for download.
:ar: Microsoft: Windows 7 Direct Download Links
Afterwards, you can use Windows 7 USB-DVD Download Tool to create a bootable DVD or USB flash drive with the ISO to do the repair install from within Windows 7 using this step.
NOTE: If the AutoPlay window does not open, then open the drive folder in Computer and run the setup.exe file.
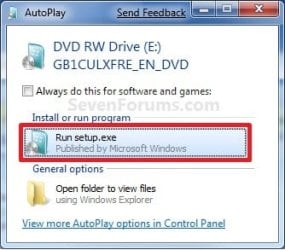
B) Go to Go to step 7 below.
6. Repair Installed Windows 7 without SP1 using Windows 7 without SP1 DVD/USB
Note
If you do not have a Windows 7 without SP1 installation DVD/USB, then you can download the latest official Windows 7 Professional or Home Premium without SP1 ISO file here: Microsoft: Windows 7 Direct Download Links, and use Windows 7 USB-DVD Download Tool to create a bootable DVD or USB flash drive with the ISO to do the repair install from within Windows 7 using this step.
It is preferred to have SP1 installed on your PC and to use step 4 or step 5 above to do a repair install with instead though.
It is preferred to have SP1 installed on your PC and to use step 4 or step 5 above to do a repair install with instead though.
NOTE: If the AutoPlay window does not open, then open the drive folder in Computer and run the setup.exe file.
B) Go to Go to step 7 below.
7. If prompted by UAC, then click on Yes.
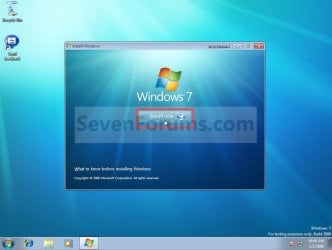
8. Click on the Install Now button to start the installation. (see screenshot below)
9. If prompted, uncheck the I want to help make Windows installation better box (unless you would like to
 ), and click on the Go online to get the latest updates for installation option. (see screenshot below)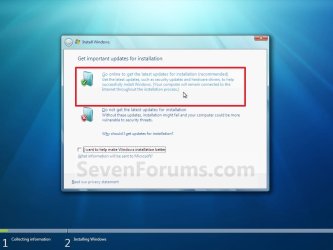
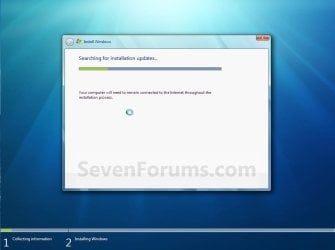
A) Windows 7 will now check online for and install any available installation updates. (see screenshots below)

10. Check the I accept the license terms box, and click on Next. (see screenshot below)

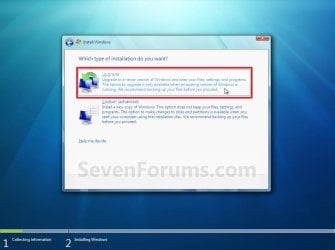
11. Click on the Upgrade option. (see screenshot below)
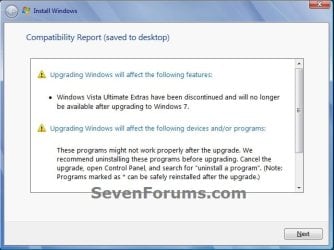
12. Windows will now check for any compatibility issues. If any are found like in the example below, click on the red X to cancel the repair install and close this "Install Windows" window, take care of any found issues (ex: uninstall any incompatible program), then restart the repair install process over again.
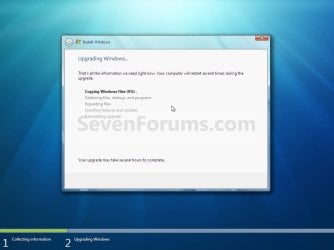
13. The installation of Windows 7 will now begin. (see screenshot below)
NOTE: During the installation process, your screen may flash and computer will restart a few times.
14. After the final restart, you will see this screen for a moment. (see screenshot below)

15. Type in your Windows 7 product key number. (see screenshot below step 16)
16. Uncheck the Automatically activate Windows when I'm online box unchecked, then click on the Next button. (see screenshot below)
NOTE: You can activate Windows 7 later after you make sure it is running properly. (see step 23 below)
If you chose to automatically activate Windows online when you set up your computer, automatic activation begins trying to activate your copy of Windows three days after you log on for the first time.

17. Click on Use recommended settings. (see screenshot below)
:note: You will always be able to change your Windows Update settings at anytime in Windows 7.

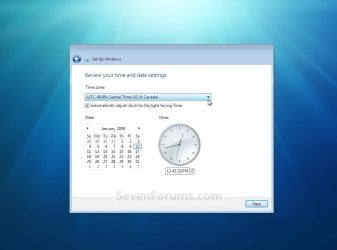
18. Select your time zone and set your time and date settings, then click on the Next button. (see screenshot below)
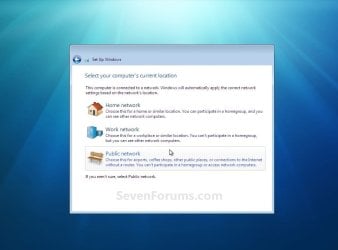
19. Click on the option for your computer's location to select the correct network location type settings to be applied for that location. (see screenshot below)
NOTE: It is best to select Public location for the best security.
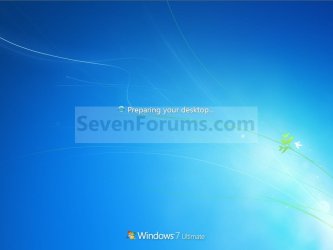
20. Windows 7 will now prepare your desktop to startup. (see screenshots below)
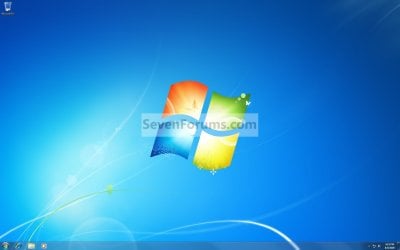
21. If you used a DVD or USB to do the repair install with, then you can remove the DVD or USB when the repair install has successfully completed and you are logged in to Windows 7.
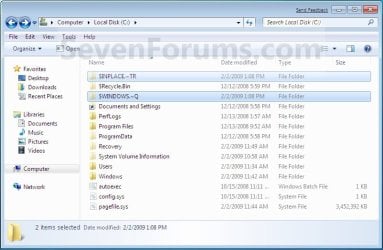
22. Check to see if you are missing any user files. If you are, then you can copy them from the C:\Windows.old or the hidden protected operating system C:\$INPLACE.~TR and C:\WINDOWS.~Q backup folders. (see screenshot below)
23. If everything checks out in step 21, then you can run Disk Cleanup (step 5 at this link). You will need to click on the Clean up system files button first, and then could check the Files discarded by Windows upgrade, Previous Windows installations, and Windows upgrade log files boxes. (see screenshot below)
NOTE: This will delete the C:\Windows.old, C:\$INPLACE.~TR and C:\WINDOWS.~Q folders from step 21 above.

24. Refresh your Windows Experience Index (WEI) score.
25. When finished, activate Windows 7, and make sure that your 3rd party security programs (if applicable) are enabled again.
That's it,
Shawn
Related Tutorials
- How to Do an Upgrade Installation with Windows 7
- How to Do a Clean Installation with Windows 7
- How to Do a Clean Install with a Upgrade Windows 7 Version
- How to Activate Windows 7 Online
- How to Run a Startup Repair in Windows 7
- How to Do a System Restore in Windows 7
- How to Repair Windows 7 System Files with System File Checker
- How to Extract Files from the Windows 7 Installation DVD
- How to Boot to the Advanced Boot Options in Windows 7
- How to Boot to the System Recovery Options in Windows 7
- How to Create a Windows 7 System Repair Disc
- How to Run Disk Check in Windows 7
- How to Create a Windows 7 Installation USB Key
- How to Install Windows 7 FAST without a DVD or USB Device
- How to Do a Custom Installation of Windows 7
- How to Create a System Recovery Shortcut in Windows 7
- How to Slipstream Windows 7 SP1 to Create a Installation DVD or ISO File
- Fix "The User Profile Service failed the logon. User profile cannot be loaded." Error in Windows 7
Last edited:


