How to multi boot with Partition or VHD using WIM ImageX
InformationThis tutorial will show you how to multi boot with different partitions or VHDs by applying the install.wim file with ImageX.
NoteThings you will need:
1) Windows AIK (Windows Automated Installation Kit)
This applies to versions of Windows Vista and later. You can do it with Windows Vista RTM,SP1,SP2,Windows 7 RTM,SP1,Windows Server 2008 RTM,SP2,Windows Server 2008 R2 RTM,SP1,Windows 8,Windows Server 2012,Windows 8.1 and Windows Server 2012 R2.
Steps:
1) Make sure you have WAIK installed. If not,search on the Web and download the ISO from the Microsoft site. It's completely free. The link is this: Download The Windows Automated Installation Kit (AIK) for Windows 7 from Official Microsoft Download Center
You can burn the ISO to a DVD or mount it.
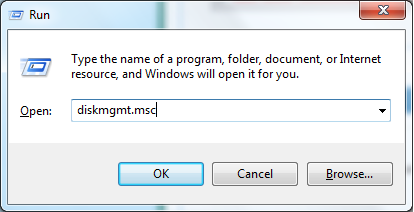
2) If not,create a VHD or shrink a partition to install the other operating system. Disk Management is the tool used here. Press Win+R to launch Run.Then type diskmgmt.msc in the box.You can also go to Start, then type in the box that says "Search programs and files" and type diskmgmt.msc.
3) After Disk Management launches, select the target partition by clicking it (the one you're going to shrink or create a VHD inside it).
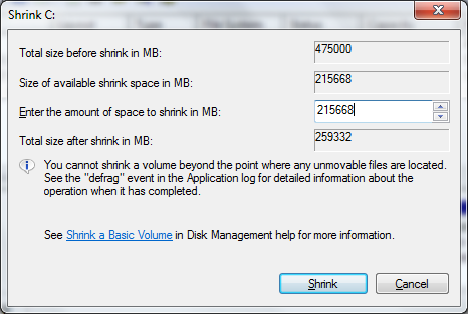
NoteFor those who want to shrink a partition: Right click the target partition and select "Shrink Volume..."
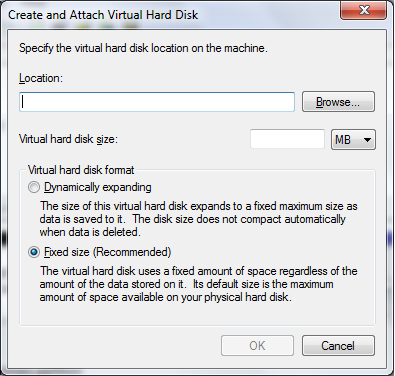
For those who want to create a VHD: Go to the Action tab, then select "Create VHD".
4) For those who want to shrink a partition: Wait while querying volume, then select the amount of space you want to allocate for the other OS.
NoteFor those who want to create a VHD: Specify the place you want your VHD to be, select the space you want it to have, and select the way the space will be allocated.
Fixed size allocates all of the space you leave for the VHD, thus having the whole space.
Dynamically expanding starts small and becomes bigger as you put music, videos ,apps and the rest.
5) For those who have shrunk a partition: After shrinking the partition, format it as NTFS.
For those who want the VHD: Attach the VHD by going to the Action tab, then Attach VHD. Find its path.
6) For those with the VHD: Select how you want your VHD to be (Master Boot Record or GUID Partition Table). If you have BIOS, select MBR. If you have UEFI, select GPT.
WarningSelect the correct booting type. If your partition is going to be bigger than 2.2 TB, select GPT. Don't select MBR for UEFI, unless the proper settings are configured. Doing so may render your system unbootable. The same goes for GPT in BIOS. Never format a VHD as GPT if you have BIOS.
BIOS is used in x86/32 bit computers and some older x64/64 bit ones. UEFI is used in newer x64 computers. UEFI is supported from Windows Vista SP1 and newer.
To cut a long story short, choose MBR for BIOS and GPT for UEFI.
If you don't know how to check if your computer has BIOS or UEFI, check the following tutorial:
BIOS Mode - See if Windows Boot in UEFI or Legacy Mode
7) After assigning a letter to the new partition or VHD, go to Start, All Programs, Microsoft Windows AIK, then select Command prompt for developing tools. Right click it and select "Run as administrator". A command prompt will open.
8) Insert your Windows DVD or mount the ISO with a program like DAEMON Tools.
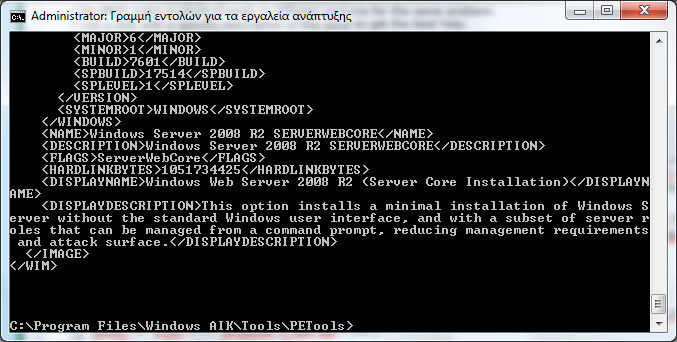
NoteAssume that you have the DVD and your DVD drive letter is H:\. Type in the prompt without quotes:"imagex /info h:\sources\install.wim" (Remember to type the correct letter for your DVD drive, as it can be F:,G:.)
It will look like this(in the end):
These are indexes of the install.wim file in your DVD or ISO. Indexes are different versions of the operating system you're going to install. You must remember the index number of your version, as you will use it to apply the file. This is a Windows Server 2008 R2 DVD, so the indexes are as follows:
1 Windows Server 2008 R2 Standard Full
2 Windows Server 2008 R2 Standard Server Core
3 Windows Server 2008 R2 Enterprise Full
4 Windows Server 2008 R2 Enterprise Server Core
5 Windows Server 2008 R2 Datacenter Full
6 Windows Server 2008 R2 Datacenter Server Core
7 Windows Server 2008 R2 Web Server Full
8 Windows Server 2008 R2 Web Server <Server Core>
These are other indexes from Windows Vista SP1 x64(Digital River), Windows 7 Ultimate SP1 x64(Digital River) and Windows Server 2012 R2 (TechNet Evaluation Center) respectively:
Windows Vista SP1:
1 Windows Vista Business
2 Windows Vista Home Basic
3 Windows Vista Home Premium
4 Windows Vista Ultimate
Windows 7 SP1:
1 Windows 7 Home Basic
2 Windows 7 Home Premium
3 Windows 7 Professional
4 Windows 7 Ultimate
Windows Server 2012 R2:
1 Windows Server 2012 R2 Standard Server Core
2 Windows Server 2012 R2 Standard Full
3 Windows Server 2012 R2 Datacenter Server Core
4 Windows Server 2012 R2 Datacenter Full
9) Now, after learning your install.wim indexes, select the one you want to install. For example, I will install Windows 7 SP1 Professional, so what I will type is this:
imagex /apply h:\sources\install.wim 3 g:\
The example here shows that the DVD drive letter is H: and the new partition or VHD has the letter G:. Remember to use the correct letters, as you may get errors that it cannot find the path specified or you may get into trouble.
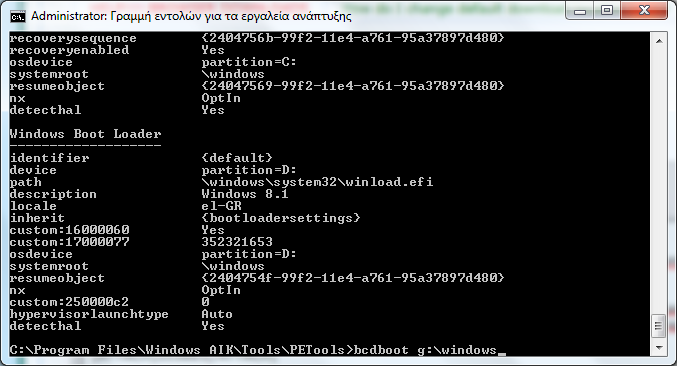
10) Step 9 may take from 7-8 minutes to 1 hour, depending on the machine. After applying the image, you can take out the DVD or unmount the ISO. Now you must create boot files, so type in the prompt:
bcdboot g:\windows
This will let you select the operating system you want to use during reboot. If you don't do that, you won't be able to access the other OS.
Never try to multi boot with an older operating system, as it can render your newer OS unbootable.
For example, if you have Windows 8 and want to dual boot with Windows Vista, you may get a blue screen on the older OS or have the newer unbootable.
As far as I have tested, Windows 7 and/or Windows Server 2008 R2 can be installed safely with Windows 8.However, if the wrong settings are configured (Fast Boot in 8,for instance), you will get chkdsk running on the old OS.
I hope this is a helpful tutorial and a fast way to install an OS starting from Windows Vista.
Hope this helps,
Nick
WIM ImageX - multi boot with partitions or VHDs
-
New #1
Interesting alternative for installing Win7. Thanks.
-
New #2
It is a fast way. But Server 2012 R2 took an hour to complete (something must have made ImageX run slow?). Since Microsoft has the OS in a .wim file now,I will update this tutorial for newer operating systems that install with a .wim file until that format dies.

WIM ImageX - multi boot with partitions or VHDs
How to multi boot with Partition or VHD using WIM ImageXPublished by VistaUltimate
Related Discussions






 Quote
Quote