

How to Allow or Prevent the Windows 7 Recycle Bin Icon to Display
InformationThe Recycle Bin provides a safety net when deleting files or folders. When you delete any of these items from your hard disk, Windows places it in the Recycle Bin and the Recycle Bin icon changes from empty to full.
This will show you how to allow or prevent the Windows 7 Recycle Bin icon to display from the desktop, Windows Explorer, programs that use Windows Explorer, and the File - Open menu bar window for all users on the computer. By default, the Recycle Bin icon is allowed to be displayed in all user accounts.NoteRemovable drives do not use or have a Recycyle Bin. Files deleted from removable drives are permanently deleted instead.WarningIf set to prevent, then this will only remove the Recycle Bin icon and not prevent a user from using other methods to gain access to the contents of the hidden protected operating system C:\$Recycle.Bin folder though.
EXAMPLE: Desktop Icon Settings window
NOTE: When set to prevent, the Recycle Bin option will be grayed out.
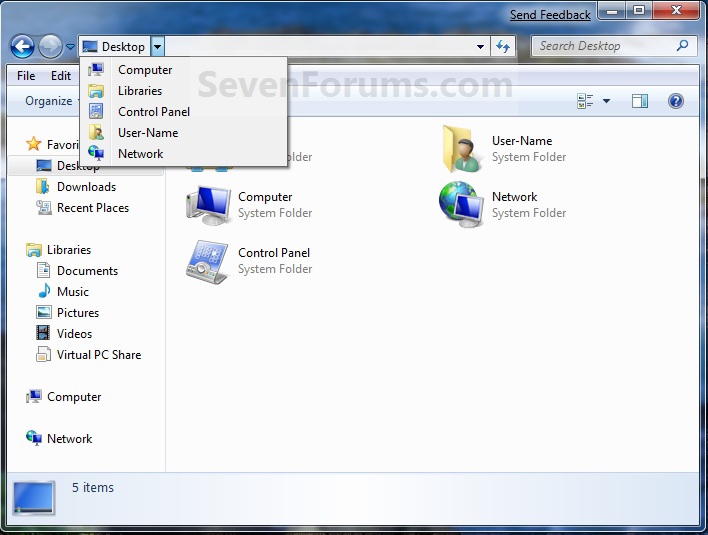
EXAMPLE: Recycle Bin icon Allowed and Prevented in Windows Explorer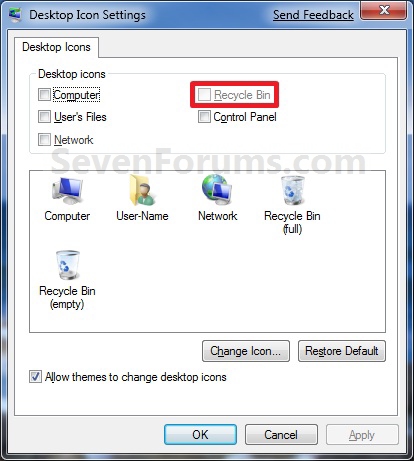
OPTION ONEUsing a REG File Download
1. To Allow Recyle Bin Icon to Display
A) Click on the Download button below to download the file below.2. To Prevent Recyle Bin Icon to Display
Allow_Display_Recycle_Bin_Icon.zipB) Go to step 3.
A) Click on the Download button below to download the file below.3. Click on Save, and save the .zip file to the desktop.
Allow_Display_Recycle_Bin_Icon.zip
4. Open the .zip file and extract the .reg file to the desktop.
5. Right click the .reg file (On Desktop) and click on Merge.
6. Click on Run, Yes, Yes, and OK when prompted.
7. Log off and log on, or restart the computer to completely apply.
8. When done, you can delete the downloaded .reg and .zip files on the desktop if you like.
OPTION TWOThrough the Local Group Policy Editor
1. Open the all users, specific users or groups, or all users except administrators Local Group Policy Editor for how you want this policy applied.That's it,
2. In the left pane, click on to expand User Configuration, Administrative Templates, and Desktop. (See screenshot below)
3. In the right pane, right click on Remove Recycle Bin icon from desktop and click on Edit. (See screenshot above)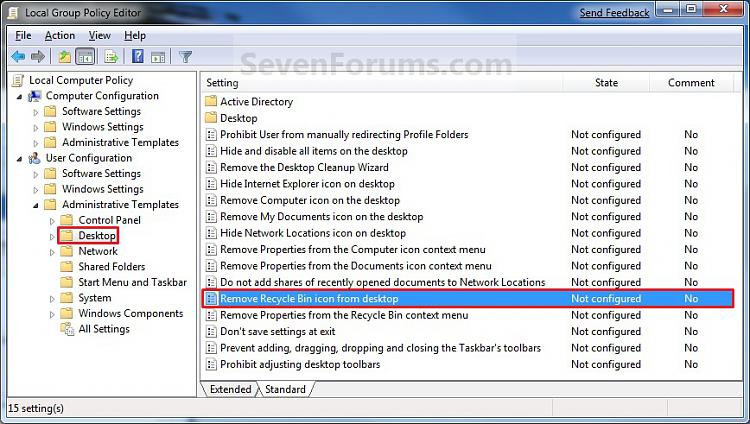
4. To Allow Recyle Bin Icon to Display
A) Select (dot) either Not Configured or Disabled. (See screenshot below step 6)5. To Prevent Recyle Bin Icon to Display
B) Go to step 6.
A) Select (dot) Enabled. (See screenshot below step 6)6. Click on OK. (See screenshot below)
7. Close the Local Group Policy Editor window.
8. Log off and log on, or restart the computer to completely apply.
Shawn
Related Tutorials
- How to Change or Restore Default Windows 7 Desktop Icons
- How to Add or Remove a Default Desktop Icon in Windows 7
- How to Create a "Desktop Icon Settings" Shortcut in Vista and Windows 7
- How to Hide or Show Desktop Icons in Windows 7
- How to Pin the Recycle Bin to the Windows 7 Taskbar
- How to Add Empty Recycle Bin to the Windows 7 Desktop Context Menu
- How to Enable or Disable Changing Default Desktop Icons in Windows 7
- How to Rename the "Recycle Bin" in Windows 7
- How to Add or Remove "Recycle Bin" from Desktop Context Menu
- How to Change the Recycle Bin Storage Size in Vista and Windows 7
- How to Add or Remove the "Recycle Bin" from the Windows 7 Navigation Pane
- How to Fix Corrupted Recycle Bin in Windows
Recycle Bin Icon - Allow or Prevent to Display
-
-
New #2
Hello Seven,
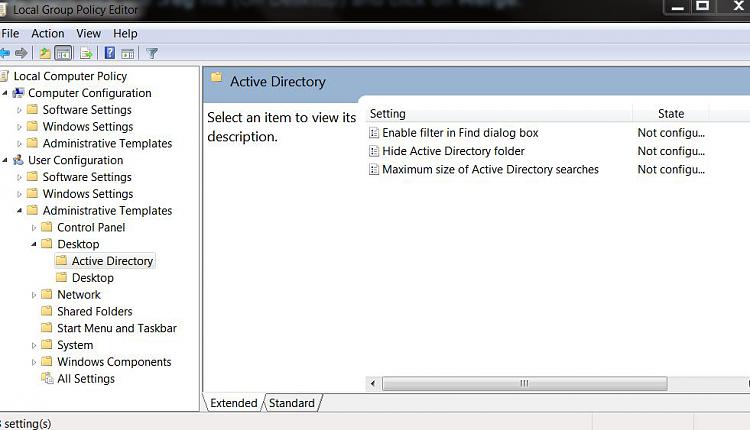
You just need to have the main Desktop folder above Active Directory that one highlighted instead.
Last edited by Brink; 23 Dec 2009 at 12:57. Reason: typo
-
New #3
No, it's not there either!
I removed it by right clicking on the desktop and unchecked 'Show desktop items' d
-
New #4
Go up one more folder. It's the Desktop folder above Active Desktop.
With Show desktop items unchecked, it will hide all of them instead.
-
-
-
New #7
this way too
To remove recycle bin icon from desktop Right click on your desktop/personalize/change desktop icons/un-check recycle bin

Desktop Icons - Add or Remove
-
New #8
Hello Adam,
That would be fine if you just wanted to turn off the Recycle Bin, but this tutorial will allow you to prevent all users from being able to turn on or display the Recycle Bin at all instead. This way they will not be able to access it.
Thank you though. :)
-

Recycle Bin Icon - Allow or Prevent to Display
How to Allow or Prevent the Windows 7 Recycle Bin Icon to DisplayPublished by Brink

 Quote
Quote
Related Discussions