

How to Create a Biometric Devices Shortcut in Windows 7
InformationThis will show you how to create or download a Biometric Devices shortcut. You can also Pin to Taskbar or Pin to Start Menu this shortcut, or move where you like for easy use.NoteBiometrics is a technique for identifying people by using a unique physical characteristic, such as a fingerprint, eye, or face. Biometric devices verify someone's identity by comparing a saved measurement of a particular physical characteristic to a current measurement.
The most common biometric device is a fingerprint reader. Windows 7 supports the use of fingerprint readers to log on to your computer. Fingerprint readers can also be used to log on to websites, and some programs offer features that work with fingerprint readers.
EXAMPLE: Biometric Devices
Option OneDownload the Shortcut
1. Click on the download button below to download the Biometric_Devices.zip file. 2. Click on Save, and save the .zip file to the desktop.
3. Open the .zip file and extract the Biometric Devices shortcut to the desktop.
4. Right click on the Biometric Devices shortcut, and click on Properties, General tab, and on the Unblock button. (See screenshot below)
NOTE: If you do not have a Unblock button under the General tab, then the shortcut is already unblocked and you can continue on to step 5.5. Move the shortcut to where you like for easy use.
6. When done, you can delete the downloaded .zip file on the desktop if you like, or save it to use again.
Option TwoManually Create the Shortcut
1. Right click on a empty area on desktop, and click on New and Shortcut. (See screenshot below)2. Type the location below into the location area, and click on the Next button. (See screenshot below)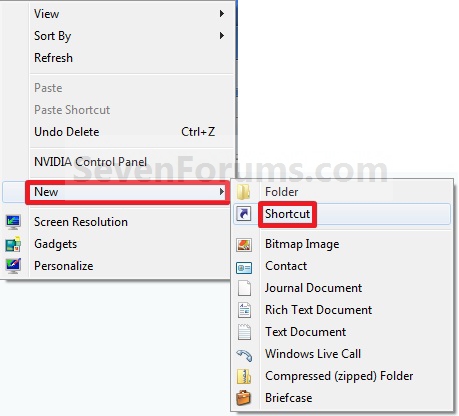
Code:C:\Windows\explorer.exe shell:::{0142e4d0-fb7a-11dc-ba4a-000ffe7ab428}3. Type Biometric Devices for the name, and click on the Finish button. (See screenshot below)That's it,
NOTE: You can name this anything you would like though.4. Right click on the new Biometric Devices shortcut on the Desktop and click on Properties.
5. Click on the Shortcut tab, then click on the Change Icon button. (See screenshot below)6. In the line under "Look for icons in this file", type in the location below and press Enter. (See screenshot below)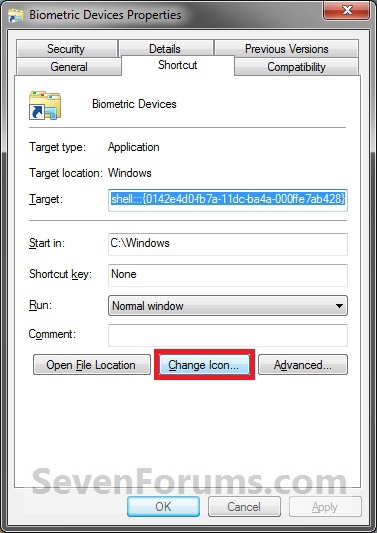
Code:%SystemRoot%\System32\biocpl.dll7. Select the icon highlighted in blue above and click on OK. (See screenshot above)
NOTE: You can use any icon that you would like instead though.
8. Click on OK. (See screenshot below)9. Move the shortcut to where you like for easy use.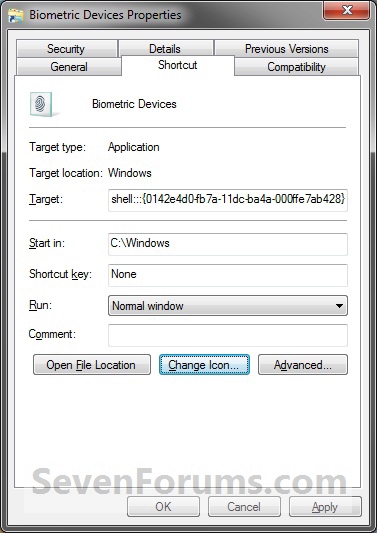
Shawn
Biometric Devices Shortcut - Create

Biometric Devices Shortcut - Create
How to Create a Biometric Devices Shortcut in Windows 7Published by Brink


Related Discussions