

How to Change Space Size Between Taskbar Thumbnail Previews in Windows 7 and Windows 8
InformationThis will show you how to change the space size between the taskbar thumbnail previews of a icon on the taskbar with multiple windows opened of it in Windows 7 and Windows 8. You will not be able to have a smaller space between the taskbar thumbnail previews than the default size.
This will only affect the current user that this is applied in.
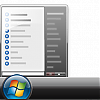
EXAMPLE: Taskbar Thumbnail Previews Default and Changed Space Between Size
NOTE: This is an example thumbnail previews of the Internet Explorer icon and Notepad with multiple tabs and windows opened set to 40 pixels.

OPTION ONEChange Space Between Taskbar Thumbnail Previews using REG File
NOTE: If you would like to use a custom size of your own, then you will need to do OPTION TWO below to make the changes.
1. To Set the Space Between Taskbar Thumbnail Previews to 40 Pixels
A) Click on the download button below to download the2. To Undo the Space Between Taskbar Thumbnail Previews Changes
Set_ThumbSpacingXPx_40.reg file.
B) Go to step 3.
A) Click on the download button below to download the3. Save the .reg file to your desktop.
Undo_ThumbSpacingXPx_Changes.reg file.
4. Double click/tap on the downloaded .reg file to merge it.
5. If prompted, click/tap on Run, Yes (UAC), Yes, and OK to approve the merge.
6. Log off and log on, or restart the computer to apply the changes.
7. When done, you can delete the downloaded .reg file(s) if you like.
OPTION TWOChange Space Between Taskbar Thumbnail Previews in Registry Editor
1. Press the Windows + R keys to open the Run dialog, type regedit, and click/tap on OK.That's it,
2. In regedit, go to: (see screenshot below)
HKEY_CURRENT_USER\Software\Microsoft\Windows\CurrentVersion\Explorer\Taskband3. To Set the Space Between Taskbar Thumbnail Previews
A) In the right pane of Taskband, right click on a empty space and click on New and DWORD (32-bit) Value. (see screenshot below)4. To Undo the Space Between Taskbar Thumbnail Previews Changes
B) Type ThumbSpacingXPx and press enter, then right click on ThumbSpacingXPx and click on Modify. (see screenshot below)
C) Select (dot) Decimal, then type in how many pixels (ex: 40) you want the space between size to be and click on OK. (see screenshot below)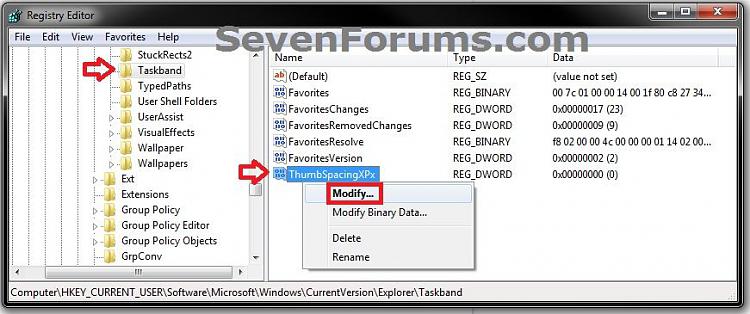
NOTE: Increase (larger space between) or decrease (smaller space between) the pixel number to adjust the size to how you would like it.
D) Go to step 5.
A) In the right pane of Taskband, select and right click on ThumbSpacingXPx and click on Delete. (see screenshot below)5. Close regedit.
B) Click on Yes to approve deletion. (see screenshot below)
6. Log off and log on, or restart the computer to apply the changes.
Shawn
Related Tutorials
- How to Change Size of Taskbar Thumbnail Previews in Windows 7 and Windows 8
- How to Change Taskbar Thumbnail and List Mode Threshold in Windows 7 and Windows 8
- How to Enable or Disable Taskbar Thumbnail Previews in Windows 7 and Windows 8
- How to Change Taskbar Thumbnail Live Preview Delay Time in Windows 7 and Windows 8
- How to Change Taskbar Thumbnail Previews Display Delay Time in Windows 7 and Windows 8
- How to Enable or Disable Internet Explorer Individual Tabbed Browsing Taskbar Preview Windows
- How to Change Margin Size of Taskbar Thumbnail Previews in Windows 7 and Windows 8
Taskbar Thumbnail Previews - Change Space Size Between
Taskbar Thumbnail Previews - Change Space Size Between
How to Change Space Size Between Taskbar Thumbnail Previews in Windows 7 and Windows 8Published by Brink


Related Discussions