How to Create Differencing Disks in Windows Virtual PC
InformationTechnet Definition
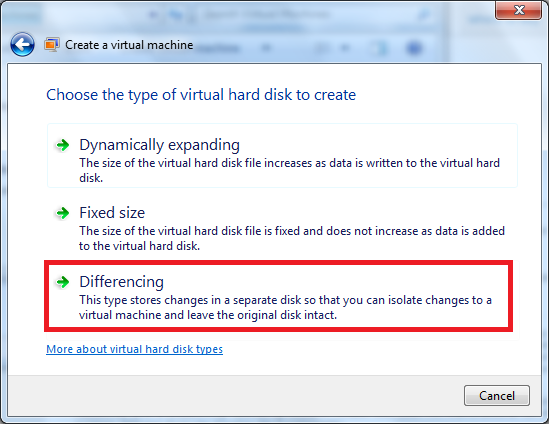
"A differencing disk is a virtual hard disk you use to isolate changes to a virtual hard disk or the guest operating system by storing them in a separate file. A differencing disk is similar to the Undo Disks feature because both offer a way to isolate changes in case you want to reverse them."NoteThis will need a already set up Virtual PC vhd to work.WarningVirtual PC and XP mode is in beta and as always can crash and corrupt data inside the VHD (Virtual Hard Drive)
Here's How:
1. Have a vhd created or have XPM installed...
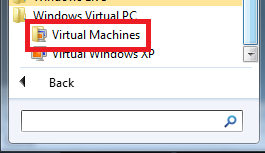
if you have and have setup XPM and can log in then you are set...2. Open the Virtual PC Wizard...
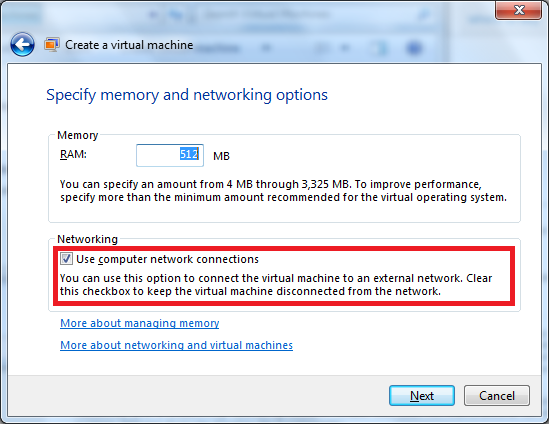
4. Type how much Ram you wish to let the VM access
and if you do not wish to let the Computer Access to the network unclick on the checkbox and click next...
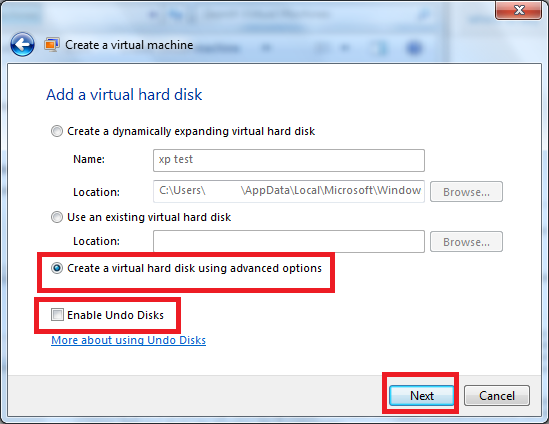
5. Click on the "Create a vhd using advanced options" and if you want to at any time reverse the any of the disk activity then click on "Undo Disks"
NoteTechnet Definition
"Undo Disks is a feature that saves changes to a virtual machine’s data and configuration in a separate undo disk file in case you want to reverse the changes."
Compared to Differncing Disk this is a Short-Term approach to Isolate a vhd.
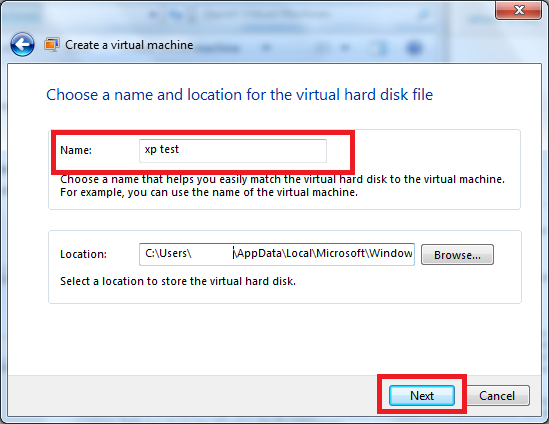
7. Now type the Name of your vhd that will hold the differences and if you want to create it in a different location you can do so now...
8. Now point the install to where you you have the original vhd with the original vhdthats it,
Warning
DA
Related Tutorials
- How to Install and Setup Virtual Windows XP Mode in Windows 7
- How to Enable the Built-in Administrator Account in Windows XP Mode
- How to Change Virtual Machine Settings in Windows Virtual PC
- How to Create a Virtual Machine in Windows Virtual PC
- How to Delete a Virtual Machine Created with Windows Virtual PC
- How to Copy a Virtual XP Machine in Windows 7
- How to Add Limited User Accounts to Windows Virtual PC XP Mode
- How to Boot from a CD or DVD in a Windows Virtual PC
- How to Install, Enable, and Disable Windows Virtual PC Integration Features
- How to Select Host Devices to Share with Virtual Machines in Windows Virtual PC
Windows Virtual PC - Create Differencing Disks

Windows Virtual PC - Create Differencing Disks
How to Create Differencing Disks in Windows Virtual PCPublished by darkassain
Related Discussions


