How to Create your Own Fan Speed Controller
PART ONEHow to Build the Fan Controller
InformationThis tutorial will show you how to use a Potentiometer (see below) to regulate your fan speed. This will work the same as a commercial fan controller, for a fraction of the cost.
The modification will use a Potentiometer, a device with a knob that is used to regulate voltage. The same item is used for volume on speakers, and commercial fan controllers.
WarningThis project involves soldering and bare wire leads. Always take the appropriate cautions when working with electrical parts.
While it may seem very daunting at first, this tutorial is actually extremely simple once you see what to do.
Items needed:
Set up:
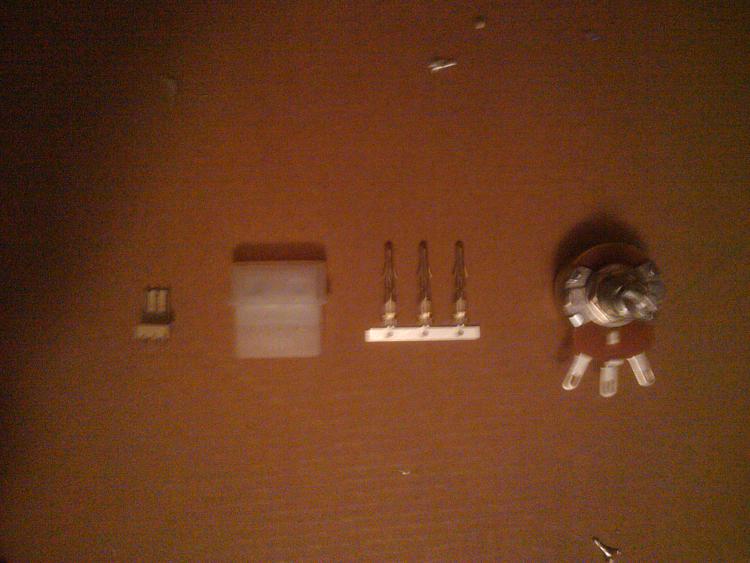
- Potentiometer
- Multimeter with Ohm measurement
- Computer fan (no longer need to cut the wire)
- 22 Gauge Wire
- 3 pin MALE fan connector
- 4 pin FEMALE (and male if you want) MOLEX connectors (to connect to PSU)
- Wire clippers
- Heat Shrink (optional, but highly recommended)
- Solder and Soldering Iron (or pliers and cable connectors if you don't mind it)
- *This tutorial will assume that you know how to solder, and that is the method you will use. If you have any questions about soldering or using connectors, feel free to ask*
Set up your Soldering station to your preference, and make sure you have wire (and connectors) and solder. I used 22 Gauge wire because it is about the same size as the wire used in the fan already. You will need your wire clippers to cut the fan wires. I also recommend you use a Test PSU to test this mod until you are sure it works.
WarningWhen you touch two leads from the power supply (i.e. The yellow and red wires, or the yellow and black, etc) you will short out the power supply. If this occurs, immediately unplug the PSU and take the wires apart. This is why I recommend heat shrink.
The Potentiometer
This device is what will be controlling your fans, so you need to make sure it is the correct resistance (in Ohms). This will depend on a few things, such as the size of your fan, and how many you wish to control with it.
To start off, you need to know a few things (and some basic algebra)
Vf = Fan Voltage desired (5v in my example)
Vs = Power from the PSU (12V for the yellow wire, 5V for the red)
Rf = Fan Resistance (in Ohms)
Rr = Potentiometer Resistance needed (in Ohms)
Vf1 = Fan Voltage (12V, 7V, or 5V)
Va = Fan Amps (usually between .1 and .5)
Formula:
Rf = Vf1/Va
Rr = ((Vs*Rf)/Vf)-Rf
Now, most computer fans operate from the 5V to 12V range (though some can go higher). So we will assume that you use the yellow wire (which is default on your connectors, or high speed). Next, we will use 5V as the desired voltage, because going below this will turn the fan off, and that is pointless.
The next step is a little harder. We need to know the resistance in the fan. This is determined by the fan operating voltage and amps. For the fan I used in this tutorial, it is 12V and .1A(Amps). We use Ohm's Law to determine the resistance. This is simply Resistance = Voltage / Amps, or Rf = 12/.1
This gives us a resistance of 120 Ohms.
Now, we need to know what resistance potentiometer we need. Plug all the variables into the second equation, and solve for Rr:
Rr = ((12*120)/5)-120
Rr = 168 Ohms
This shows us that we need a 168 Ohm potentiometer, but we will have to go up to the next closest potentiometer offered, either a 200 Ohm or 250 Ohm.
If you need any help with this step, please post in the thread, or PM me.
EDIT:I have rewritten this tutorial using my new method, which makes a TON more sense. There will be no need to cut the fan wire this time, and the potentiometer connection will use a regular 3 pin fan connector for use with ANY fan without modification.
Step 1:
Cut your red, yellow, and black wires to the length you desire. I made the wire long enough to be the fan connector AND the molex connector, and simply cut the red wire at the point I wanted the potentiometer attached. (you can see this is my pictures)
Step 2:
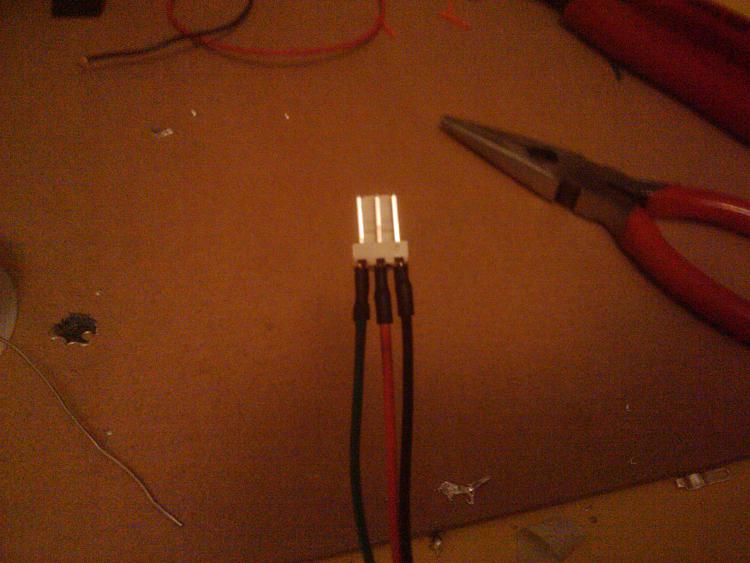
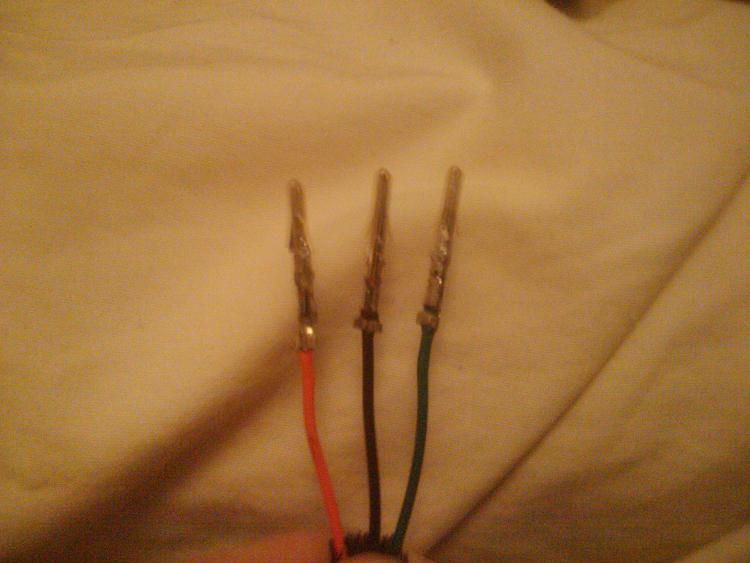
Strip the ends on all three (just a little) and solder each wire to its appropriate connector.
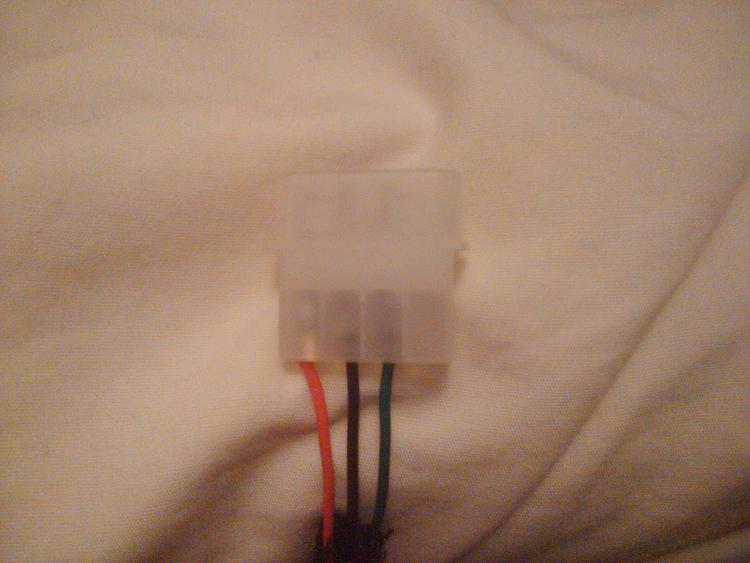
The red wire is the 12V wire, and will be in the MIDDLE, the other 2 wires are ground wires and can go either way (but matching is more fun).
In this tutorial I have used a green wire in place of a yellow.
Optionally, you can also wrap each individual wire in heat shrink to make sure it stays insulated
Also, you can wrap the wires to keep them looking good.
Step 3:
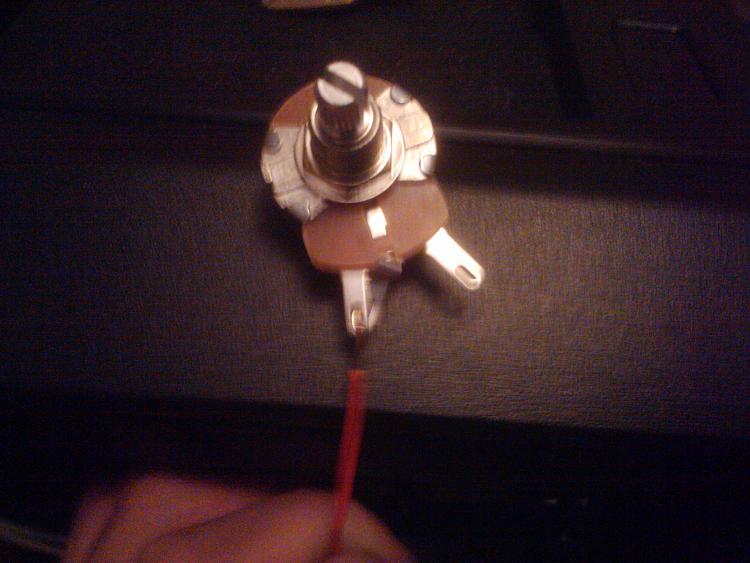
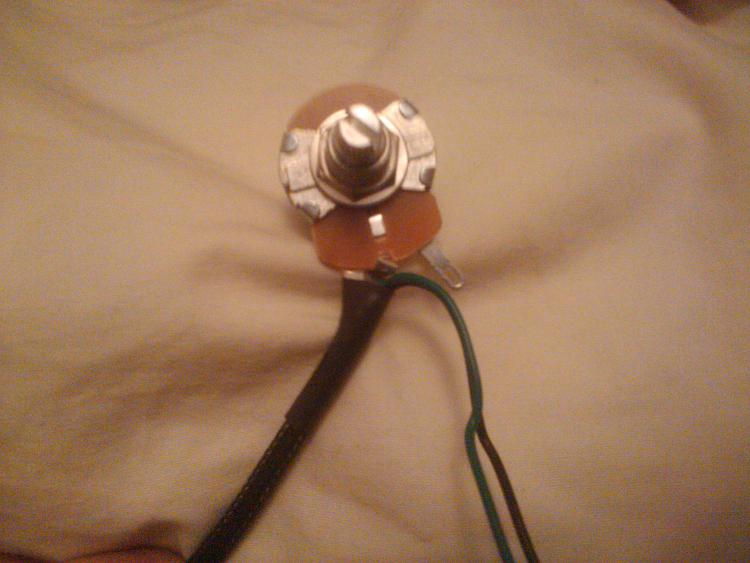
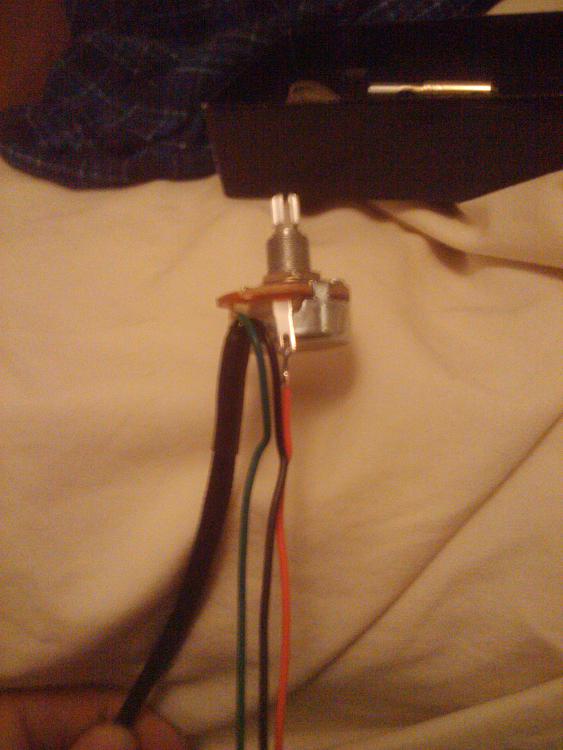
Now we solder the wires to the potentiometer. The first 2 pins needs to be soldered together. I just bent the middle one over to the first and then hooked the wire into the holes on the end and soldered it, but you could also just solder a wire between them and not bend it.
I then wrapped the wires
Step 4:
The wire leading to the 12V psu connector now needs to be soldered to the potentiometer.
Step 5:
Strip the ends of the red, yellow, and black wires and crimp (I also soldered) the molex pins onto the ends.
Then simply push them up through the bottom of the molex connector until they click gently. You can also tug on the wires GENTLY to make sure they are secure.
Step 6:
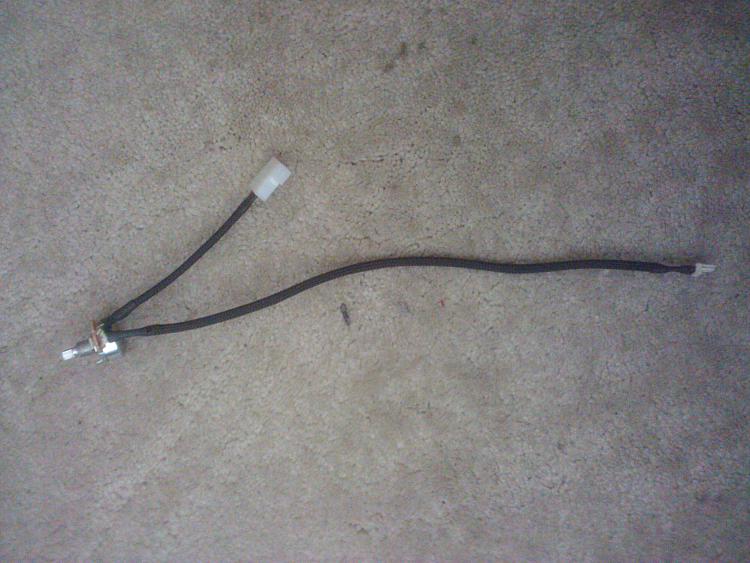
Last of all, I wrapped the molex wire and it was complete.
The great part about this fan controller is that you can simply plug a fan into it and then plug it into the power supply. No need to cut fan wires, no need to cut power supply wires. It is just like an extra connection you plug in!
PART TWOHow to Install the Fan Controller
InformationThis tutorial will show you how to install the fan controller made in part 1WarningThis project involves soldering and bare wire leads. Always take the appropriate cautions when working with electrical parts.
While it may seem very daunting at first, this tutorial is actually extremely simple once you see what to do.
Items needed:
- Fan Controller from Part 1
- Computer fan (no longer need to cut the wire)
- 4 pin FEMALE (and male if you want) MOLEX connectors (to connect to PSU)
- Wire clippers
- Drill and bits
- Metal Plate / Front drive cover
- Heat Shrink (optional, but highly recommended)
- Solder and Soldering Iron (or pliers and cable connectors if you don't mind it)
- *This tutorial will assume that you know how to solder, and that is the method you will use. If you have any questions about soldering or using connectors, feel free to ask*
WarningWhen you touch two leads from the power supply (i.e. The yellow and red wires, or the yellow and black, etc) you will short out the power supply. If this occurs, immediately unplug the PSU and take the wires apart. This is why I recommend heat shrink.
Setup:
If you use a metal plate like I did, then you need to make that to size yourself, I will not cover it here (it was too difficult to make into a simple tutorial).
Step 1:Hope this helps out the modders!
Decide where you want to position your fan controller (and switches from part 5, your new start button from part 2, etc)
Step 2:
Determine the drill bit size needed (I tend to estimate, then use bigger and bigger sizes until it fits). Mark the location from step 1, and drill the hole.
Step 3:
Push the controller through from the back. Only the "knob" should stick out. Put the washer on, then the nut, and tighten (use a wrench).
Then add the nice knob (I made sure to get nice machined aluminum ones) to give it an easy turn and good look.
Step 4:
Push the controller plate into place (I also like to have it screwed in). Attach the fan at the 3 pin connector, and plug it into the PSU. Turn on the computer and test it out!
OPT Step 5:
Use the extra ground plug to add the fan light switch right next to the speed controller (needs its own hole) to have a really custom fan controller!
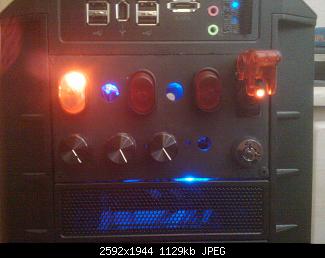
Here is my semi-completed project. I have utilized all 5 sections of this series. To the right is my keyed start switch (the key switch at bottom right and aircraft safety toggle switch). On the top is my cathode switch and my soon-to-be fan light switches. The bottom has 3 of my 4 potentiometer speed controllers.
~Lordbob
Related Tutorials
Computer Mod Series:
1. PSU - Jump Start
2. Start Button - Customize
3. Fans - Speed Controller
4. Lights - Add An On/Off Switch
Fan Speed Controller - Build your Own
-
-
New #2

Man, you're on a roll!
How long will it be until we see a "Case Mod" sticky thread...
Will yours be the first one?
EDIT: Haven't checked lately, but how's your trial going with the removable mobo tray? Show some pics...
-
New #3
Thanks. After all the searching for this stuff I have done, I felt it would be a VERY good idea to write a tutorial so that no one else needed to go through what I did.
Scratched. Turns out the structure of the case would not be sound enough to take the weight after cutting a large section out of the back.
Maybe one day though.
Then again, I would just design a case WITH a removable tray, and absolve the issue
~Lordbob
-
New #4
Just a note: Working through your formula, it seems that using a potentiometer of 250 Ohms will drop a fan just below 4V.. I'm not sure how much lower, but by my calculations, 4V can be aquired with only 244 Ohms. For peripheral fans, sometimes it might actually be nice to turn the fan off when not needed (extra case fans for example), and with most fans these days having LEDs in them, it's easy to see when a fan is running and when it isn't.
And now a question: you don't mention anything here regarding the Watt rating of the potentiometer required, how would one decide on which to use? Is it a direct comparison to the wattage of the fans to be controlled? Or is there a 'safe standard' that can be used?
I want to build a basic 4-fan controller to mount in my case's 3.5" bay, the 5.25" controller has a whole whack of features I don't need (LCD display with fan speeds, temps, e-Sata and card reader), and I'm trying to decide if I can mod that one or if it would be better to build a new one.
So... What's your verdict on the wattage rating then?
Update: A local shop here in SA has a range of potentiometers (link), but in the whole list I can only find one model that I think would work in making a 12V fan speed controller (link)... But R168.95 per potentiometer seems a bit pricey to me though, especially considering the same site offers others for way less. Any specific potentiometers you'd recommend for this task...?
-
New #5
There are also some Pots that have a switch. This means that you can take it down to its lowest setting (with the fan still on), then have it click off.
That is because I have no idea.
In my research, I never saw a 200Ohm pot with anything other than a 5 or 10 watt rating.
I would make a new one. Just make sure you measure correctly.....
Also, if you go that path, let me know how you do it, I would be interested. Mine so far have all been messed up.
Well, I called State Electronics (Potentiometer.com Stock and Custom Potentiometers) and recieved no answer (twice).
So I ordered mine from Mouser Electronics (Mouser Electronics - Electronic Component Distributor) and not only got someone on the phone, but they helped me pick out the right one (well, there was only one) and the nice black aluminum knobs to go with it!
~Lordbob
-
New #6
Ah.. Ok cool, no problem.I was just curious, not really sure how much of a difference it'll make. If I do find out though, I'll let you know.
Yeah, I thought that might be easier. I might end up pulling apart my current controller for parts and just mounting it on a new bracket, but we'll see.
As for how I'd make the bracket, considering it's going to fit into a 3.5" bay, I'm thinking of digging out my ancient (and quite possibly dead) 1.44MB stiffy disk drive and gutting it.. From there all I'd need to do is make a new face plate for it.
Thanks for the links.. I'll check them out.
-
New #7
Just to be clear, with your calculations a fan that uses 12V and 1.1A would need a pot rated at 15ohms?
-
-

Fan Speed Controller - Build your Own
How to Create your Own Fan Speed ControllerPublished by Lordbob75
Related Discussions






 Quote
Quote