How to Create a "Personalization" Shortcut in Windows 7 and Windows 8
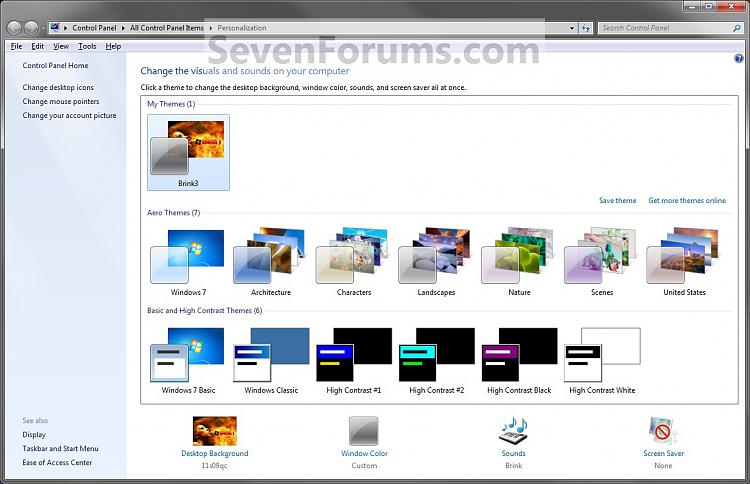
InformationThis tutorial will show you how to create or download a Personalization shortcut that opens directly to the Personalization window to change the visuals and sounds settings in Windows 7 and Windows 8.
NoteThe Windows 7 Starter and Home Basic editions do not have the personalization feature included in them. This shortcut will open Windows Color and Appearance instead in the these two editions.
EXAMPLE: Personalization
OPTION ONETo Download a "Personalization" Shortcut
1. Click/tap on the Download button below to download the file below.
Personalization.zip2. Save the .zip file to your desktop.
3. Open the .zip file and extract the Personalization shortcut to the desktop.
4. Unblock the Personalization shortcut. (See screenshot below)
NOTE: If you do not have a Unblock button under the General tab, then the shortcut is already unblocked and you can continue on to step 5.
5. In Windows 7, you can now Pin to Taskbar or Pin to Start Menu, add to Quick Launch, assign a keyboard shortcut to it, or move this shortcut to where you like for easy use.
6. In Windows 8, you can Pin to Taskbar on desktop, Pin to Start screen, add to Quick Launch, assign a keyboard shortcut to it, or move this shortcut to where you like for easy use.
7. When done, you can delete the downloaded .zip file on the desktop if you like, or save it to use again.
OPTION TWOTo Manually Create a "Personalization" Shortcut
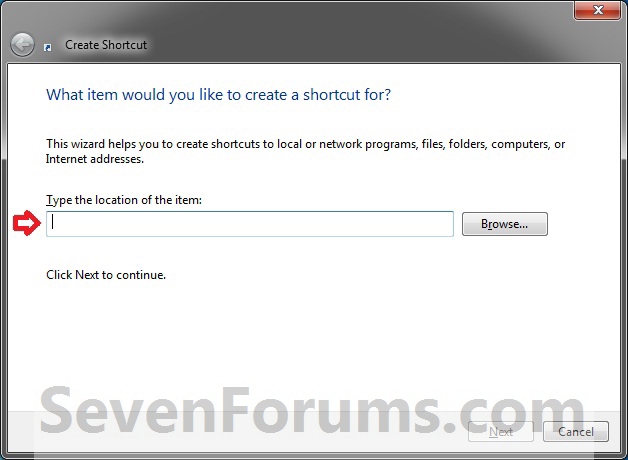
1. Right click on a empty area on desktop, and click/tap on New and Shortcut.
2. Copy and paste the command below into the location area, and click/tap on the Next button. (See screenshot below)
rundll32.exe shell32.dll,Control_RunDLL desk.cpl,,23. Type Personalization for the name, and click/tap on the Finish button. (See screenshot below)That's it,
NOTE: You can name this anything you would like though.
4. Right click on the new Personalization shortcut on the Desktop, and click/tap on Properties.
5. Click on the Shortcut tab, then click/tap on the Change Icon button. (See screenshot below)
6. In the line under "Look for icons in this file", copy and paste the location below, and press Enter. (See screenshot below)
%windir%\System32\themecpl.dll7. Select the icon highlighted in blue above, and click/tap on OK. (See screenshot above)
NOTE: You can use any icon that you would like instead though.
8. Click/tap on OK. (See screenshot below)
9. In Windows 7, you can now Pin to Taskbar or Pin to Start Menu, add to Quick Launch, assign a keyboard shortcut to it, or move this shortcut to where you like for easy use.
10. In Windows 8, you can Pin to Taskbar on desktop, Pin to Start screen, add to Quick Launch, assign a keyboard shortcut to it, or move this shortcut to where you like for easy use.
Shawn
Related Tutorials
- How to Change the Windows 7 Desktop Background
- How to Change the Desktop Background in Windows 7 Starter and Home Basic Editions
- How to Create a Change "Desktop Background" Shortcut in Vista and Windows 7
- How to Change the Window Color and Appearance in Windows 7
- How to Change or Save a Windows 7 Theme
- How to Change the Event Sound Effects in Windows 7
- How to Change the Screen Saver in Windows 7
- How to Create a "Screen Saver Settings" Shortcut in Windows
- How to Add or Remove "Personalize" from Desktop Context Menu in Windows 7 and Windows 8
- How to Add or Remove Expanding "Personalize" Desktop Context Menu in Windows 7 and Windows 8
Personalization Shortcut - Create
-
New #1
Thank you Brink.
Recently I inherited -sort of - 4 years old Asus eeePc 1001 netbook. The display connector has started giving problems on it and I don't feel like spending $ 120 to get it fixed. I have it connected to a 22" monitor. I tested it and it consumes maximum of 30 watts when charging and under 20 when the display if off. I am using it strictly for unattended http and torrent downloads at night. Without your fix it was defaulting to 1080p resolution and the text was practically impossible to read. Thanks to you now it is under control.
I have a usb connected power controller - from Energenie Netherlands - which powers off the charger when it reaches 90 % level and switches on again when it drops to 15 % through a command line utility. I am also using a batch file to check the level every 30 minutes. Next I will be testing it for actual power consumption (KWH)over the period.
Thank you once again.
-

Personalization Shortcut - Create
How to Create a "Personalization" Shortcut in Windows 7 and Windows 8Published by Brink
Related Discussions


 Quote
Quote