

How to Take and Create a Screenshot with Paint in Windows 7
InformationThis will show you how to take a full screen screenshot or a single window screenshot, then create and save the screenshot in Windows 7 Paint.TipIf you wanted to take a screenshot of a opened menu item, then you would want to use step 1 and crop the screenshot in Paint since the menu item would close when trying to take the screenshot with step 2.
Here's How:
1. To Take a Screenshot of the Entire Display ScreenThat's it,
NOTE: If you have multiple monitors, then they will also be included in the full screen screenshot. This option will also include context menus in the screenshot.
A) Press the PrtScn key for a desktop.2. To Take a Screenshot of only the "Active" Window
NOTE: For laptops or notebooks, you may need to press either the Ctrl+PrtScn or Fn+PrtScn keys instead of only the PrtScn key.
B) Go to step 3.
NOTE: This will just be a screenshot of the window that you have the focus set on. The window that has focus will have a darker border than the other opened windows.
A) Click on the title bar of the window that you want to take a screenshot of to place focus on it.3. Open Paint.
B) Press the Alt+PrtScn keys for a desktop.
NOTE: For laptops or notebooks, you may need to press the Alt+Fn+PrtScn keys instead of only the Alt+PrtScn key.
4. In Paint, press Ctrl+V to paste the screenshot into Paint.
A) Go to step 6.OR
5. In Paint, click on the rectangle above Select on the toolbar, then right click on the white space in the lower main pane of Paint and click on Paste. (See screenshot below)
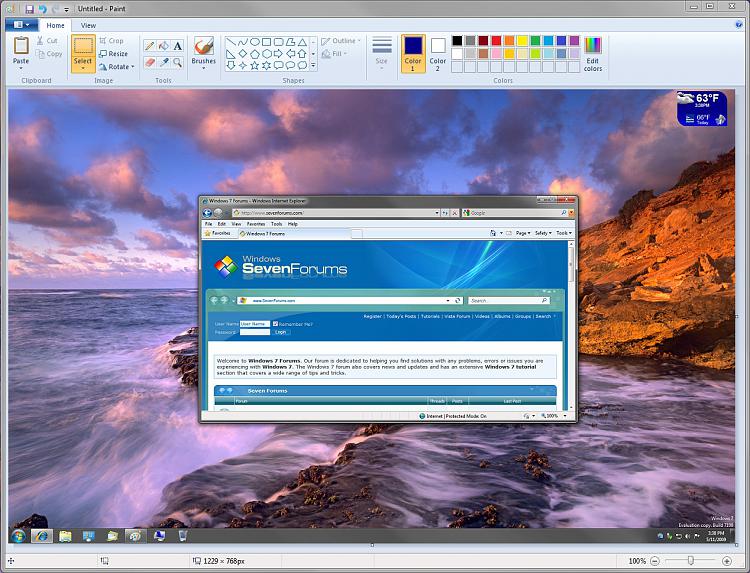
6. Make any crops or adjustments you would like to the screenshot. (See screenshots below)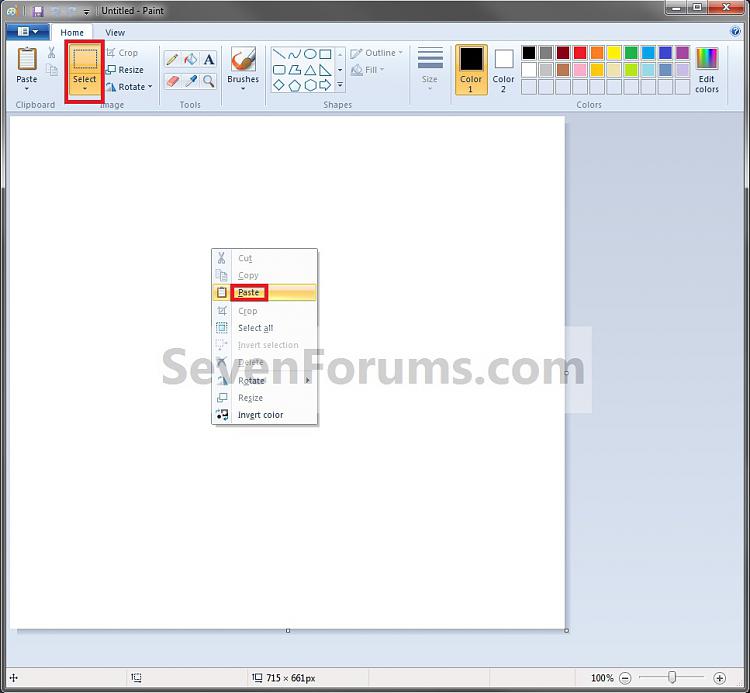
NOTE: For detailed information on how to use Paint, click on theicon at the upper right corner in Paint. The left screenshot is of a single window, and the right screenshot is of the full screen.
7. When ready to save the screenshot, click on the file drop down arrow to the left of the Home and View tab. Next, hover the mouse pointer on Save as to open it, then click on the file extension (ex: JPEG) that you want to save the screenshot as. (See screenshot below)
8. Navigate to where you want to save the screenshot. Type in a name for the screenshot to be saved as, and click on the Save button. (See screenshot below)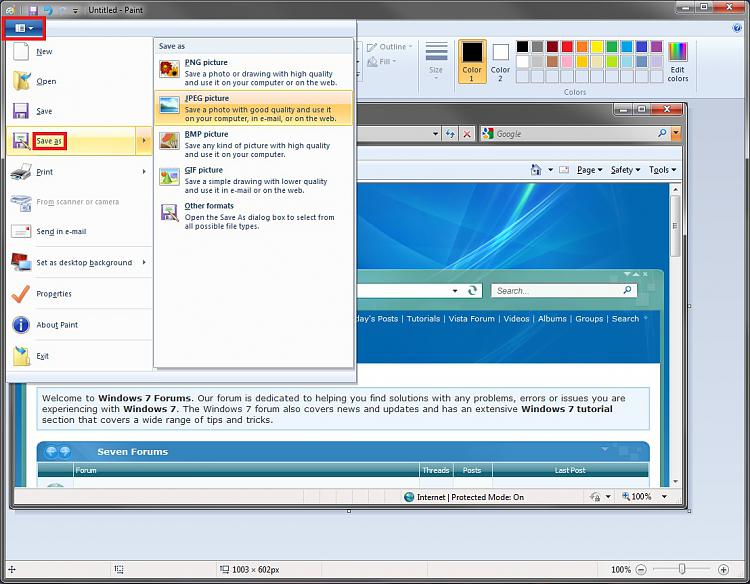
9. When done taking screenshots, close Paint.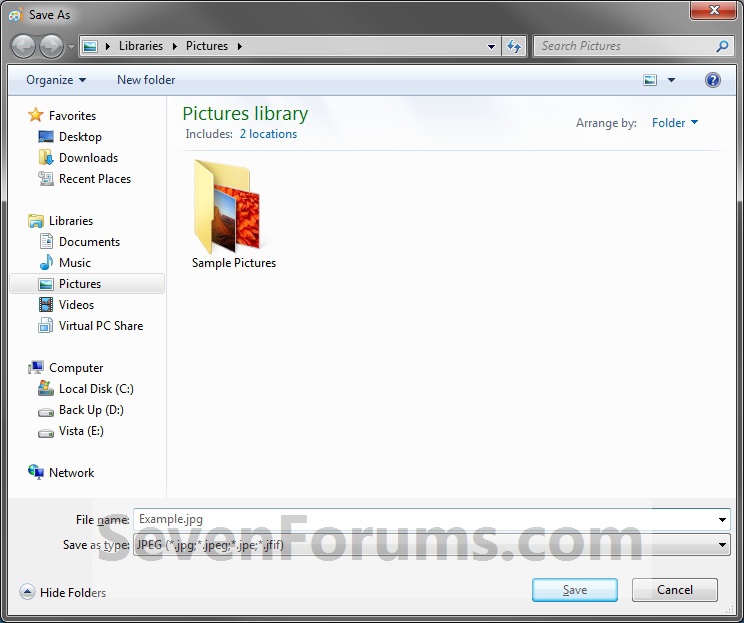
Shawn
Screenshot with Paint
-
-
-
New #3
I still use this old school trick to capture transient screen images like tool-tips. The snipping tool will take system focus and some dialog boxes will disappear. PrintScreen/Paste is a very good thing to know (remember).
-
-
New #5
Hi Dave,
I thought about it, but with the Snipping Tool, you cannot take screenshots of open menu items as Antman posted above though. I wanted to make it usable in all cases.
-
New #6
Oh wow, you do learn something new everyday!
Didn't know about the Alt + Prt Sc trick! Thanks a lot Brink!
-
-
-
New #9
Hello AEM,
Sure, as long as it's not a program that must be purchased to use it. You might also double check in the Tutorial index to make sure that we do not already have one for it as well. :)

Screenshot with Paint
How to Take and Create a Screenshot with Paint in Windows 7Published by Brink


 Quote
Quote
Related Discussions