Welcome to 7Forums :) .
Both bug checks uploaded are blaming nVidia but on different terms.
Code:
BugCheck 9F, {3, fffffa80060c4a20, fffff80000b9c518, fffffa80083ad710}

*** WARNING: Unable to verify timestamp for nvlddmkm.sys
*** ERROR: Module load completed but symbols could not be loaded for nvlddmkm.sys
Probably caused by : nvlddmkm.sys
Code:
!irp fffffa80083ad710
Irp is active with 3 stacks 2 is current (= 0xfffffa80083ad828)
 No Mdl: No System Buffer: Thread 00000000:  Irp stack trace.
     cmd  flg cl Device   File     Completion-Context
 [  0, 0]   0  0 00000000 00000000 00000000-00000000

            Args: 00000000 00000000 00000000 00000000
>[ 16, 2]   0 e1 fffffa8007b50480 00000000 00000000-00000000    pending
           \Driver\nvlddmkm
Code:
BugCheck 116, {fffffa800c4fc010, fffff88011163034, 0, d}

*** WARNING: Unable to verify timestamp for nvlddmkm.sys
*** ERROR: Module load completed but symbols could not be loaded for nvlddmkm.sys
Probably caused by : nvlddmkm.sys ( nvlddmkm+153034 )
A TDR (Timeout Detection Recovery) is not a bugcheck in the true sense in that something
has went terribly wrong in the kernel which forced the machine to crash.
"Display driver xxxxx stopped responding and was recovered"
Timeout Detection & Recovery (TDR) = "Display Driver Stopped Responding and was Recovered" is a useful feature that started in Vista and is also in W7 that allows the OS to try and recover from a video timeout so that the system does not crash to a bluescreen. Symptoms included a screen flash with the TDR message appearing one or more times or the screen blinking out to black. If the system cannot recover it will crash (Stop Error 116 typical). The issue is that the video card is not responding as expected. The solution is in the: why?
There is no one-size-fits-all solution to TDR errors. But the problem is usually found in the local environment (your computer). Finding the cause is a matter of checking every possible cause and uncovering the culprit through a simple process of elimination. By methodically running down a checklist of diagnostic procedures you should be able to find the cause and can correct it.
There are numerous reports of hardware solutions to TDR's. The most common are:
- Poor Cooling
- Problems with the power supply
- Overclocking Issues
- Bad System memory or incorrect memory timings
- Defective PC Components
On both bugchecks the driver was up to date:
Code:
lmvm nvlddmkm
start             end                 module name
fffff880`11010000 fffff880`11c47000   nvlddmkm T (no symbols)
    Loaded symbol image file: nvlddmkm.sys
    Image path: nvlddmkm.sys
    Image name: nvlddmkm.sys
    Timestamp:        Wed Oct 23 09:21:50 2013
I don't think the issue is the driver to be honest but it's worth rolling back to a known stable release.
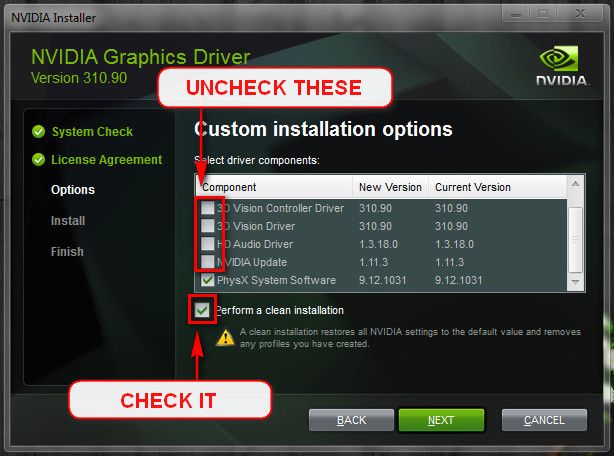
Install the 314.22 WHQL only.
- Uninstall All nvidia items in Control Panel > Programs and features
- 3D Vision Control Driver
- 3D Vision Driver
- Graphics Driver
- HD Audio Driver
- PhysX
- nvidia Update
(Are you using nvidia chipset drivers? If so, dont uninstall anything other than those are listed). - Now follow Drivers - Clean Left over Files after Uninstalling
- Boot normally now. Download 314.22 WHQL. While installing, Select Custom (Advanced) install. In the next page, follow this settings:
Let us know the results.
What is the make, model and age of your PSU?
Fill out this form and post back the result:
Good practice, open up the case and re-seat all types of connection.
- SATA Cables (HDD/SSD/ODD).
- SATA-Power.
- Motherboard 24-pin.
- Motherboard 4/8-pin (CPU).
- Re-seat the RAM.
- Re-seat the GPU.
Make sure that every slot / cable head is free of dust or other obstruction.
Make sure that every connection is seating properly and firmly in-place.
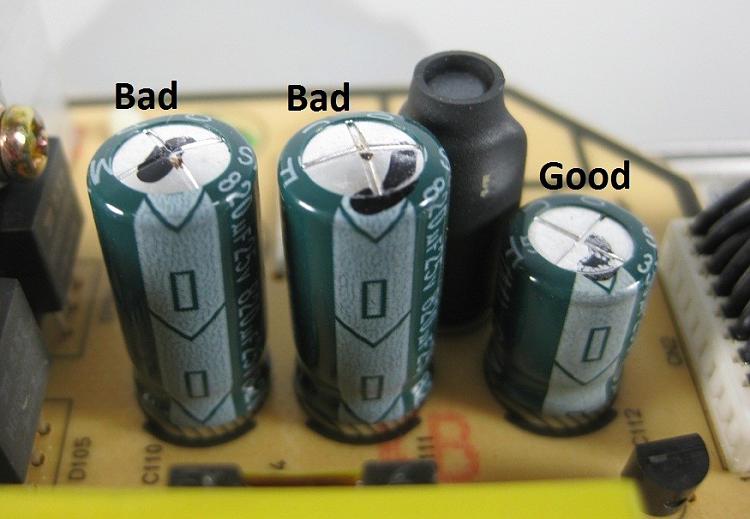
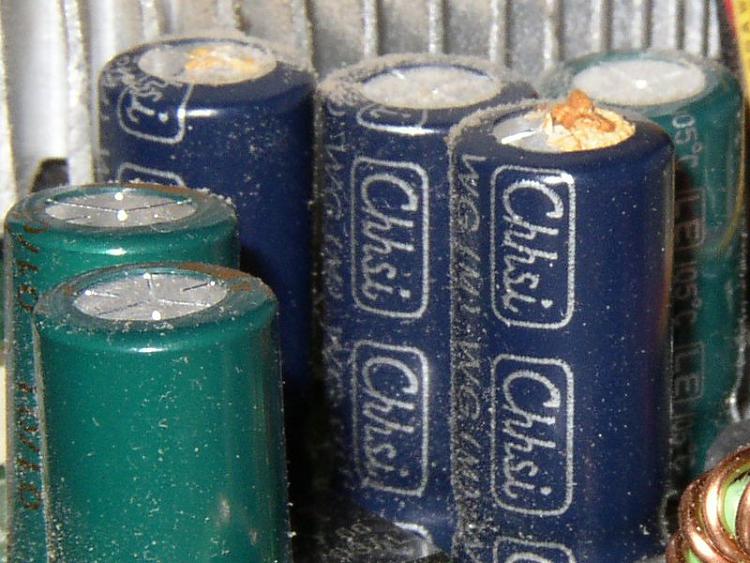
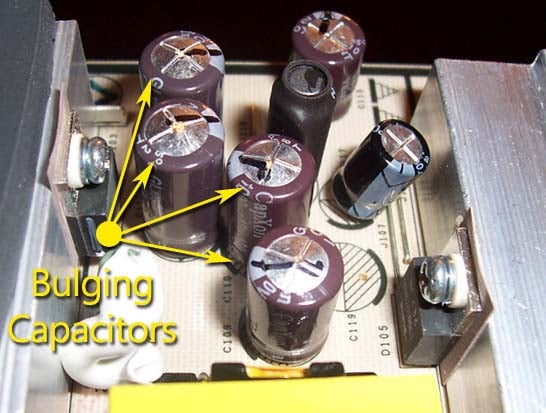
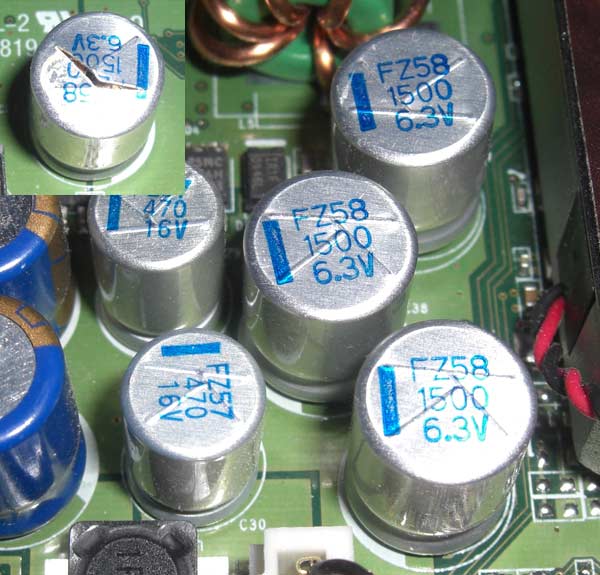
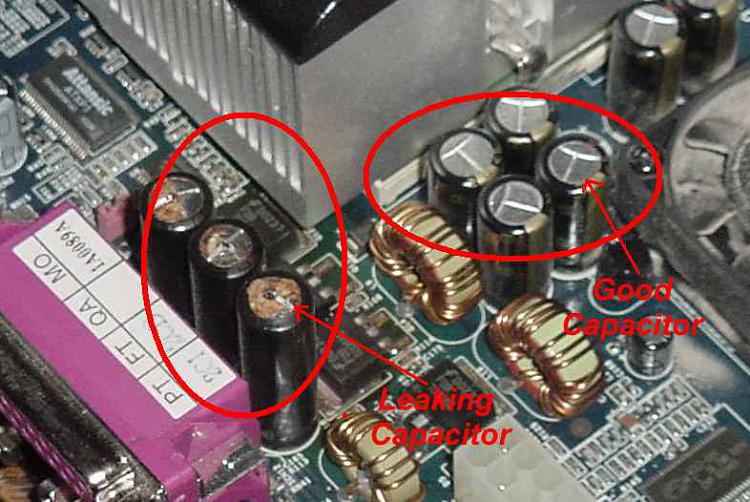
Also have a look at the motherboard and the GPU, search for any "bad caps", bulky, leaking bloated capacitors.
i.e
Testing the RAM:
Test and Diagnose RAM Issues with Memtest86+:
Tip
-
 Pay close attention to part 3 of the tutorial "If you have errors"
 -
 Test the RAM with Memtest86+ for at least 7-10 passes. It may take up to 22 passes to find problems. Make sure to run it once after the system has been on for a few hours and is warm, and then also run it again when the system has been off for a few hours and is cold.
When done with the testing procedure take a picture and upload it here.
Test for thermals and stability:
- Download Speccy and post a Screenshot of the summary window, one at idle and another while putting load on the PC using Prime95 for the CPU side and Furmark for the GPU.
- Before running Prime95 make sure to enable Round-off checking (see 1st post under the tutorial).
Reset the BIOS back to default:
Note
Write down the current value of the SATA Mode!
Its either AHCI or IDE.
After resetting the CMOS go back and verify the value for SATA Mode is what it was
when the OS was installed.
Note
If any component is overclocked reset it back to stock speeds!
Keep us posted :).


 Quote
Quote


