New
#21
Just one more set of "power user" tips for MP3Tag to make it even more powerful and yet easier for you to accomplish mass-updates intelligently and efficiently...
(1) You don't have to use the tag-field pane, make your changes (or specify "< blank >" or "< keep >") and then push the "save" icon button at the left side of the toolbar, although you can do things this way.
Much easier is to simply overtype the field(s) that you want to change in a given row, and then use the TAB key to move to the next field. With the proper program setting this action will accomplish a combined "apply my field change, and SAVE".
If you then modify the next field and again TAB, you will have repeated the "apply my field change, and SAVE", etc., etc.
If you simply hit TAB on a field to skip to the next field without change, then there will be no "apply my field change" but there will be a SAVE (so the date/time in the file will be updated).
If you don't want to change a field that you land on with TAB, but you simply want to exit the updating process of that row, just hit the ESC key.
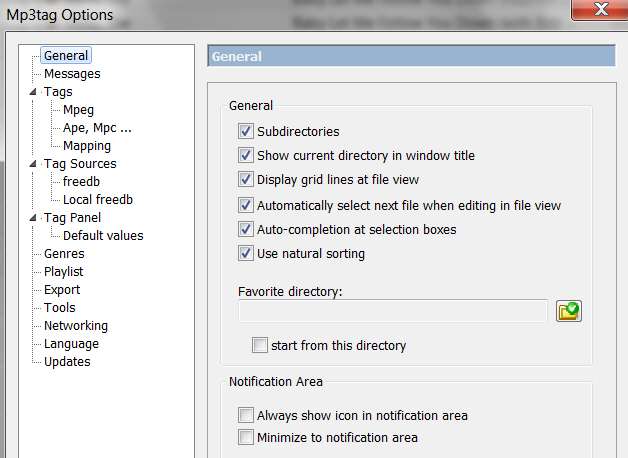
NOTE: the correct setting to enable this TAB function is Tools -> Options -> General, and CHECK the "auto-completion at selection boxes" item. To prevent this TAB function from auto-saving at each TAB key use, you UNCHECK and then you MUST use the "save" icon button to do the SAVE. This latter approach allows you to defer the SAVE function (or decide you don't want to actually permanently apply any updates you may have applied so far). It's up to you, but I myself use the TAB as auto-save approach to save time and make my life easier.
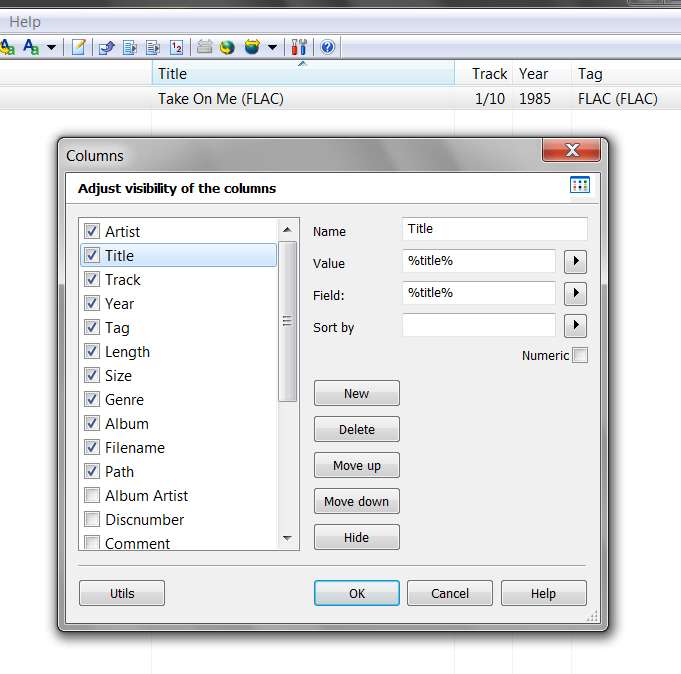
(2) In order to make the TAB (to the next field) even more efficient, you can select the columns whose values you plan to overtype most commonly and rearrange the order of those columns as presented by MP3Tag. And you can even hide columns whose data values you're not ever interested in seeing to "reduce clutter" on the screen, or show columns whose data values may not be selected by default but for which you would like to be able to view and edit those tag field values.
This is accomplished by right-clicking on the column heading bar and then selecting "customize columns...", and then checking or un-checking and using the "move up/down" button.
(3) At the bottom of the MP3Tag screen there is a "filter" line. You can do a HELP search on "filter" to learn how to specify the filter syntax, but the effect is as you'd imagine... to filter a subset of rows from the complete set of rows that would otherwise be displayed. If you are recursing through your entire music collection (e.g. for me, at \Music) then the "filter" will display not everything in your collection but only those files which satisfy your filter specification.
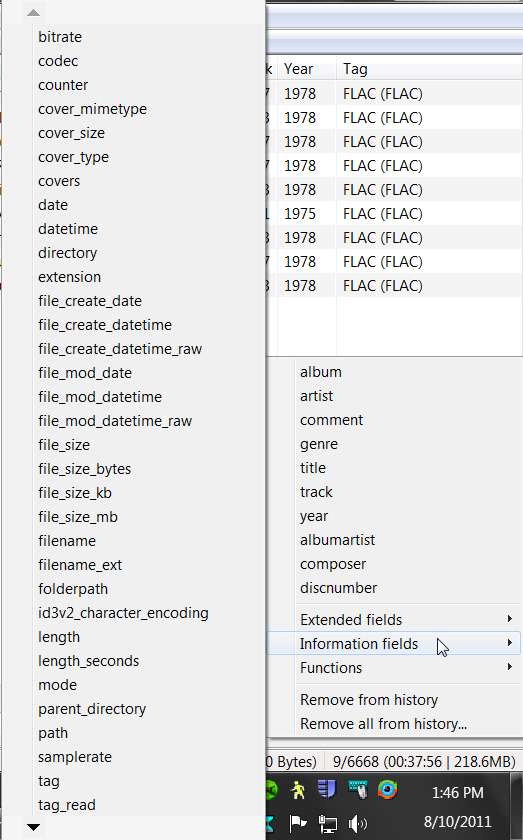
At the extreme right of this line there is a right-arrow button. If you click on that right-arrow button you will get a popup menu that provides "filter values" that can be inserted into the "filter" line area.
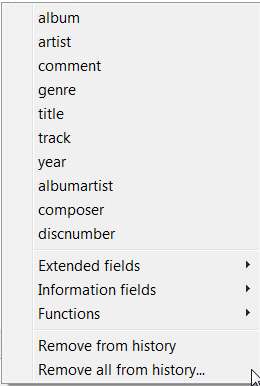
Some of the additional filter items available to you are further imbedded, in the "extended fields", "information fields", and "functions". If you select those items in the first popup menu you'll get a second menu next to it, and you can continue selecting items, etc.
You can specify the filter value using expected AND and OR relation separators as you'd expect. You specify values within quotes ("value"). Filter items are specified within "%" (e.g. "%artist%"). You specify tests most commonly as HAS/IS/GREATER/LESS/EQUAL/MATCHES.
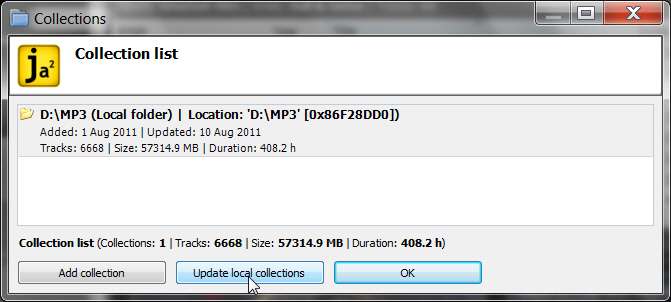
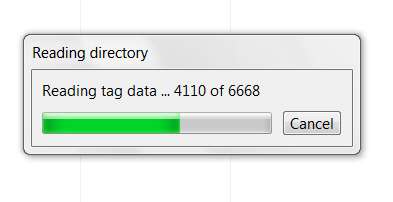
For example, when positioning at my highest-level parent folder (i.e. the main folder of my entire music collection), MP3Tag reads all files in all lower-level folders and determines that there are 6668 files whose tags must be read:
Then, I click on the "filter" button and select the "artist" item. This causes "%artist%" to be populated at the left side of the filter area.
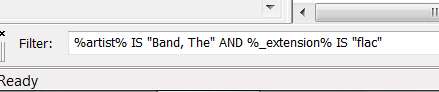
I then manually type in the filter area (after this now-present "%artist%") the string IS "Band, The" because I want to filter out and display all files in my music collection whose artist is equal to "Band, The"... no matter what album those tracks might be on.
I then again click on the "filter" button and select the "information fields" item to get the second menu, and then from the second menu list I select the "extension" item. This causes "%extension%" to be populated after what's already now in the filter area.
I then manually type in the filter area "flac", because I want to display all files by "Band, The" whose file extension is FLAC.
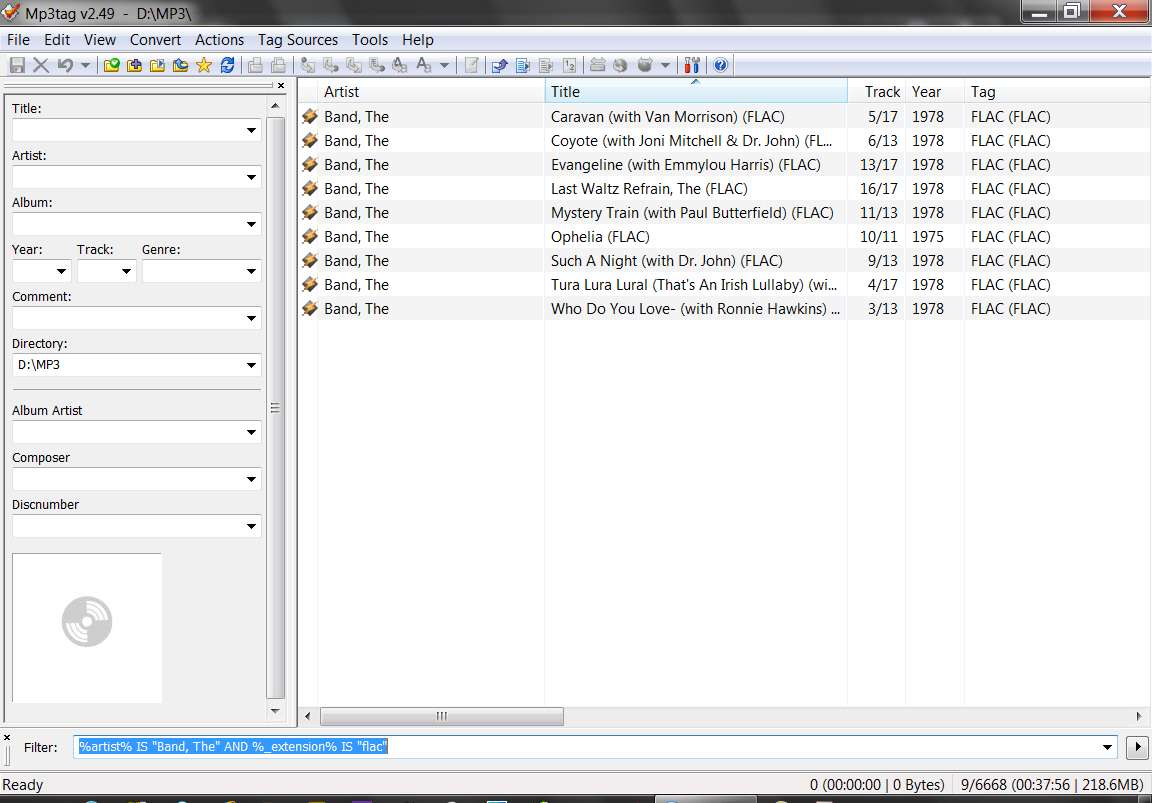
And the result is now whittled down to exactly what I'm looking for:
I just present this "filter" tutorial to acquaint you with what can be done. And once you learn the few filter values you may use along with the IS, AND and OR relations, you don't really need use the button to populate the fields in the filter area. You can just manually type the expression yourself.
Using the "recurse directories" option, plus filters, may make it easier and faster for you to pass through your collection and make any of the changes you find are necessary to the tags. For example, you might use filter to find all files that have a particular characteristic (say something that is wrong, in common with multiple files), so that the list of tracks shown is just those defective files... allowing you to fix all of these "broken" files using the simple list presented by use of the filter that found them all.
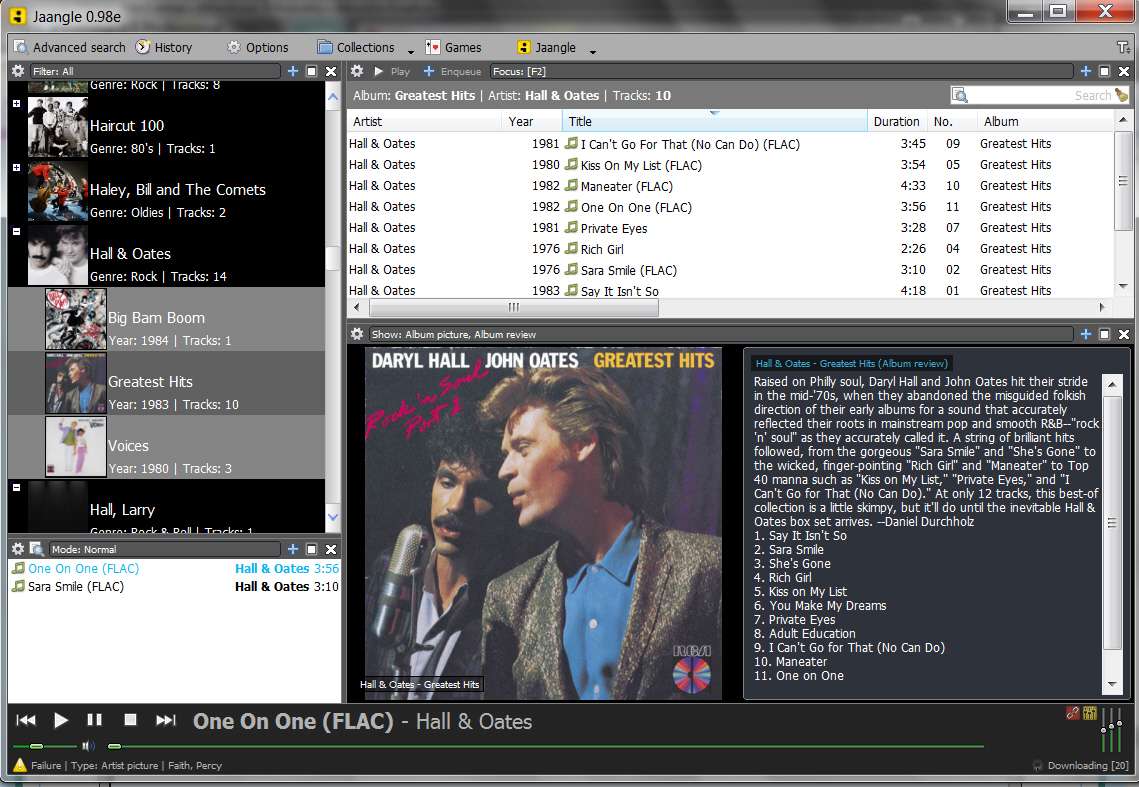
Again... the goal is to use Jaangle as your music player/organizer. And your ideal and simplest arrangement is to have \Music\Artist\Album organization, with "cover.jpg" album art in each album folder.
MP3Tag is your friend for this effort.
I might recommend two other very useful programs (i.e. general purpose Windows file managers, to supplement Windows Explorer which is really not terribly powerful or friendly) that I also use:
(a) Free Commander (which is free)
(b) Beyond Compare (which costs $30)
Last edited by dsperber; 10 Aug 2011 at 15:50.

 Quote
Quote