Got a New Case!

Page 3 of 37 FirstFirst 1234513 ... LastLast

  1. Posts : 9,600
    Win 7 Ultimate 64 bit
    Thread Starter
       #21

    madcratebuilder said:
    Pics or it didn't happen!...
    Conversely (or is that perversely? ), until something does happen, there will be no pics (I'm still in the planning and parts acquisition stage). The only actual work I've done so far is to remove unneeded parts (such as the fans) and parts I will be modding (such as the drive cages and the front panel connector assembly).

    madcratebuilder said:
    ...Take a look at these filters.
    Already have. In fact, I contacted them yesterday to see if the would sell just the filter material only (they won't ). The 650D already has two easily accessed filters, one for the PSU and one for the front fan, that only need a finer filter mesh, such as the one used in the DEMCiflex Filters. Installing new filter mesh on the stock filters is fairly easy. The PSU filter just needs the new mesh stretched over the filter frame on top of the original filter mesh and brush nail glue on the perimeter and the cross pieces. The front filter frame would have to have the metal mesh temporarily removed first (I will take pictures when I actually do it), then the new mesh glued over the old mesh, same as with the PSU filter.

    I don't like the appearance of the magnetic filters (looks a bit too Mickey Mouse for my tastes) so I'm going to use a couple of filters like this one, only 140mm instead of 120mm, on the left side panel.

    Got a New Case!-img_0002.jpg

    They are almost as easy to remove and easier to replace than the magnetic filters and, I feel, look a lot better and can't be easily dislodged. However, they use a foam filter that stops a lot of dust from getting through but some really fine dust still gets through. I'm going to lose the foam and glue in the DEMCiflex Filter mesh, same as on the two stock filters. Since DEMCiflex Filters won't sell just the mesh only, I'll have to buy some complete filters and cannibalize the mesh from them.
    Last edited by Lady Fitzgerald; 23 Apr 2014 at 21:28.
      My Computer


  2. Posts : 9,600
    Win 7 Ultimate 64 bit
    Thread Starter
       #22

    Lady Fitzgerald said:
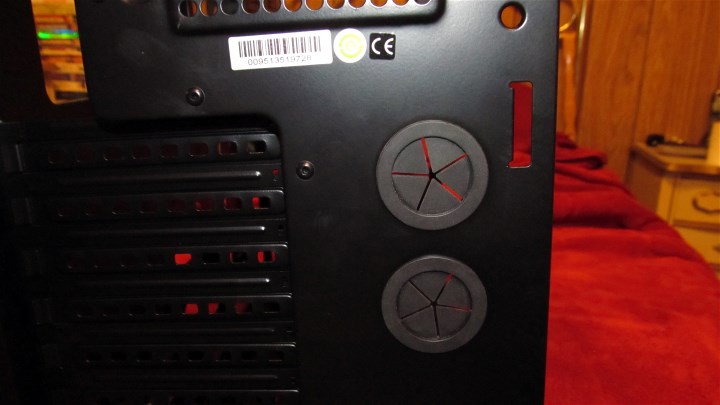
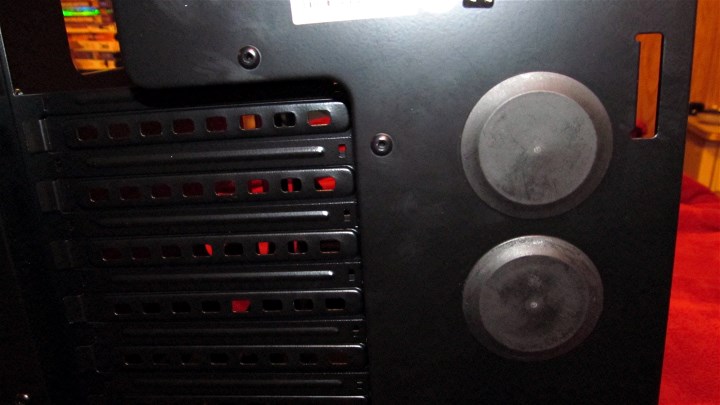
    ...I found a way to seal the two large round holes on the back of the case that currently have the rubber grommets in them. I just found and ordered some flat polyethylene plugs at McMaster-Carr online that are a perfect fit for those plugs. Had to order a hundred of them (mutter, mutter) but they aren't all that expensive and they are a sanitary way to deal with those holes. And I will never run out of plugs! ...

    Well, it just dawned on me what I can do with one of the 98 extra plugs I'm going to have. I can enlarge that stupid square hole in the upper left corner of the back to the same size and shape as the two round holes and pop in another round plug. It seems silly to make a hole larger to hide it but, whatever works, not to mention I'm too cheap to buy another 100 plugs.


    Well, I lied. I stumbled on a little square rubber plug that should just pop right into that little square hole. Even though I had to buy 50 of them, I caved and ordered them anyway.
    Last edited by Lady Fitzgerald; 23 Apr 2014 at 21:33.
      My Computer


  3. Posts : 9,600
    Win 7 Ultimate 64 bit
    Thread Starter
       #23

    Well, the first of the goodies I ordered for the case just came in. The first mod I did was to get rid of the stupid USB 3.0 front panel pass-through connectors.

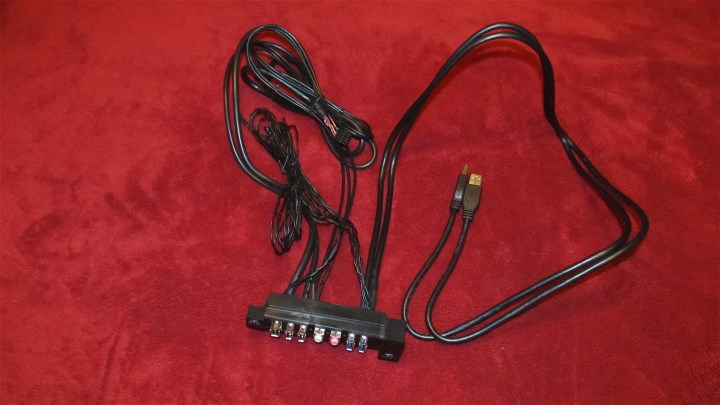
    Here is the stock 650D front panel connector assembly:

    Got a New Case!-img_0002.jpg

    Note how ridiculously long the USB 3.0 cables are and how they end in a pair of male Type A plugs.

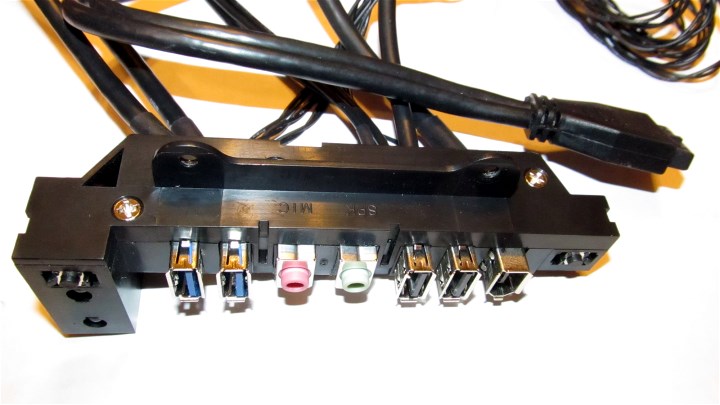
    This is the front panel connector assembly from a Corsair 350D front panel connector assembly:

    [Got a New Case!-img_0004.jpg

    Note the more reasonable length of the USB 3.0 cables and that they lead to a USB 3.0 header connector.

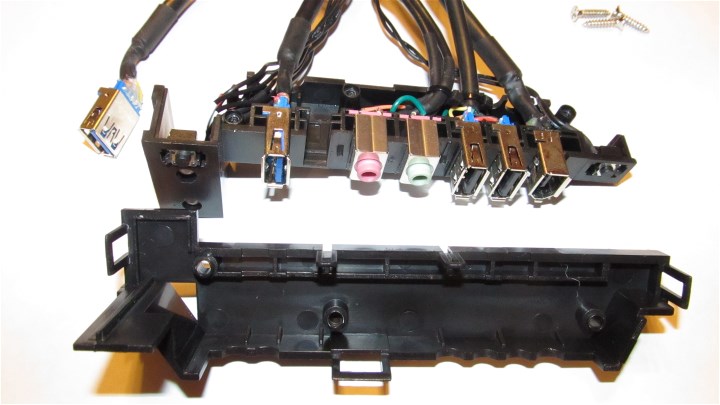
    This is the 350D front panel connector assembly opened up showing how the USB 3.0 sockets come out.

    Got a New Case!-img_0007.jpg

    This shot shows the 650D's front panel connector assembly opened up and the original USB 3.0 sockets and cables being removed.

    Got a New Case!-img_0010.jpg
      My Computer


  4. Posts : 19,383
    Windows 10 Pro x64 ; Xubuntu x64
       #24

    Lady Fitzgerald said:
    Well, the first of the goodies I ordered for the case just came in. The first mod I did was to get rid of the stupid USB 3.0 front panel pass-through connectors.

    Here is the stock 650D front panel connector assembly:

    Attachment 315293

    Note how ridiculously long the USB 3.0 cables are and how they end in a pair of male Type A plugs.

    This is the front panel connector assembly from a Corsair 350D front panel connector assembly:

    Attachment 315294

    Note the more reasonable length of the USB 3.0 cables and that they lead to a USB 3.0 header connector.

    This is the 350D front panel connector assembly opened up showing how the USB 3.0 sockets come out.

    Attachment 315295

    This shot shows the 650D's front panel connector assembly opened up and the original USB 3.0 sockets and cables being removed.

    Attachment 315296

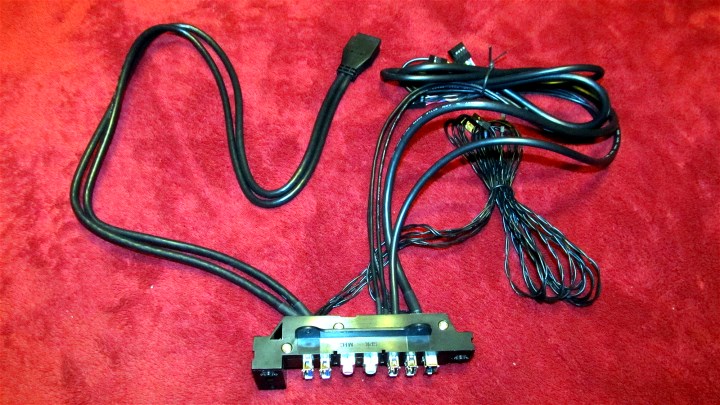
    This shows the 650D front panel connector assembly put back together with the USB cables from the 250D panel.

    Attachment 315297
    Screenshots and Files - Upload and Post in Seven Forums
      My Computer


  5. Posts : 9,600
    Win 7 Ultimate 64 bit
    Thread Starter
       #25

    That's what I did but something went wonky. I'm fixing it now.
      My Computer


  6. Posts : 9,600
    Win 7 Ultimate 64 bit
    Thread Starter
       #26

    These shots are of the finished mod. I'm hanging on to the 350D assembly in case a switch or other connector on the 650D assembly goes south.

    Got a New Case!-img_0020.jpg

    Got a New Case!-img_0023.jpg
      My Computer


  7. Posts : 9,600
    Win 7 Ultimate 64 bit
    Thread Starter
       #27

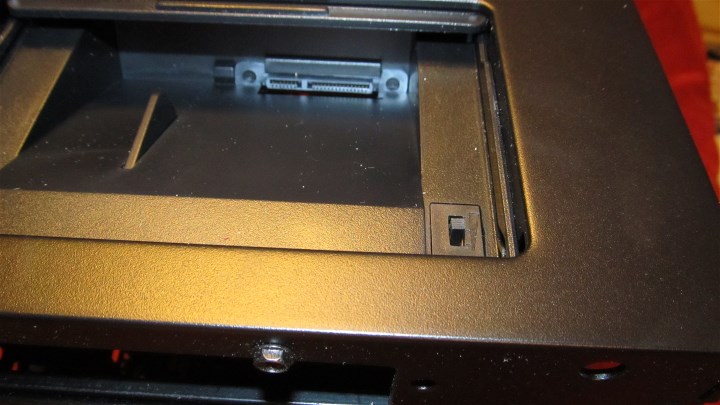
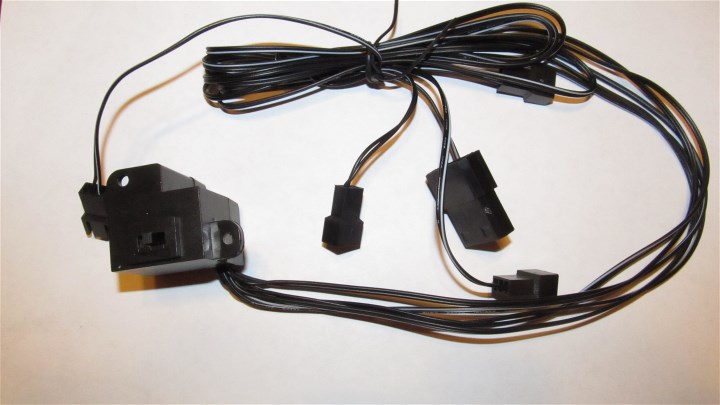
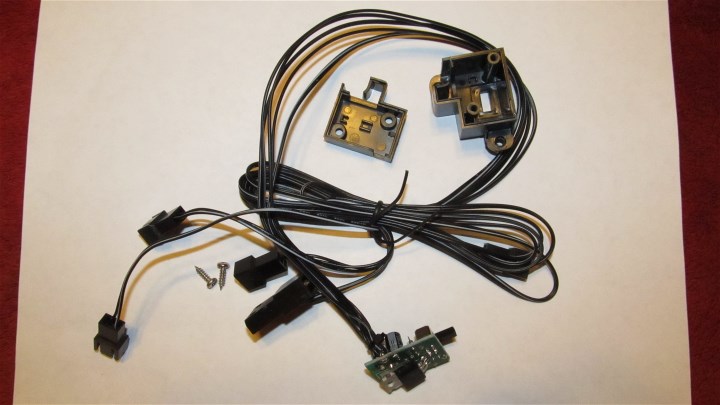
    I originally had planned on using the fan switch for the 200mm front fan I'm going to put in because I didn't know how much current it drew, the MOBO fan header has a 1A limit, and I wasn't sure if I could control a non-PWM fan from a PWM fan header. I've since found out the fan draws way less than 1A and the fan header can control fan speed. Also, many people have had problems with the fan switch burning up, including the new version which was supposed to fix the problem. It probably would have been OK but I preferred using the MOBO fan header so I decided to get rid of the switch. I couldn't just remove the switch would leave a hole dust could use to get in. Leaving the switch in and cutting off the wires would fill the hole but leave a non-functional switch (which would bother this anal old broad) and was a little too redneck for my tastes. Instead, I decided to remove the switch innards.

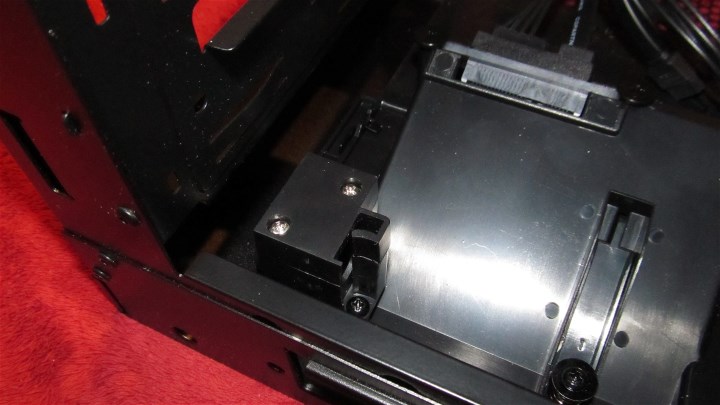
    These shots show where the switch housing is inside the case (upside down) and the switch inside the hot swap bay.

    Got a New Case!-img_0005.jpg

    Got a New Case!-img_0008.jpg

    This is the switch assembly removed from the case:

    Got a New Case!-img_0011.jpg

    And after the innards have been removed (I'm hanging onto them in case I ever change my mind):

    Got a New Case!-img_0012.jpg
    Last edited by Lady Fitzgerald; 26 Apr 2014 at 10:12.
      My Computer


  8. Posts : 9,600
    Win 7 Ultimate 64 bit
    Thread Starter
       #28

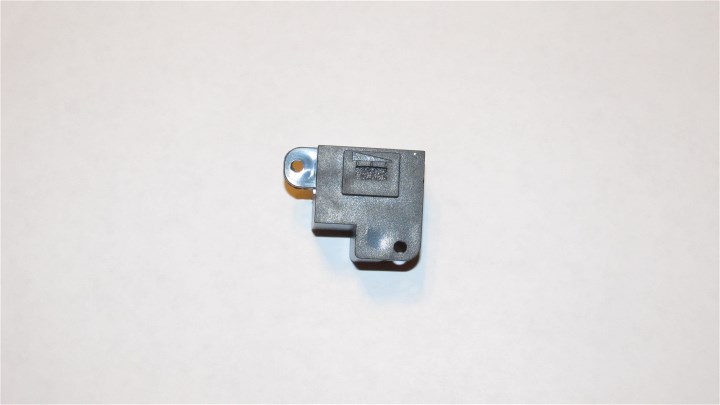
    There was still the small issue of the tiny hole left by the switch slider itself. I filled that in with a small piece of foam cut from the top of a Mexican food takeout box. Even though it was a snug fit, I used a tiny bit of brush-on nail glue to make sure it stayed put. I should still be able to get it out if I ever need to restore the switch.

    Got a New Case!-img_0014.jpg

    Got a New Case!-img_0015.jpg

    The next two shots show the empty switch assembly installed back in the case.

    Got a New Case!-img_0017.jpg

    Got a New Case!-img_0019.jpg
      My Computer


  9. Posts : 2,686
    Windows 8.1 Pro w/Media Center 64bit, Windows 7 HP 64bit
       #29

    This is for future information as you have already got your new USB 3 cables.

    Amazon.com: 2-Port USB 3.0 A Female to 20 PIN Adapter: Computers & Accessories

    Amazon.com: Silverstone Tek 19 Pin USB3.0 Adapter Cable - External to Internal (CP09): Computers & Accessories

    I have a 400R and really like it. No problems with the Front USB headers but Corsair left out the short fan screws with the fat head to fit the rubber mounts and it took a few weeks for them to ship new ones.

    Also those DEMCiflex Filters reduce airflow by 15%. I have them on my systems and they do keep it clean.

    Jim
    Last edited by Phone Man; 26 Apr 2014 at 01:43. Reason: Correct case model
      My Computer


  10. Posts : 9,600
    Win 7 Ultimate 64 bit
    Thread Starter
       #30

    Here are the plugs I got to seal the leaky rear panel grommets. I will have to trim a small bit of the side of one of the plugs to clear the little panel I'm going to use to cover the slots on the back of the case (I should get them and some black blind rivets I ordered on Monday). I wonder what I'll do with the remaining 98 plugs I had to buy just to get the two?

    Got a New Case!-img_0035.jpg

    Got a New Case!-img_0037.jpg

    Got a New Case!-img_0040.jpg
      My Computer


Page 3 of 37 FirstFirst 1234513 ... LastLast

  Related Discussions
Our Sites
Site Links
About Us
Windows 7 Forums is an independent web site and has not been authorized, sponsored, or otherwise approved by Microsoft Corporation. "Windows 7" and related materials are trademarks of Microsoft Corp.

© Designer Media Ltd
All times are GMT -5. The time now is 04:32.
Find Us