Got a New Case!

Page 13 of 37 FirstFirst ... 3111213141523 ... LastLast

  1. Posts : 5,956
    Win 7 Pro x64, Win 10 Pro x64, Linux Light x86
       #121

    Lady Fitzgerald said:
    I woke up a little after 3AM with a mild hot flash (I would like to "meet" the MAN who named them hot FLASHES!) and couldn't get back to sleep so, once I got the old carcass limbered up, I hung up the two fan braces and the 200mm front grill outside and spent the rest of the morning painting them. After the last coat of color went on, I made an Ace Hardware run to get some nuts, washers, and a 1/2" punch. The biggest punch they had was 3/8". So, after collecting my mail (including some spare case parts I ordered from Corsair), I went back toward home to where there is a Tandy Leather close to my home...er...where it used to be. It turned out they had moved to the other side of town. So, I ran (actually, drove) across town and got the punch.

    After a late lunch and visiting a bit with the neighbors, I punched out the 1/2" holes in the acoustic foam for the side panel, installed the foam, then installed the fans on top of the foam.

    Attachment 317560

    Attachment 317561

    Then came the filter bases...

    Attachment 317562

    ...and then the filter tops.

    Attachment 317564

    Here is the inside view with the foam.

    Attachment 317565

    I won't be able to install the braces for a week or two until the paint has had enough time to dry completely. I also need to get some black fan connectors to replace those ugly white ones.

    The next step will be to finish cutting out the top grill and install the fan shroud—I'm not looking forward to that—then I can start cutting, punching, and installing the acoustic foam in the case. I should be able to install the PSU, fans, and fan hub after that.

    I've also decided to make a shroud to cover the entire PSU and the cables coming out of the PSU. The PSU has this big, ugly sticker on top of the case and I can't remove it without voiding the warranty because it has the model and serial number on it (mutter, mutter, mumble, mumble). Since I can't remove it, I'll just cover it. I'm going to secure it to the PSU with 1/8" x 1" magnetic tape, which just happens to be the thickness I need to shim the cover away from the top of the PSU to clear one of the retention brackets. I need to get a sheet of aluminum to make the shroud with (forgot to grab some while I was at Ace Hardware today).
    Your new build is looking fantastic Jeannie great work and a great thread !
      My Computer


  2. Posts : 9,600
    Win 7 Ultimate 64 bit
    Thread Starter
       #122

    Layback Bear said:
    Thank you all because now I feel better.
    I'm not the only one that has installed a fan backwards.
    Lady you new build is looking very nice.
    Thanks, Jack! I also feel better knowing I'm in good company. Part of my problem was being a bit short in the sleep department.
      My Computer


  3. Posts : 9,600
    Win 7 Ultimate 64 bit
    Thread Starter
       #123

    Stephanie said:

    Your new build is looking fantastic Jeannie great work and a great thread !
    Thanks, Stephanie!
      My Computer


  4. Posts : 9,600
    Win 7 Ultimate 64 bit
    Thread Starter
       #124

    I'm no longer dreading cutting out the rest of the top grill in the case because the deed is done. It's kinda crude but, once the shroud and acoustic foam is in, no one will ever see it.

    This is what the top of the case looked like after I chewed out most of the grill the other day:

    Got a New Case!-img_0001.jpg

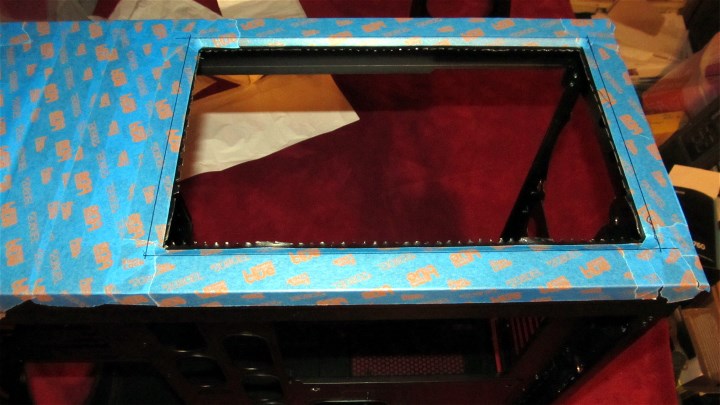
    It was meatball surgery but it got the worst of it out of my way. I put low tack tape on top to protect the finish and make the layout lines more visible. I had to leave parts of the flange remaining from the grill to give support for the mounting holes because the holes would otherwise be just over the edge of the final opening.

    Got a New Case!-img_0005.jpg

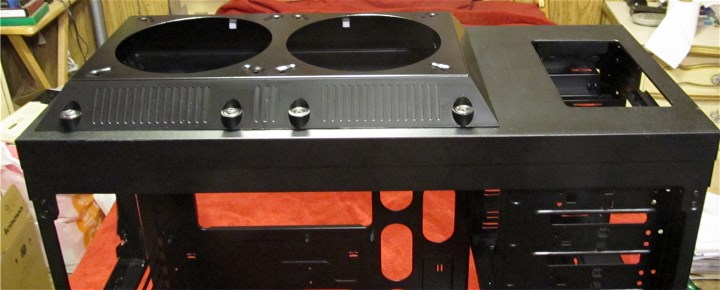
    Here are the final results after cutting, drilling, and filing. I did a lot of eyeballing since everything is going to be covered up and I'm getting tired of working on this. You can see the tabs (formerly part of the flange that angled down) I had to leave in place to give some "meat" around the holes so the screws won't "blow out". That's about 2.5 hours work (including a few short breaks to rest the Dremel, my hands, and my back).

    Got a New Case!-img_0009.jpg

    Yay! It fits! I haven't chinched it down but the screws are all in place so I could see if everything fit properly.

    Got a New Case!-img_0011.jpg

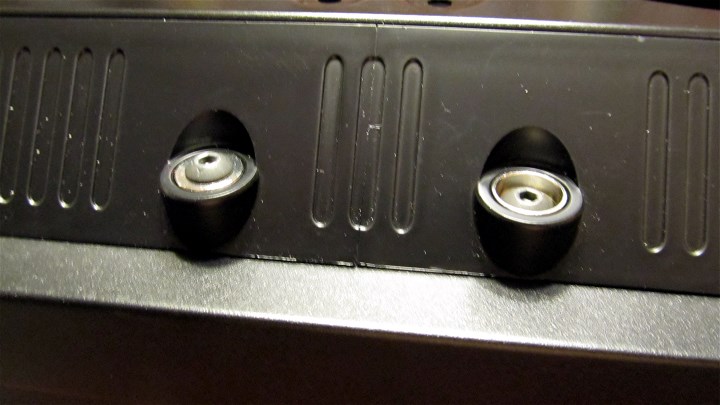
    The shroud has little stainless steel cups that slip into recesses in the plastic sides. They are supposed to be inserted the way shown on the right but I'm not crazy about how that looks plus it forms a pocket that can collect dust and other assorted crud that could be a nuisance to clean. One thing I love about this case it doesn't have hard to clean recesses to collect dust so I didn't like the idea of adding eight of them. On the left, I reversed the cup. That looks better and will not collect "stuff".

    Got a New Case!-img_0013.jpg

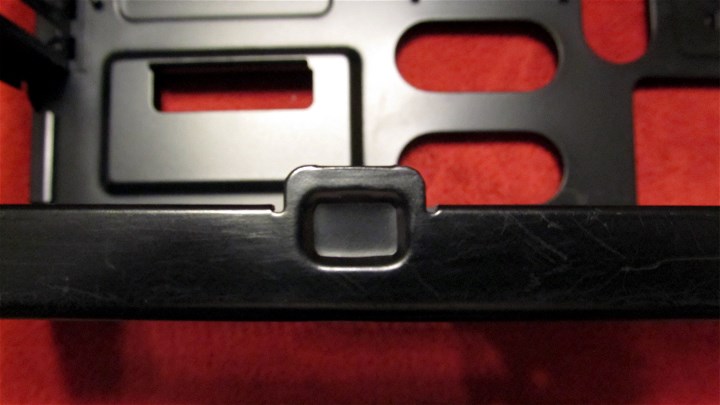
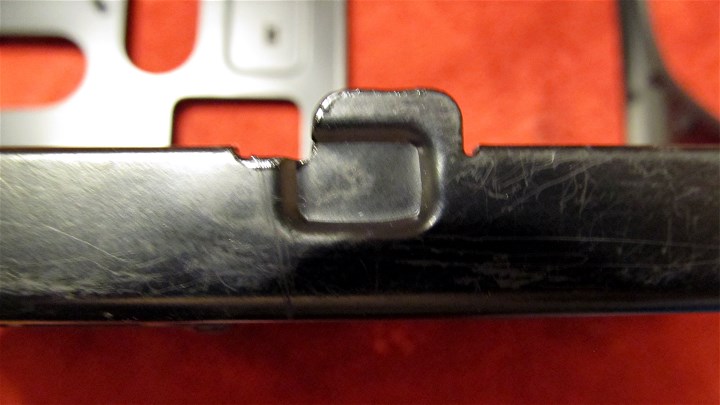
    There are three tabs, like the one shown below, at the bottom of the case on each side to position the case side panels. I had to cut the center tab out on the left side because it was in the way of removing the bottom HDD tray (whoever designed that should be shot...where it hurts!). Fortunately only the outside edges of the outside tabs are needed to position the side panel.

    Got a New Case!-img_0014.jpg

    I had to cut part of the front tab away because the corner of the tab still got in the way of the HDD tray. I could still wiggle past it but once I shim the cage to eliminate any slack that could allow HDD vibration, I probably wouldn't be able to get the HDD tray out. The notch I cut in the tab will ensure I will be able to get the tray out.

    Got a New Case!-img_0016.jpg

    I don't think I will need to do anymore surgery so the next step will be to install the acoustic foam. I need to make a shim to go in the recessed area under the PSU where the PSU fan isn't so I can lay acoustic foam over it to act like a gasket around the PSU so dust can't get in. Then I can install the fan hub, PSU, and the fans. Then I get to start modifying/making the PSU cables.
    Last edited by Lady Fitzgerald; 14 May 2014 at 02:10.
      My Computer


  5. Posts : 24,479
    Windows 7 Ultimate X64 SP1
       #125

    The final result on the top really looks good! Very good idea on reversing the stainless cups too. I think they look much better.

    I will look forward to the pictures of the cable mods you will do.
      My Computer


  6. Posts : 25,847
    Windows 10 Pro. 64/ version 1709 Windows 7 Pro/64
       #126

    I had to go back to the beginning of the thread to see what the case looked like before you started working on it.
    The way you have done the case top sure looks good for a thick radiator push/pull.
      My Computer


  7. Posts : 9,600
    Win 7 Ultimate 64 bit
    Thread Starter
       #127

    Britton30 said:
    The final result on the top really looks good! Very good idea on reversing the stainless cups too. I think they look much better.

    I will look forward to the pictures of the cable mods you will do.
    Thanks, Gary!
      My Computer


  8. Posts : 11,424
    Windows 7 Ultimate 64
       #128

    Lady,
    If you can find black washers and cap screws it would keep the black look going unless you want the contrast or plan to paint. The progress is coming along great and with luck it should run dead quiet.
    Last edited by linnemeyerhere; 14 May 2014 at 20:41.
      My Computer


  9. Posts : 9,600
    Win 7 Ultimate 64 bit
    Thread Starter
       #129

    Layback Bear said:
    I had to go back to the beginning of the thread to see what the case looked like before you started working on it.
    The way you have done the case top sure looks good for a thick radiator push/pull.
    Thanks, Jack! The shroud was designed to add room for a radiator with push pull fans but that wasn't why I decided to put it on this case. The original top was one massive open grill designed to allow mounting one 200mm fan, two, 140mm fans, or two 120mm fans (it came with a rinkydink 200mm fan installed). The result was a massive air dust leak on top so I had to come up with a sanitary way of sealing up that leak.

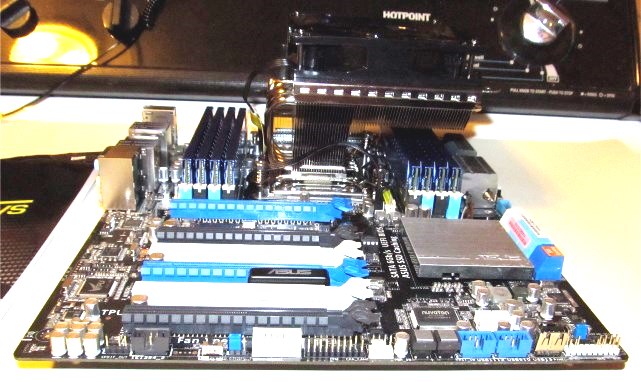
    Also, I wanted to rotate the CPU cooler on my MOBO up 90° so I could get at it and my RAM without having to remove the MOBO (along with just about everything else) like I would have to do on my present case. I had to locate the cooler the way it is in my present case (and in the photo below) because there just wasn't enough room to point it up.

    Got a New Case!-img_0072.2.jpg

    That would make the top of the cooler extend above the top edge of the MOBO, getting close enough to the top fans to get a wee bit tight for easy fan installation and replacement. Since the whole point of getting this case is to avoid having to remove components to remove other components, adding the shroud gives me the additional room I wanted and was also a sanitary way to closing up the massive leak. I have no intention of putting my rig underwater; too much maintenance plus I don't want to worry about water leaks shorting out some insignificant component, such as the MOBO.
      My Computer


  10. NoN
    Posts : 4,166
    Windows 7 Professional SP1 - x64 [Non-UEFI Boot]
       #130

    You combined both....Additional room for components + Good looking PC case.

    Great work Lady! I'm amaze how tricky you are to suit the way you want your case to be.
      My Computer


Page 13 of 37 FirstFirst ... 3111213141523 ... LastLast

  Related Discussions
Our Sites
Site Links
About Us
Windows 7 Forums is an independent web site and has not been authorized, sponsored, or otherwise approved by Microsoft Corporation. "Windows 7" and related materials are trademarks of Microsoft Corp.

© Designer Media Ltd
All times are GMT -5. The time now is 19:44.
Find Us