
New
#131
Got a New Case!
-
-
-
New #133
Thanks, Stephanie!
I'm not going to get much done today; the wind is up again and my allergies are driving me insane. I was up late trying to work out a few details on installing the acoustic foam (the inside of the case is a regular obstacle course). I did install the 140mm lugs on the three exhaust fans this morning and painted the wires and the centers of all the 140mm fans black. Some of the lugs were still a little loosey goosey after tightening the screws so I removed them, brushed on some nail glue, and reinstalled. Problem solved.
I also installed the painted braces on the side panel fans.
That pretty much takes care of the oil canning problem.
-
New #134
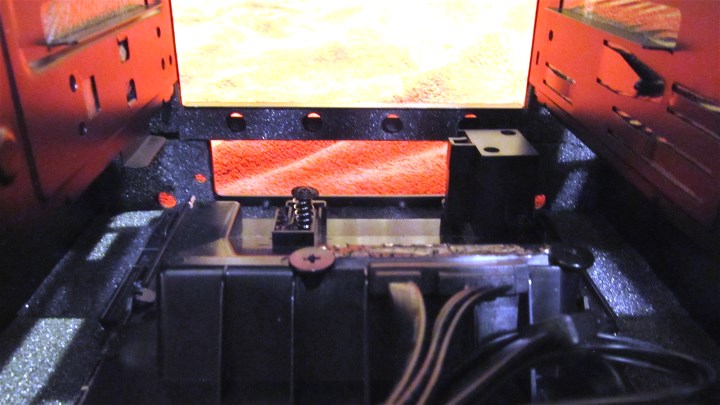
Working yesterday and today, I managed to finish installing the acoustic foam on the bottom of the case. I had to play dodgem with the PSU and the third HDD cage, the latter especially being a stinker. Part of the "fun" were all the little holes that had to punched into the foam. Here is a shot of the foam in the bottom of the case.
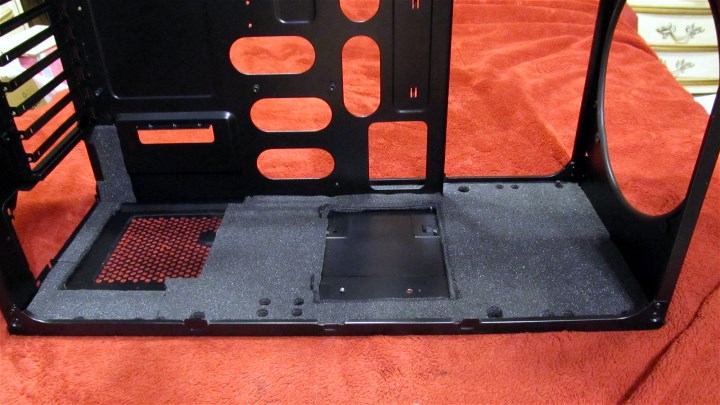
Besides dampening sound, the foam is also sealing up some holes and is serving as gasket material in places. The strip of foam on the lower back corner of the MOBO plate is to seal an air...er...dust leak in that area that the PSU left open. Foam also covers up the portion of the bottom grill that not only wasn't needed by the PSU fan, it also would either let air out of the case or suck it in (at least it would have been filtered). Here is a shot with the PSU in place.
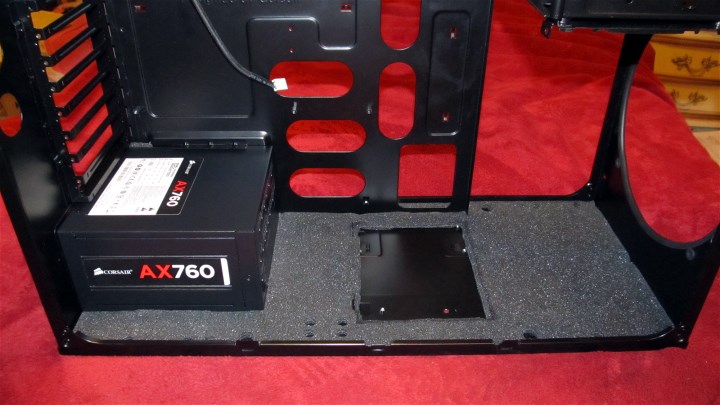
It fits pretty snugly. There are no air leaks around that thing now.
I wanted to get as much foam under the third HDD cage as possible, both to damp sound and for appearance sake but I had to trim out quite a bit just to be able to still get the cage in. This is how the case looks with the cage installed.
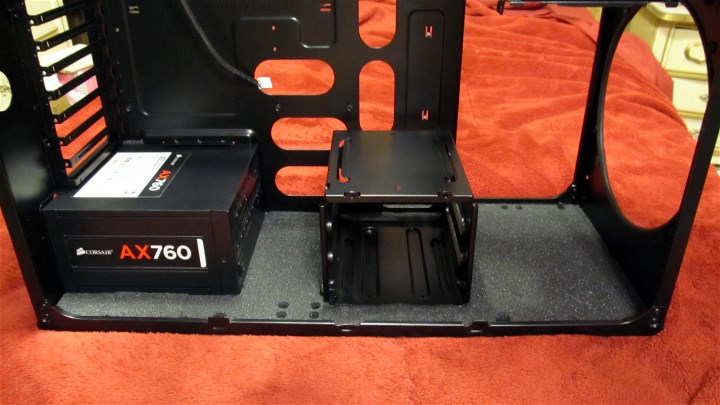
Again, it's a pretty snug fit. I have to hold my mouth just right to get it in there. The two thumbscrews that help to secure the cage are a bit closer to the foam than I like but I had no trouble getting my paw between the cage and the PSU to get at the screws. Of course, there are no cables plugged into the PSU yet. Fortunately, I have no plans to remove the cage once it's in there for keeps after I'm finished modding the case.
Here is a shot of the bottom of the case. I've got the four 3/8" plugs popped in. You can see where I had to use foam to block off part of the PSU grill to seal off what would have been a major air and dust leak. Since I took the photo, I've taken a black paint pen to the bottom of the foam that is showing through the grill to keep dust from sticking to the adhesive and for appearance sake.

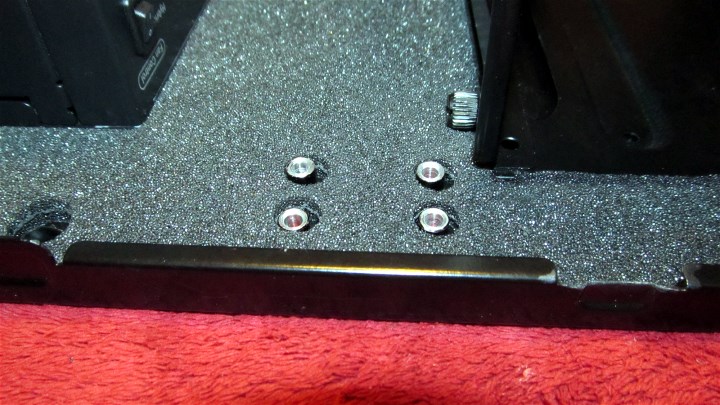
Here are the standoffs that will support the base of the fan hub for the side panel fans. If I just bolted it down directly to the foam, I never would have gotten it tight nor to stay put.
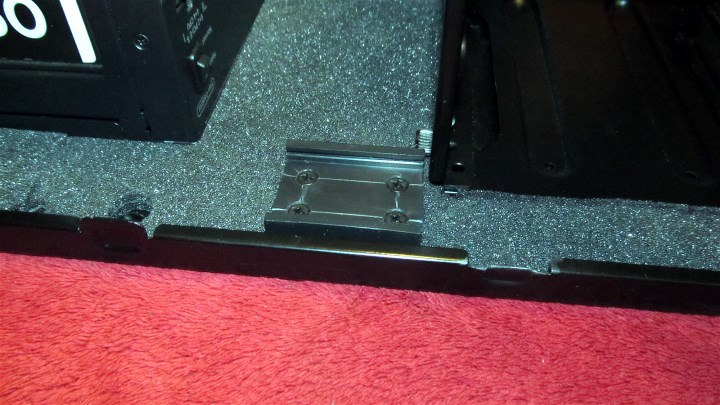
Here is the base bolted down.
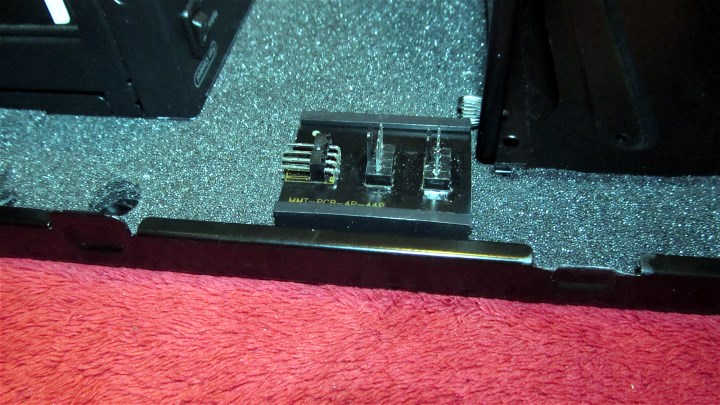
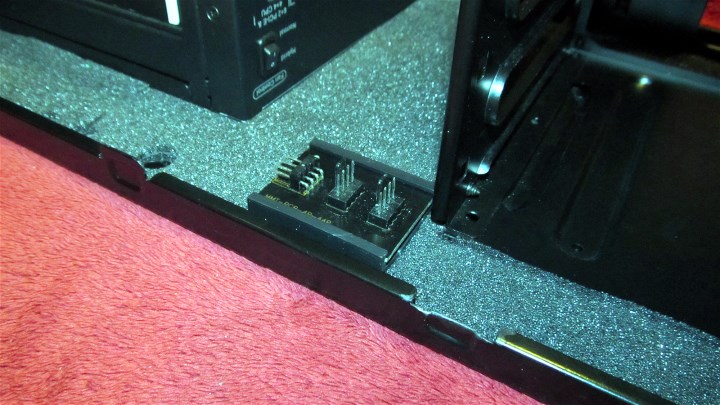
And here is the hub itself installed in the base. The two side panel fans will plug into the two top connectors on the hub. A cable will connect the horizontal connector to the bottom fan header on the MOBO.
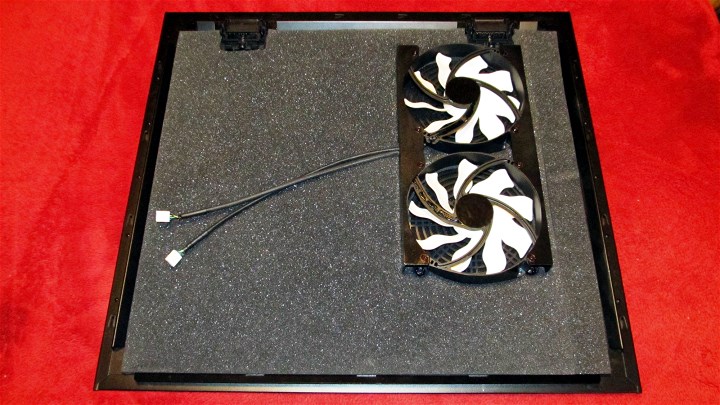
I also have some shots of the acoustic foam on the top panel but I still need to install some more up there and I suddenly started feeling tired all over (stupid old age) so I'm going to take a nap for now.Last edited by Lady Fitzgerald; 18 May 2014 at 07:13.
-
-
-
-
New #138
I attacked the front of the case this afternoon. It wasn't as bad as I was expecting. Here are a couple of shots of the front.


I did not like or trust the tool free gizmos on the 5.25" cage so I removed them. Screws are much more secure. However, the remaining brackets and extra holes looked pretty ugly so I covered both sides with acoustic foam that I punched clearance holes into for the 5.25" device mounting screws (getting those holes just right was...ah...fun). The reason there are only four holes punched into the right side of the cage is that's all there were.
I put the modified front fan in to check the fit of the foam around it. 'Tis a bit snug but better that than a bit loose. I have the fan temporarily screwed in until I can get some washers to go under the heads of the screws I'm going to use to keep them from falling through the loops of the front fan grill. That probably won't be until Monday or Tuesday.
The really tricky part was putting in the foam on the front at the top of the case. There was all kinds of "stuff" I had to play dodgem with. I had to temporarily remove that stupid switch housing again to get room to get my fingers in there. Thank God I don't have big hands!
I still have the sides of the top of the case to do and the back of the case (both are going to be a bit tricky). However, I'm just about out of acoustic foam. I have another sheet already on order and it should be in Monday or Tuesday. I should also be getting the black fan connector bodies I ordered around the same time so I can replace the ugly white ones on my 140mm fans and get those installed once I get the rest of the foam in.
-
New #139
You are going to need a little blinking yellow light on top of the computer.
Why; is what you are thinking.
This case is going to be so quiet it will be a indicator when the computer is on. This will remind you to turn the compute off when desired.
No self respecting dust bunny would dare go inside this case.
Lot of great work and ideas.
Who is you supplied of the acoustic foam?
-

 Quote
Quote


Related Discussions