Got a New Case!

Page 28 of 37 FirstFirst ... 182627282930 ... LastLast

  1. Posts : 9,600
    Win 7 Ultimate 64 bit
    Thread Starter
       #271

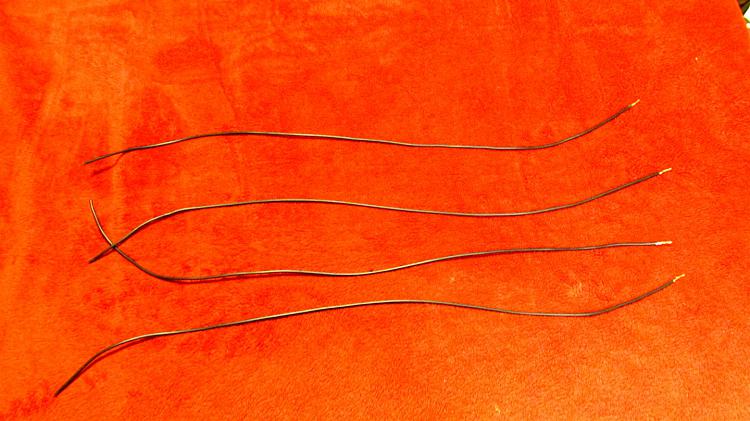
    Well, I'm back to try to corrupt more of you with an even simpler cable. This is the one to power the sound card and, except for possible the SATA data cables, should be the last of the cables.

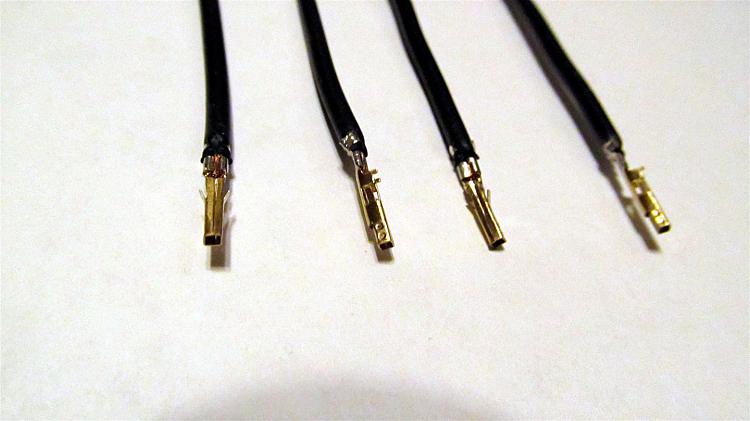
    This time, I started with crimping the pins on the PSU end of the cable. I know I'm not a great photographer but how the big fat holy hairy heck did even I get three pins fairly well focused but the fourth so way out of focus?

    Got a New Case!-img_0001.jpg

    Got a New Case!-img_0002.jpg

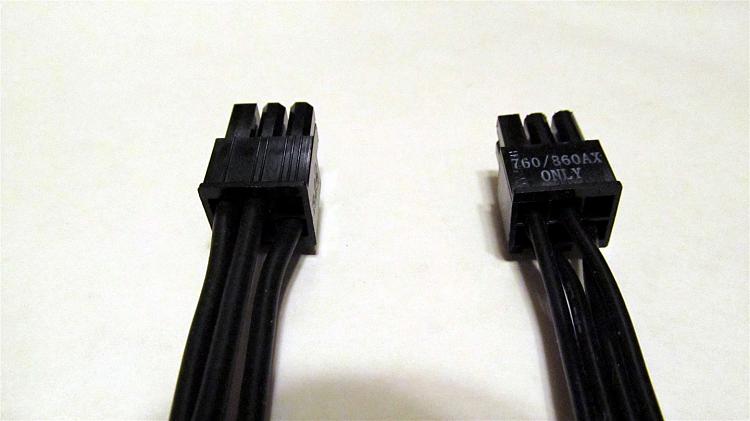
    The connector on the left is the one I just poked the pinned wires into. The one on the right is on the stock four pin Molex cable that came with the PSU.

    Got a New Case!-img_0005.jpg

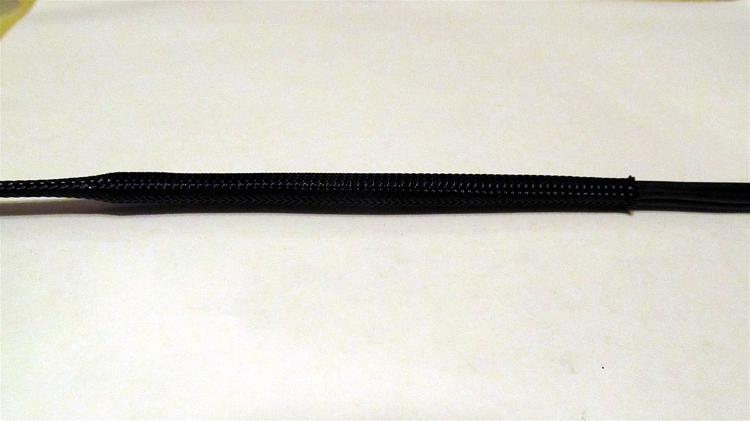
    Here, I'm starting to slip the sleeve onto the cable before putting the connector on the other end. the sleeve is a bit on the small size but I ran out of the correct size. One of the beauties of this brand of sleeving is it is so expandable.

    Got a New Case!-img_0008.jpg

    This is a closer view. Before slipping the sleeve on, I used dots of Krazyglue roughly every couple of inches to keep the wires bundled and parallel.

    Got a New Case!-img_0010.jpg

    Here is the finished cable. Kinda anticlimactic.

    Got a New Case!-img_0011.jpg

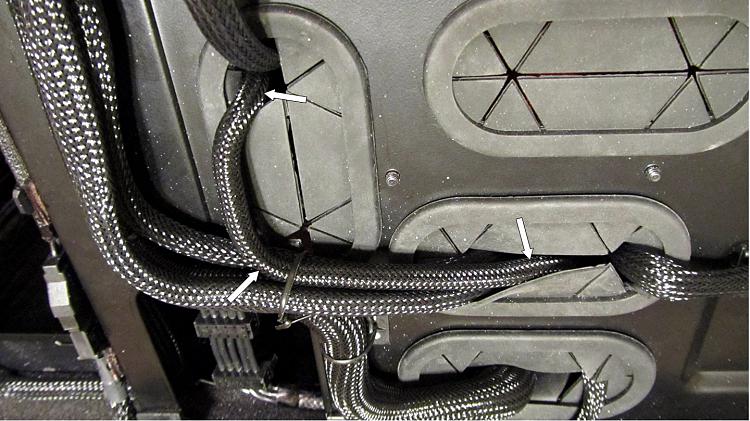
    The cable has been more or less installed in this shot inside the case. The white arrows point to the cable itself. The blue (purple, whatever) arrow points at the front panel audio connector cable. That will be tied to the sound card power cable once I get the innards of my current rig transferred to this one.

    Got a New Case!-img_0013.jpg

    And here is the cable as seen from the backside.

    Got a New Case!-img_0015.jpg

    Hopefully, this is the last cable and the last major mod. I won't be doing much more for a couple of weeks when I will have more time to do the swap.
      My Computer


  2. Posts : 24,479
    Windows 7 Ultimate X64 SP1
       #272

    Thanks Jeannie, I saw the tiny wire cut-off after I made the picture, very smart still. How in the wide world of sports do you keep the different volt wires sorted since you use black wires?

    I think I can see a complete rebuild in Jack's future.

    I've used Vise Grips of varying sizes for holding wires for soldering too, cuts way down on the burns. I have even used on pair to hold another to get the work in a better position.
      My Computer


  3. Posts : 9,600
    Win 7 Ultimate 64 bit
    Thread Starter
       #273

    Britton30 said:
    Thanks Jeannie, I saw the tiny wire cut-off after I made the picture, very smart still. How in the wide world of sports do you keep the different volt wires sorted since you use black wires?...
    It makes a difference which wire goes where? Really? Yikes!

    All seriousness aside, I tag the wires with little pieces of tape. I also use an antique Micronta Digital multimeter to check my work (hey, it still works). I have small bare wires taped to the probes so they will fit in the tiny connectors. I also use the original cables as a pattern to determine which wire goes where and to check my work.
      My Computer


  4. Posts : 9,600
    Win 7 Ultimate 64 bit
    Thread Starter
       #274

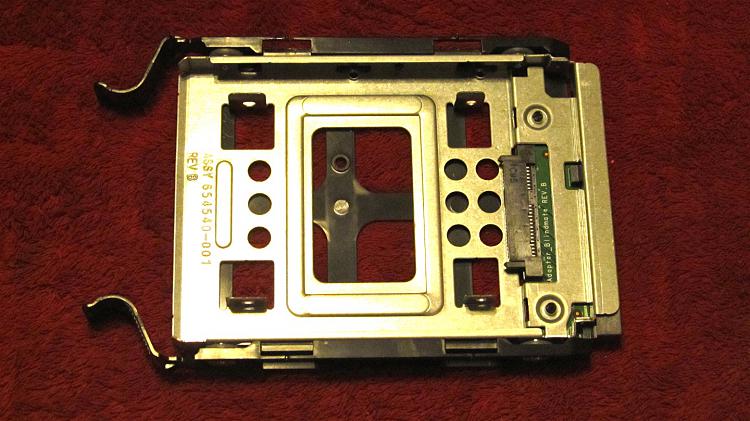
    I was browsing through Amazon the other day and found something that is the solution for a problem I've been wrestling with in the back of my mind (i.e. the third brain cell). The plastic HDD trays have a tendency to sag over time. The trays in the display model at my friendly, neighborhood Fry's have sagged at least half an inch in the center. Putting a HDD in the tray will prevent most of that sag (I'll show what will prevent the rest in a bit) because it kinda sorta bridges the width of the tray. However, a 2.5" HDD or SSD gets screwed to the bottom of the tray. Although 2.5" drives get placed where the connectors will be in the same place as the connectors of a 3.5" HDD, they don't bridge the width of the tray and it could still sag. Even a small amount of sag could allow the tray to rattle in the cage and make it harder to get the connectors align. I thought of putting a plate under a 2.5" drive to reinforce the tray but then the connectors wouldn't properly align.

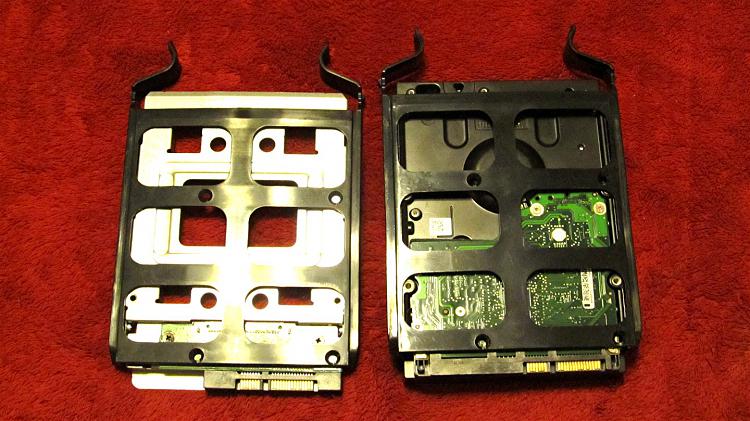
    The gizmo on the left is designed for use in drive trays, such as the one from my case on the right, to solve that very problem. you can see the holes on the bottom of the tray for mounting 2.5" drives.

    Got a New Case!-img_0001.jpg

    Got a New Case!-img_0004.jpg

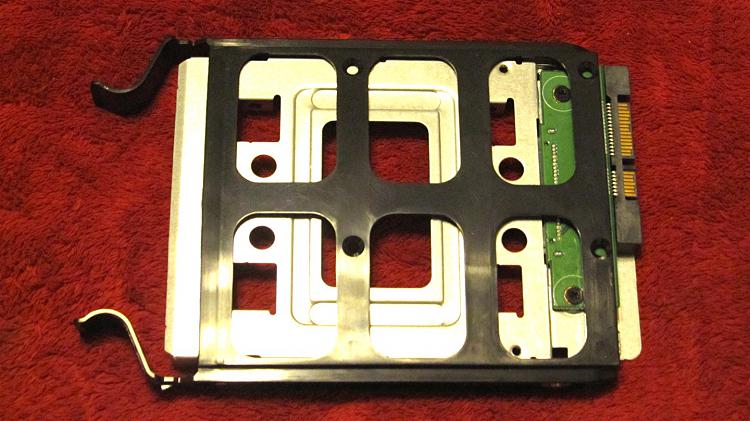
    This is what the gizmo looks like installed in the tray

    Got a New Case!-img_0006.jpg

    Got a New Case!-img_0007.jpg

    Notice in this shot that the gizmo on the left puts the connectors in the same place as the 3.5" drive in the tray on the right.

    Got a New Case!-img_0009.jpg

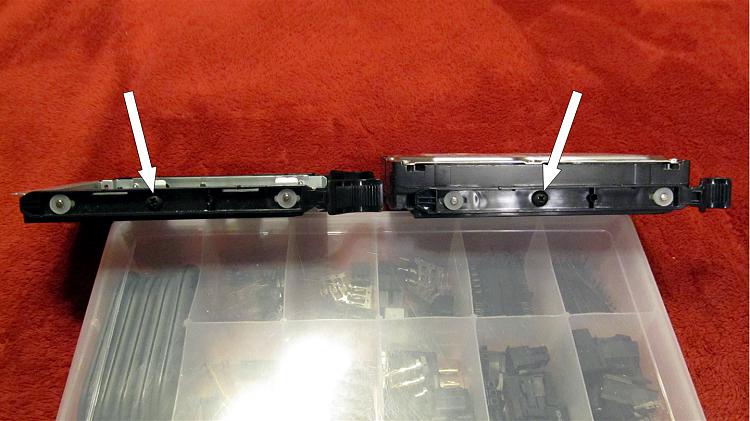
    Here is where I tell you how to get the rest of the sag out. Although the HDD trays are supposed to be tool free, I found, even after shimming the cages, the trays and drives could still rattle a bit but, if I installed 6-32 x 1/4" screws in the sides where the arrows point, all the slack was taken up and the HDDs and trays felt rock solid in the cages. Holes apparently were provided to allow screwing a screw into the middle hole on each side of the HDD. The gizmo has the exact same screw pattern on the sides and bottom of the tray part so it will install wherever a 3.5" drive will.

    Got a New Case!-img_0010.jpg

    The only downside of the gizmo is one has to remove it from the tray to be able to install a 2.5" drive in it. Methinks I can live with that. Since it came from an Amazon Marketplace vendor that apparently is a closeout buyer and reseller, the supply will probably dry up before long so I just ordered four more for future use.
    Last edited by Lady Fitzgerald; 14 Jun 2014 at 20:35.
      My Computer


  5. Posts : 9,600
    Win 7 Ultimate 64 bit
    Thread Starter
       #275

    Got the filter mesh in the PSU filter replaced.

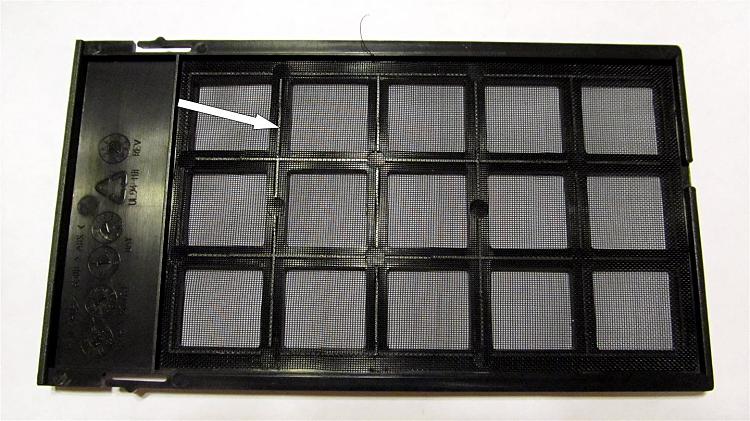
    Before.

    Got a New Case!-img_0003.jpg

    The arrow shows the narrow raised ridge that the mesh was fastened to. Apparently, "they" melted the plastic and pressed the mesh into it.

    Got a New Case!-img_0004.jpg

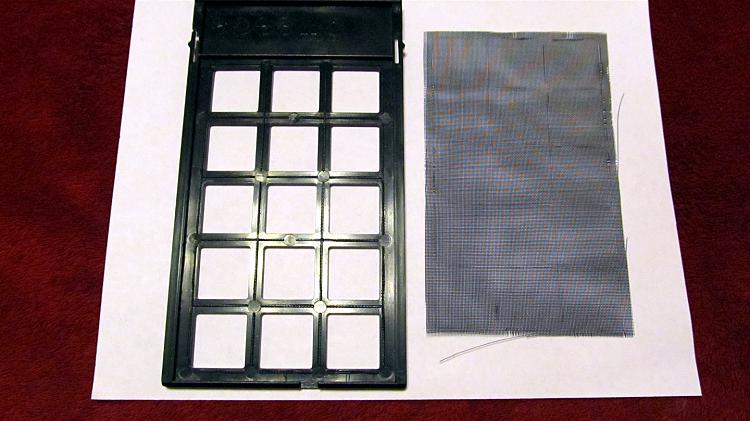
    After removing the mesh.

    Got a New Case!-img_0005.jpg

    And here we have the final results. It looks as rough as a rasp because I had the darnedest getting the glue on just the raised ridge and getting the mesh to stay down on the top of the ridge until the glue set.

    Got a New Case!-img_0007.jpg

    At least the flip side looks better. Not that it matters since it's on the bottom of the case where no one will see it. At least it will stop more dust.
      My Computer


  6. Posts : 11,424
    Windows 7 Ultimate 64
       #276

    Great updates Jeannie. Regarding the focus issue on the connectors you can just see that the third connector is just beginning to become out and the additional distance to the forth placed that one out of focus. Likely you shot at just an angle in or out of close up mode.
    Last edited by linnemeyerhere; 15 Jun 2014 at 14:33.
      My Computer


  7. Posts : 9,600
    Win 7 Ultimate 64 bit
    Thread Starter
       #277

    Thanks, Alan!

    You may be right about the angle thing, too. It's maddening (but then, I'm already mad as a hatter; I had to be to undertake this project) but not enough to lose sleep overzzzzzzzz.
      My Computer


  8. Posts : 11,424
    Windows 7 Ultimate 64
       #278

    I just love that you measure out to the closest mm all these cable paths and go to all this extra effort as it does show in the finished product. We're all loving your nuttiness.....is that even a word or just a state of mind?
      My Computer


  9. Posts : 9,600
    Win 7 Ultimate 64 bit
    Thread Starter
       #279

    What can I say? I'm OCD. And yes, nuttiness is a word and a state of mind, not to mention a flavor adjective.
      My Computer


  10. NoN
    Posts : 4,166
    Windows 7 Professional SP1 - x64 [Non-UEFI Boot]
       #280

    Nice job and efforts made on wiring and cable managements...Lady.:)

    I'm using an appropriate wire stripper for those AWG wires to cut and pull-out wrapped plastic before mounting them to the electrical terminal crimp pin.

    But as for terminal crimp i've only a simple one (flat & long nose for jewellery) to flatten the crimps. It does the job holding but not as well rounded properly to snap the wires, it just flatten them (might slip out crimp if pull off too hard out the headers).

    I saw some specially made Crimping Tool for electronics, 16 to 28AWG wires but quite expensive ones around here and the regular one i own is just too big for those little crimp pins and very unprecise.

    As for my 4 pin Molex and 3 pin headers extension & little modd, to flatten is alright but for a PSU modding i would like it more well done.

    The last one it did sleeved entirely was for a "starter" cold cathode, which came w/those ugly wire colors.

    Oh Well...might invest on a proper one 'cause you gave me the envy to redo my PSU wiring. Mine is pretty made of colored Awg wires and the braided sleeves are also quite made of differents colors.

    Very addictive...world of computing i recon!
    Attached Thumbnails Attached Thumbnails Got a New Case!-starter.jpg  
    Last edited by NoN; 15 Jun 2014 at 11:54. Reason: added pic
      My Computer


Page 28 of 37 FirstFirst ... 182627282930 ... LastLast

  Related Discussions
Our Sites
Site Links
About Us
Windows 7 Forums is an independent web site and has not been authorized, sponsored, or otherwise approved by Microsoft Corporation. "Windows 7" and related materials are trademarks of Microsoft Corp.

© Designer Media Ltd
All times are GMT -5. The time now is 13:36.
Find Us