Got a New Case!

Page 29 of 37 FirstFirst ... 192728293031 ... LastLast

  1. Posts : 9,600
    Win 7 Ultimate 64 bit
    Thread Starter
       #281

    Thanks, NoN. Expensive crimpers are nice if you do a lot of crimping. I've already done twice as much crimping as I had planned on when I started working on my first case and bought a cheap pair of crimpers like these (they were only $10 when I got them somewhere else that no longer carries them). They have built-in strippers but they were somewhat underwhelming and I got better results using a knife. If I ever loose what little sanity and remaining brain cells I have left and embark on another project like this, I will invest in a better pair of crimpers and strippers.

    That's a good looking job. A spot of solder on a crimped pin will prevent slip out (it needs to be really tiny to avoid filling the pin or leaving a glob that will keep the pin from going into the connector body). I had to do that on one of the Corsair front panel connector pins that had the wire slip out on me. I didn't have another pin like that handy so I just stuffed the conductor into the part of the crimp that was supposed to hold the insulation, held a soldering gun to the pin, and melted a tiny bit of solder to the pin and wire.
      My Computer


  2. NoN
    Posts : 4,166
    Windows 7 Professional SP1 - x64 [Non-UEFI Boot]
       #282

    Yeah, i haven't yet done much of crimping, that's why i didn't look at an expensive one. I have to see around for a cheaper one and looks the one you mention is OK. Unfortunately seems the tool is a little more priced here as for electronic devices, but i'll find one.

    I could do little soldering but i think it wasn't worth to do it for so tiny Awg wires + i know what you're talking about letting a globe around the crimp which is not very nice at looking and hardened the wires could break the crimp more easily. I'm doing soldering when i've no choice or ran out spare parts.

    It will be needed if i decide to undo the actual braided sleeves of my PSU (nearly finish with warranty, and + i'll be only modding the cables!).

    Unlike you did (but far prefer your black ones) i will keep the colored one that came with mine and put some heatshrink around each wires, near terminal before new sleeves.
      My Computer


  3. Posts : 9,600
    Win 7 Ultimate 64 bit
    Thread Starter
       #283

    NoN said:
    ...I could do little soldering but i think it wasn't worth to do it for so tiny Awg wires + i know what you're talking about letting a globe around the crimp which is not very nice at looking and hardened the wires could break the crimp more easily. I'm doing soldering when i've no choice or ran out spare parts...
    If done correctly, the solder won't show once you poke the pin into the connector body. The idea is to have the solder wick into the joint instead of surrounding it with a glob. The solder should show on the surface but you should still see the individual strands through the solder. Also, the solder will wick up into the wire under the insulation and that helps to reinforce that week point. You just don't want it to wick more than 1/8" past the start of the insulation.

    NoN said:
    ...It will be needed if i decide to undo the actual braided sleeves of my PSU (nearly finish with warranty, and + i'll be only modding the cables!)...
    Actually, it may not be needed. If you will keep the same length, you can just remove the pins from the connector body, cover them with a layer or two of making tape so they won't snag sleeving, the slip the sleeving over them and onto the cable. The sleeving I linked earlier in this thread is good at expanding and stretching. If the wires are colored, it wouldn't hurt to cover them with black electrical tape first so the color won't show through the sleeving.

    If you need to cut wires to shorten then, it's actually easier (not to mention more sanitary) to crimp on new pins than to do a splice and solder job.

    NoN said:
    ...Unlike you did (but far prefer your black ones) i will keep the colored one that came with mine and put some heatshrink around each wires, near terminal before new sleeves.
    I take a black felt pen (fine and ultrafine Sharpies) to any colored wires that show or will show.
      My Computer


  4. NoN
    Posts : 4,166
    Windows 7 Professional SP1 - x64 [Non-UEFI Boot]
       #284

    If done correctly, the solder won't show once you poke the pin into the connector body. The idea is to have the solder wick into the joint instead of surrounding it with a glob. The solder should show on the surface but you should still see the individual strands through the solder. Also, the solder will wick up into the wire under the insulation and that helps to reinforce that week point. You just don't want it to wick more than 1/8" past the start of the insulation.
    I use a liquid soldering material since a while for little electronics as it permit to go deeper and in a thin layer on parts. But it still "globe" if i heat it up too much...a question of right temp!

    As for the PSU re-sleeving, i'm not sure yet about the length to shorten but some modifications could be made for my needs. I also want to split the sleeves in two braided cables onto the same rail to make them more flat & less harder to bend (e.g: on Psu PCI-e cable, separate Yellow 12v from the Black ground), because if i do wrap them as they already are i'll have the feeling having done the same but with a different sleeved color!!!

    I think i'll still be using heatshrink at terminal, but its true that the colored wires will be slightly visible under the sleeves and it will stiff the wires if i try to double the sleeving!

    It is anyway cheaper to buy the connectors parts and the appropriate Awg wires than buying a set of new PSU cables, so if the result doesn't suits me i might do the all cut, crimp & sleeves to connectors to have a deep black color.
      My Computer


  5. Posts : 9,600
    Win 7 Ultimate 64 bit
    Thread Starter
       #285

    Liquid soldering material? I'm not familiar with that (or even heard of it, other than tinning compound). I use rosin core wire solder. I just hold the iron to the joint, touch the solder where the iron and the joint meet to help with heat transfer, then hold the solder to the side of the joint opposite the iron until the joint is hot enough to let the solder wick itself into the joint. How much solder that gets taken into the joint is determined by the size of the wire (smaller is better) and how long it is held to the joint. Once the correct amount of solder is applied Just enough to cover the strands but still leave them visible), I pull the solder wire and the iron away from the joint and let the joint cool undisturbed. The cooled solder should be bright and shiny.

    I wasn't suggesting double sleeving (other than black tape to hide color; felt pens can be used for that with less bulk). A common way to resleeve a PSU is to strip off the old sleeving and replace it with new sleeving; that was the process I was describing. Doing a really good job on cables permanently attached to the PSU would require opening up the PSU, something I normally do not recommend because the capacitors inside can hold a lethal charge for quite some time.

    Even when using a heat shrink by the connector (which is usually a good idea unless the cable has to make a sharp bend there), there will be a small bit of color showing, such as by the blue Molex connectors on the cable you pictured. If you had taken felt pens to those wires before putting on the shrink, there would be no color showing.

    Using the original cables does have the advantage of less opportunity of making any mistakes. It's easy to make a wrong connection and it only takes one to fricassee something expensive. That's why I check my work multiple times to make sure I didn't screw up anything (and I have caught mistakes more than once).
      My Computer


  6. NoN
    Posts : 4,166
    Windows 7 Professional SP1 - x64 [Non-UEFI Boot]
       #286

    Hey Lady,

    Here a picture of that "lead free pewter" in liquid state that i'm using. Its quite handy because when you do have to solder a wire, just soak in it or use a toothpick to fill the crimp/pin then heat it up with your iron.

    It does exactly the same effect as rosin core wire solder but you can have a hand free to hold well the cable to the crimp or pin.

    About sleeving the PSU main rail i will surely remove it from the connectors side then re-sleeve the same way back so i' will not touching the capacitors inside and put only a black plastic clamp to tight it on the PSU boxed side.

    For the other cables, yes, it'll be easier to just follow the schema with or without little modifications.

    You can put a heatshrink deep inside the connectors on each wires on the main sleeving and another bigger heatshrink to rub the all thing and finish the job proper. Just don't heat them too much on the first heatshrink because it might stiff the wires to bend.
    Attached Thumbnails Attached Thumbnails Got a New Case!-dscn1538.jpg   Got a New Case!-capture.png  
      My Computer


  7. Posts : 9,600
    Win 7 Ultimate 64 bit
    Thread Starter
       #287

    Hmmmm...I'll have to keep an eye out (ouch) for that stuff and check it out. I suspect it won't have the control of separate wire solder, though. It might be good for sweat soldering, though.

    I rarely have a problem with holding the wire while soldering. I just position it so it will stay put and put the tip of the iron under it so it the wire rests on it; it usually stays put without any added help.

    An alternative to using a small heat shrink sleeve to hid wire color at the end of sleeving and the larger heat shrink sleeve is to use individual sleeving like you show in the second picture and let it run directly into the connector, like this:
    Got a New Case!-silverstone-pp07-extension-para-conector-pci-e-de-8-pines-de-30-cms-sleeving-rojo-pp07-pcir.jpg

    The trick is to use a temporary shrink on the end of the sleeve and use a flame to heat it enough on the end to actually melt the end of the sleeve to the pin, the cut away the shrink afterward. What will be left is a sleeve fused to the end of the pin which can then be inserted into the connector body. I don't use it because I don't like how bulky individually sleeved wire cables look.
      My Computer


  8. Posts : 24,479
    Windows 7 Ultimate X64 SP1
       #288

    The brand name is hidden NoN.
      My Computer


  9. NoN
    Posts : 4,166
    Windows 7 Professional SP1 - x64 [Non-UEFI Boot]
       #289

    Britton30 said:
    The brand name is hidden NoN.
    That's a generic sub-branded by "Camping Gaz" corporation...not much infos apart cautions of way using it.

    @Lady, i wasn't intend to sleeve PSU Rail wires one by one, that's why i thought about small piece of heatshrink on each. But this solution can do the trick!!
      My Computer


  10. Posts : 9,600
    Win 7 Ultimate 64 bit
    Thread Starter
       #290

    I finally got a combination of reasonably cool temperatures and reasonably well behaved allergies this morning so I got up early to paint the PSU shroud I've been working on. While I was at it, I also painted the gizmo I told you all about earlier. For some reason, rattle can paint and I don't get along very well. The self etching primer I used on the aluminum of the shroud and the zinc plate of the gizmo goes on fuzzy, even if I try to put a wet coat down. I was able to wet sand the shroud after putting down some regular primer and that took care of the fuzziness. I had to take some body glaze to the some minor pits and wet sand that before putting on the color coat. In the case of the gizmo, however, it would have been a nightmare to sand the regular primer after shooting it on so I just left it that way and hit with some color.

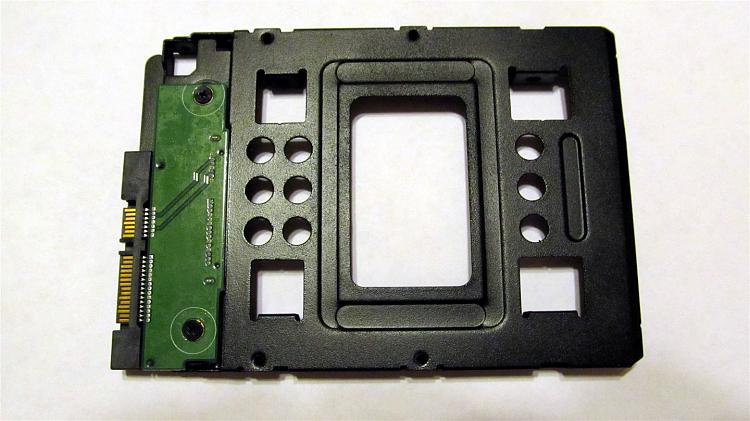
    Here is a reminder of what the gizmo looked like:

    Got a New Case!-img_0001.1.jpg

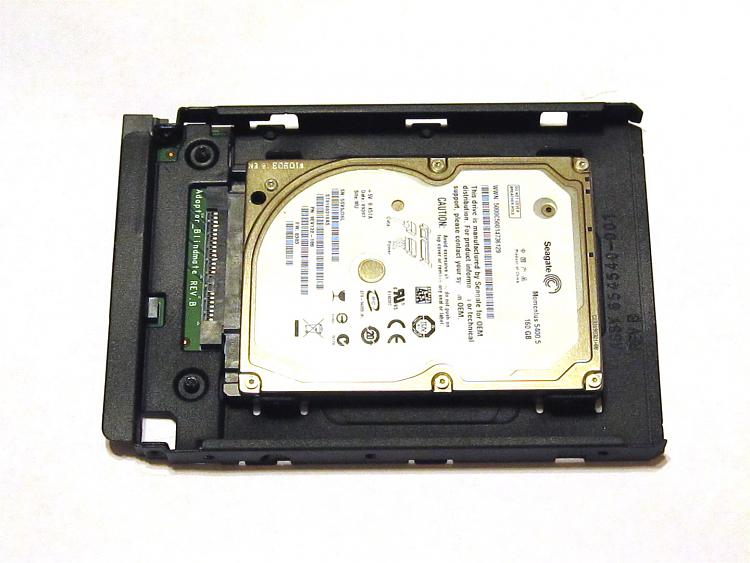
    This is what it looks like after painting and replacing the PCB and with a 2.5" HDD in it (I'll be putting the SSD in it when I do the swap).

    Got a New Case!-img_0001.jpg

    Got a New Case!-img_0003.jpg

    Got a New Case!-img_0008.jpg

    Today, I picked up the extra gizmos I ordered in case I ever use more SSDs in the case (they came from a close out type vendor so they will become unavailable before long) and the extra 140mm filters since those are also apparently going to disappear and plastic will eventually break. I'm going to need a box the size of the case to store all the spare parts.

    Later today, I'm going to put the front cover back on the case. I may need to take a rattail needle file to the bottom 5.25" bay mounting holes to slot them slightly so the drawer face will be flush with the front panel since I added that piece of aluminum to the front of the drawer. I want to wait a week or to for the paint on the PSU shroud to finish drying so I won't mess it up when I finish working on it. I want to put a custom sticker on the side. I have some magnetic tape I'm going to use to hold the shroud to the PSU but I don't want to stick anything to the paint until it is good and dry.
      My Computer


Page 29 of 37 FirstFirst ... 192728293031 ... LastLast

  Related Discussions
Our Sites
Site Links
About Us
Windows 7 Forums is an independent web site and has not been authorized, sponsored, or otherwise approved by Microsoft Corporation. "Windows 7" and related materials are trademarks of Microsoft Corp.

© Designer Media Ltd
All times are GMT -5. The time now is 15:18.
Find Us