Thank you Benjamin Hall... You Rock.
I was able to create my own theme by modifying other's existing simple theme.
To recap as a basic tutorial for future newbie who happens to fumble into my own steps.
This little instruction will guide ya to create your own little simple theme.
This tutorial to change Start Menu image background for Windows 7.
STEPS.
1) Read this thread to get familarize:
Theme - Customize custom themes
2) Download the following programs: If any link is broken, use Google to search for it.
- Restorator 2009 (This will allow you to edit windows aero.msstyles or other Windows Resources).
Here is the link:
** ILLEGAL LINK REMOVED **
- Dark7Mix Theme (Existence theme that allow you to modify or create your own) by adrianodj25.
Here is the link:
http://www.deviantart.com/download/136063382/Dark7mix_Theme_UPDATE_by_adrianodj25.rar
- Universal Theme Patcher (allow 3rd party theme to be installed on Windows)
Here is the link:
Universal Theme Patcher for Windows 7 - Universal theme patcher - Windows 7 Download
- "Takeownership.reg" (allow you to take ownership of file ... for deleting file that is accessing by Windows or some administrator).
Here is the link:
http://www.howtogeek.com/downloads/TakeOwnership.zip
- W7FBC (This allow you to change folder background image)... optional
Here is the link:
W7FBC - Download from megaupload.com - Filestube.com
- W7LBC (This allow you to change Windows 7 Logon background) ... optional
Here is the link:
Windows 7 Logon Background Changer Software Informer: version 1.3 information
- W7SBC (This allow you to change Windows 7 Start Button ... Start Menu Orb)... optional
Here is the link:
W7SBC.rar
--- AT THIS POINT, YOU MIGHT WANT TO BACKUP YOUR COMPUTER BY IMAGING IT AND CREATE A RESTORE POINT ---
3) Extract the Dark7Mix and install it. It will be under C:\Windows\Resources\Themes\Dark7Mix
3a) Extract and install Restorator 2009
4) Duplicate the Dark7Mix.msstyles and paste it on to the desktop.
5) Right hand click on the dark7mix.msstyles and open it Restorator 2009
6) Open the "Image" folder of dark7mix thru Restorator.
7) Scroll down to 872.png (don't ask me what the devil is 872.png and why not some understanable English file name). It is a way MS referring to its resources. Searching internet, you will see something like image#817 or some weird number.
8) Right-hand on the file and "Extract ..." / "Extract as" / "Extract as ..." then point and save it onto your desktop as PNG file
9) Now use your favorite paint program to import/modify/edit the 872.PNG file with any picture /color or what so ever. Just don't change the resolution of the file. And save it as same name as 872.PNG
10) With Restorator 2009 is still open, right-hand click on 872.PNG and "Assign..." / "Assign to ..." now import the new 872.PNG that you just created. This will replace the dark7mix 872.PNG with the new one.
11) Save the Dark7Mix.msstyles file ... exit Restorator.
12) Extract and run the Universal Theme Patcher (you might neet to "Run as Administrator" by right hand click on the file)... Yes, "Patch" all 3 items that are listed in the Universal Theme Patcher
13) Run the takeownership.reg (by double-click on it). If it doesn't run... then "Run as Administrator" by right-hand click on the and choose "Run as Administrator"
14) Now "Personalize" your desktop (by right hand click on your desktop)... choose any different theme other than Dark7Mix. (it will free Dark7Mix from being open)
15) Go to C:\Windows\Resources\Themes\Dark7Mix and right hand click on Dark7Mix and chose "Take Ownership" and delete the file.
16) Next copy the modified Dark7Mix from your desktop to the deleted dark7mix.msstyles
17) Now "Personalize" your desktop again with the new dark7mix.msstyles ...
18) Viola! you done
19) Now you can change your wallpaper, font color, etc thru normal windows.
--------
Remember Step 1 earlier? and those weird number for taskbar, scrollbar.... you could still use Restorator to "modify those babies enhance your theme"
")
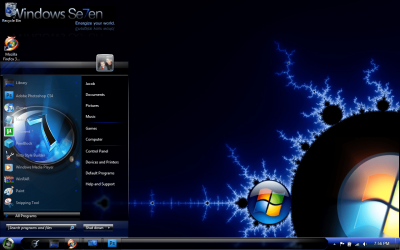
 After looking at the links (and a couple others) I finally figured out how to do it. It was my first try at it, so it doesn't look the best, but I don't think it turned out to bad..