


How to Install a Font in Windows 7 and Windows 8
InformationThis tutorial will show you how to install a font that you have downloaded in Windows 7 and Windows 8.
For a list of all default fonts that come supplied with Windows 7, see: Fonts supplied with Windows 7
For a list of all default fonts that come supplied with Windows 8, see: Fonts supplied with Windows 8
NoteWindows comes with TrueType fonts and OpenType fonts. They work with a variety of computers, printers, and programs.
- TrueType fonts (.ttf/.ttc) can be scaled to any size and are clear and readable in all sizes. They can be sent to any printer or other output device supported by Windows.
- OpenType fonts (.otf) are related to TrueType fonts, but typically incorporate a greater extension of the basic character set, such as small capitalization, old-style numerals, and more detailed shapes, such as glyph and ligatures. OpenType fonts are also clear and readable in all sizes and can be sent to any printer or other output device supported by Windows.
- PostScript fonts are fonts created by Adobe Systems that are smooth, detailed, and of high quality. They are often used for printing, especially professional-quality printing, such as books or magazines.
TipIf you need a default Windows font, then please just post a request for it here, and I'll be happy to post a clean copy of it for you. :)
WarningIf you install a TrueType font with exactly the same name as a PostScript font on the same computer, Windows won't know which one to access, which could result in a font type being altered. To avoid this, don't install different types of fonts with the same name.
Here's How:
1. Download the font that you want to install.That's it,
NOTE: You can download fonts from a software program, the Internet, or your organization's network. You can get free fonts from the links at Microsoft Typography - Font foundries.
WARNING: Before you download a font, make sure you trust the source.
2. Unblock the font.
3. Do step 4, 5, or 6 below for how you would like to install the font.
4. Install Font Option One
A) Right click or press and hold on the downloaded font, click/tap on Install, and go to step 7 below.5. Install Font Option Two
A) Double click/tap on the downloaded font, click/tap on the Install button, and go to step 7 below. (See screeenshot below)6. Install Font Option Three
A) Drag and drop the downloaded font into the Fonts Control Panel page location, and go to step 7 below. (See screenshot below)7. You can verify that the font is installed by seeing if it is listed in the Fonts Control Panel page.
NOTE: You can either navigate to C:\Windows\Fonts in Windows Explorer or open the Control Panel (icons view) and click/tap on the Fonts icon to open the Fonts Control Panel page.
NOTE: You can either navigate to C:\Windows\Fonts in Windows Explorer or open the Control Panel (icons view) and click on the Fonts icon to open the Fonts Control Panel page.
Shawn
Fonts - Install
-
New #1
It looks pretty easy to install a font in Windows 7. Thanks for the tutorial Shawn!
-
-
New #3
For some reason, after installing the fonts that I have. It does not show the Fonts Control Panel page...
Anyone else having this problem?
-
-
New #5
Hi Brink,
Was looking at your reply from my laptop which i installed Win7 and saw that I had more fonts displaying on my laptop than on my desktop pc - which only shows 9 fonts installed. But when you click and drag new fonts on my desktop setup is says that its already there and do you want to replace it. But it never shows. Looks like something has gone weird with my Win7 install and most of the default fonts are not displaying CRAP!
CRAP!
-
New #6
SnapCount,
Double check to see if the fonts were set to hide by chance.
Fonts - Show and Hide
-
New #7
Seems I have the same prob. in x64. Checked in x86 and all is well. Thought it might be caused by font nav. which I've used to keep track of fonts for years. It's not installed on 7 x86.


Gary
-
Posts : 2,899 Windows 7 Ult x64(x2), HomePrem x32(x4), Server 08 (+VM), 08 R2 (VM) , SuSe 11.2 (VM), XP 32 (VM)
-
New #9
Hi DA.
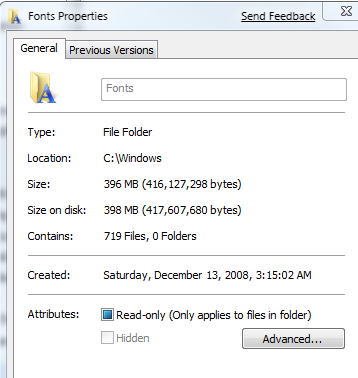
I did enable show all in the font settings and I have show hidden files and folders checked in explorer. In 7 32bit I have lots of fonts on the list. In 64 bit only those few. As you can see from font navigator, there are 504 fonts installed. In font folder properties there are 719 files.


 Quote
Quote


Related Discussions