InformationI know that it is not a part of usual personalization, still I am making this tutorial ... who knows , one day it may be helpful to someone
WHAT DO YOU NEED :
1. An image manipulating tool, say Photoshop (I used it in the making ot the tuto)
2. Resource Hacker ( get it on Download Resource Hacker 3.4.0 - A freeware utility to view, modify, add, delete and extract resources in 32bit Windows executables. )
3. System File Replacer or even you can do it manually .
WarningFirst of all , go to C:\Windows\Branding\ShellBrd and have a manual copy of shellbrd.dll ; so that you can restore it in future .
The actual tutorial is divided into two parts :
Part : I - Drawing the Logo
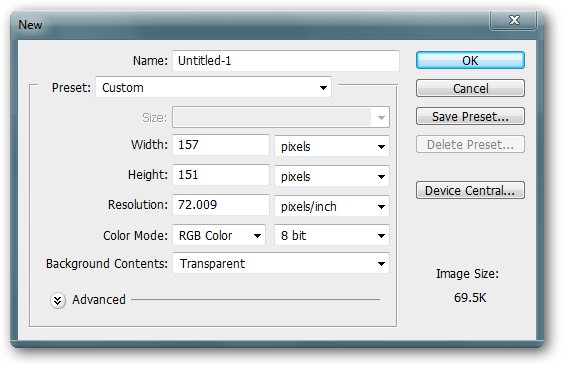
1. Start Photoshop ... open a new document with 157x151 pixels , let the background be transparent at the start .
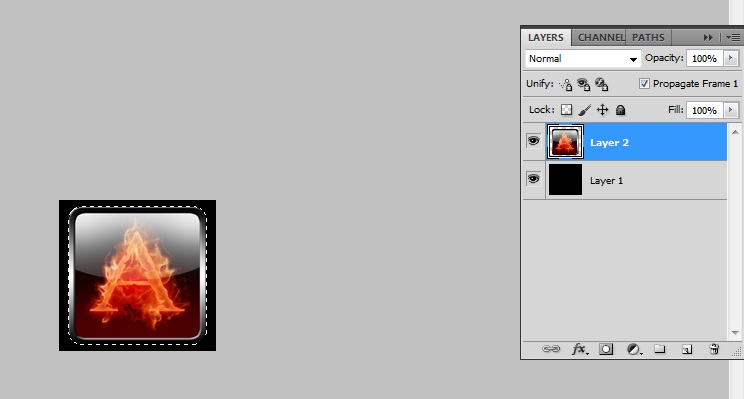
2. Now fill the document with black , place your desired image on it ( You may resize it to fit in the place (Edit>Free Transform ; Hold shift and drag mouse ) . When done , Hold control and click on the logo layer to select the logo (layer 2 in example) .
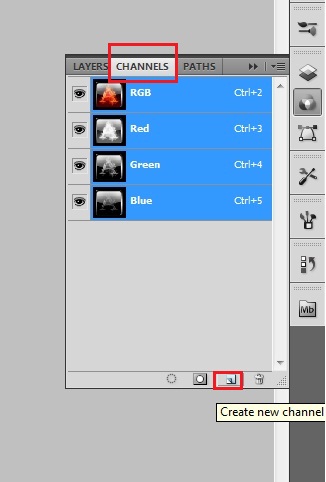
3. Now click on Channels pallet , four are already there ... RGB , red , green and blue . Click at the new channel button at the bottom of the pallet ; it will add a new channel Alpha1 , and at the same time will make the other channels invisible
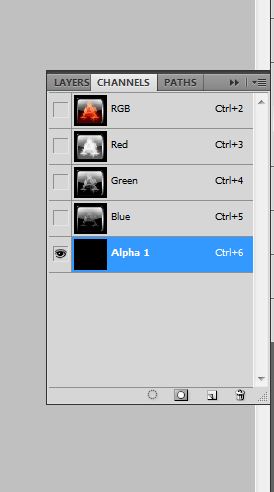
4. Now , with the channles pallet selected , pot the rounded brush tool (size say 100 pixels) , make it sure that the foreground color is white and background color is black , and fill the selected (previously, instep 2) part with white. So now your channels pallet looks like the shot below
5. Now click on the vacant box in front of RGB channel to make the other four layers visible again , Get back to layers pallet and flatten the image . Save it as 32 bit BMP file on Desktop , and the first part is done .
Part : II - Modifying and Replacing
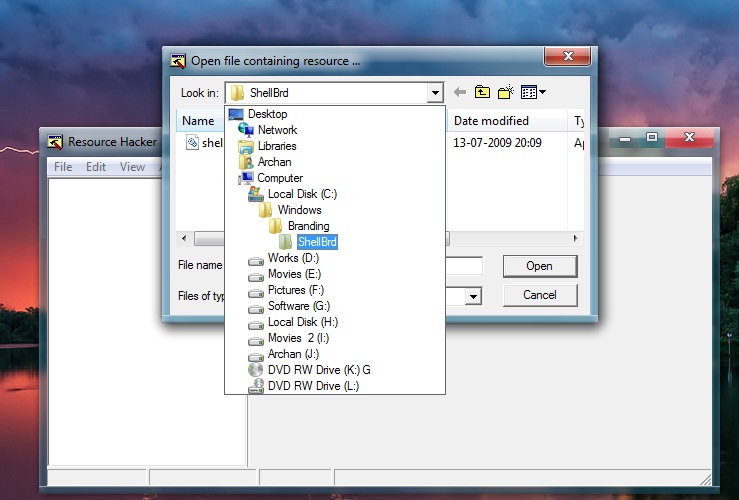
6. Start Resource Hacker .... go to C:\Windows\Branding\ShellBrd , and open shellbrd.dll with it .
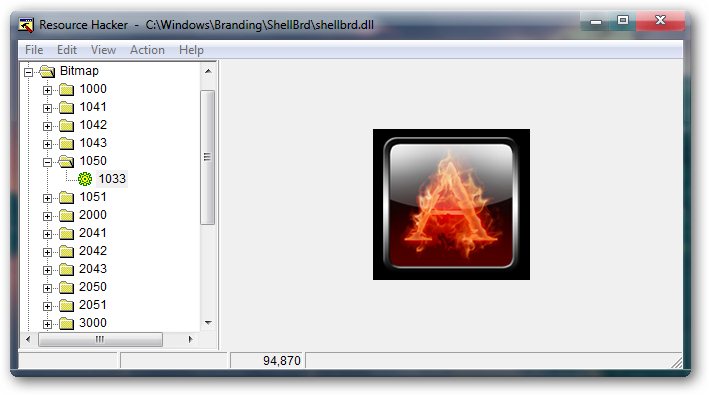
7. Expand Bitmap > 1050 > 1033 ; Cilck on Action > Replace Bitmap , and replace the existing with the just made one .
NOTE: (for 125% resolution it will be 2050>1033 and for 150% it will be 3050>1033)
8. Save the result as shellbrd.dll on desktop .
9. Open System File Replacer, and replace the original dll with the modded one ( you may do it manually too , and you are to take ownership if the file which is shought to be replaced for this purpose ).
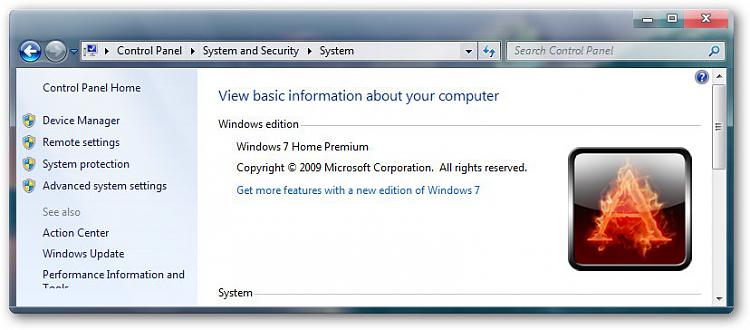
10. Restart your computer , and you are done . This is the result belowthat I got .
System Logo : How to Change
-
-
-
-
New #4
Hello Archan.
I have no knowledge of how to use PS and do not possess the software; if you have the time would you please make this usable for me and I will be eternally grateful?
Thank you very much! :)
BareFoot Poster.zip
-
New #5
BareFootKid: just create the same size and type (bmp i think he said) file that he created in photoshop using any image editor and you should be fine. You dont need to worry about all of the layers and special editing he did in PS. He just made his look really nice.
-
-
-
New #8
Thanks Arc. My friend just asked about it. I'll let him know. And needless to say, useful for me too..
-

System Logo : How to Change
How to Change the Windows Logo on the System Properties PagePublished by Arc
Related Discussions




 Quote
Quote
