How to Install Windows 7 to a Partition Ahead of Installed VistaThis shows how to create a partition so that Windows 7 can be installed to the first position on the Hard Disk Drive / Solid State Drive ahead of an existing installation of Windows Vista so the older Operating System can be removed at a later time.
There must be at least one (1) Primary partition available for creation / use as Windows will not boot independently from an Extended partition / Logical drive.Information
Partition Wizard is a very reliable tool for your tool kit and it is a free download for home / personal use, it can be found at the link below, download the ISO file to your desktop then burn the image file to a CD, Windows 7 now has native support for ISO / IMG files.
As it was designed for use from a CD it will be best to burn it to a CD and not a DVD.
Partition Wizard Free Bootable CDWarning
As with anything that makes changes to the Windows structure there is always the chance for an error to occur, it would be advisable to make reliable backups to the media of your choice of any important data, i.e. pictures, music or documents, that you would not want to lose before you make any changes to your system, it is always better to be safe than sorry.
Do not attempt to shrink an existing Windows OS partition to a size smaller than the space it currently, actually takes up on the Hard Disk Drive (HDD), doing so may result in the complete loss of Windows and all of its contents. The actual current size can be viewed by clicking the "Computer" button in the Windows start menu before you start this process.
If you would like to explore the option of creating the new Windows 7 "System Reserved" partition during this process, have a look at this tutorial for an outline of the best way to go about it.
System Reserved : Create for Dual Boot
Let's get started!
I'm going to use the Partition Wizard bootable disk (PWBD) to shrink / resize the existing Windows partition to create free space to the left of Vista so Windows 7 can be installed to that created space.
Step One: Shrink the Vista Partition
Insert the PWBD into the Optical Disk Drive and restart the PC so the BIOS can be set for the ODD to be the first boot device when the PWDB starts it does not require any input from you to start, just relax and let it start-up.
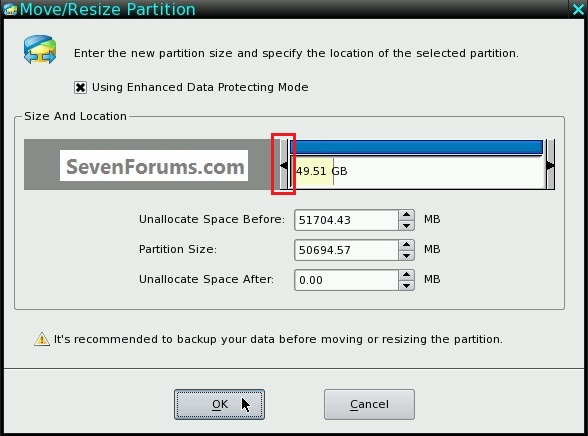
1) In the Partition Wizard program, right click the OS partition you want to shrink and click Move/Resize, in the dialog box that opens click and hold to drag the left slider to select the size you want to shrink the partition and click OK.
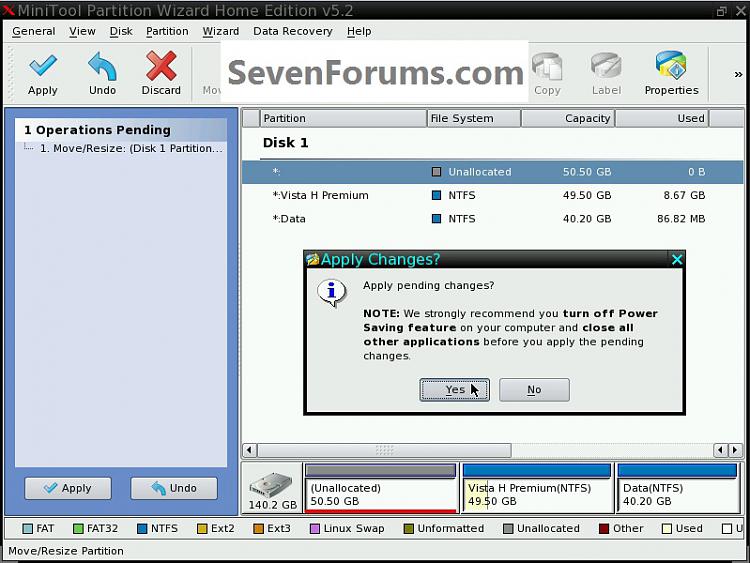
2) Then in the left pane Operations Pending column click Apply then Yes for the conformation dialog box.
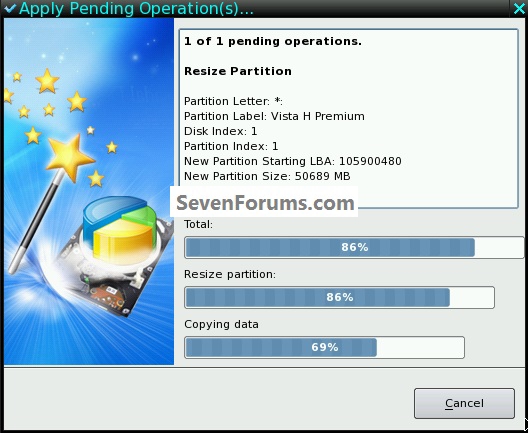
3) There will be a Pending graph so you can watch the progress, just relax and let it work as it may take quite some time to complete depending on the size and the contents of the partition; when it finishes click OK for the Successful box.
That's it, you're now finished with the Partition Wizard program, remove the PWBD from the ODD, then in the upper left corner at General click exit to close the program and restart Windows Vista.
When Vista starts-up it will "discover new devices" and will require a system restart that must be done to complete the process, it would even be a good idea to do several restarts and look around to make sure everything is in order before you continue on to the next step of this process.
Step Two: Create the New Partition
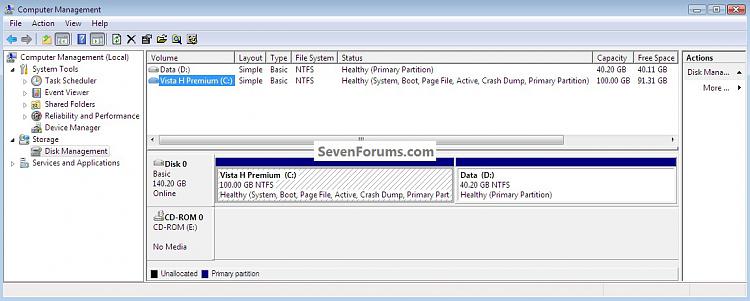
In the Windows Vista start menu Start Search box type diskmgmt.msc right click the entry and click "Run as Administrator" if you get a User Account Control (UAC) prompt enter your user credentials and click Yes.
1) In the disk management window right click the newly created unallocated space and click New Simple Volume then Next for the first "Wizard" dialog box.
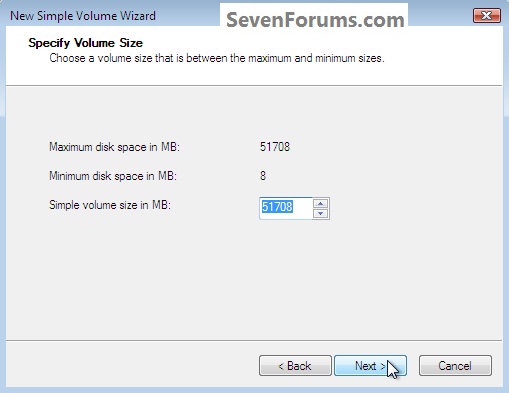
2) In the "Specify Volume Size" box click Next to accept the offered size.
3) In the "Assign Drive Letter" box click Next to accept the offered partition letter.
4) In the "Format" box at the "Volume Label" line type Windows 7 or any name you like and do not put a check/tic at the "quick" box and click Next.
5) At the last "Completing, Wizard" dialog box click Finish to complete the process and the new partition will then be created and formatted.
It would be a good idea to restart Vista a couple times to make sure all is well and in good working order before you continue on with the installation of Windows 7.
Step Three: Install Windows 7
1) The first thing that needs done is to mark the "Windows 7" partition as "Active" so Windows will create the system volume where the system boot files are stored, to the created "Windows 7" partition, so that doesn't have to be done later if a need arises to remove Vista; in Windows Vista disk management right click the "Windows 7" partition and click "Mark as Active" then Yes for the conformation dialog box, the third snip is what you will then have.
2) Now insert the Windows installation media into the Optical Disk Drive and restart the PC to set the first boot device as the ODD in the BIOS and install Windows 7 to the created "Windows 7" partition.
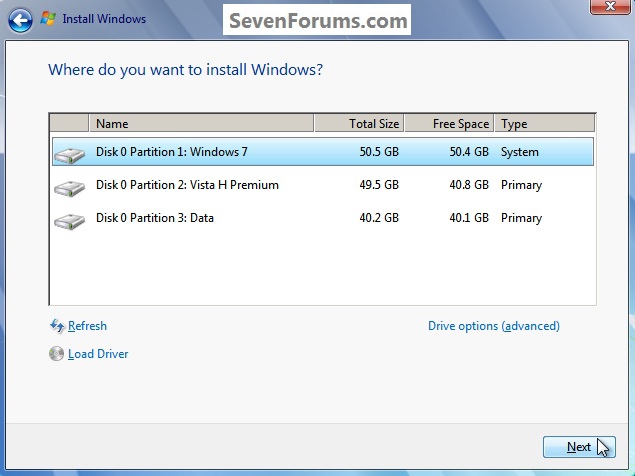
You will want to do a clean install choosing the "Custom (advanced)" not the "Upgrade" option, when you are presented with this "Where do you want ... " dialog box click to choose the created "Windows 7" partition and click next; do not use the installer to format anything.
3) Here's the end result, that's all there is to it!
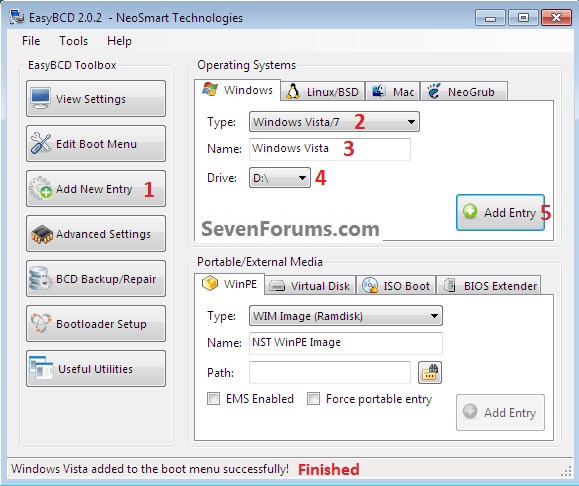
4) There's one last step if you want to get back to Windows Vista, you will need to use EasyBCD from within Windows 7 to add an entry for Vista to the Windows boot (dual boot) menu but that's the easiest part of this process.
5) If you want to remove Vista, I would suggest using Partition Wizard to do a partition specific wipe (secure erase) to the Vista partition, this will leave the partition intact so it can then be recreated and reformatted for future use; have a look at Option Three of this tutorial for an outline of the process.
Partition Wizard : Use the Bootable CD
Enjoy :)
Related Tutorials
- Clean Install Windows 7 : Ahead of XP
- System Reserved : Create Using Disk Management
- System Reserved : Create for Dual Boot
- System Reserved : Multi Boot from Logical Partitions
- DISKPART : At PC Startup
- SSD / HDD : Optimize for Windows Reinstallation
- Partition Wizard : Use the Bootable CD
- Dual Boot Installation with Windows 7 and Vista
- Dual Boot Installation with Windows 7 and XP
- Partition : Recover Space Used by an Older OS
- Repair Install
- System Repair Disc - Create
- Safe Mode
- https://www.sevenforums.com/tutorials...ndows-7-a.html
- How to Do a Clean Install of Windows 7 from the Windows 7 Desktop
- How to Do a Clean Install of Windows 7 from the Windows XP Desktop
Clean Install Windows 7 : Ahead of Vista

Clean Install Windows 7 : Ahead of Vista
How to Install Windows 7 to a Partition Ahead of Installed VistaPublished by Bare Foot Kid
Related Discussions











 Quote
Quote