Microsoft has created a toolset called the Windows Performance Toolkit, or WPT, to help developers and users visualize and troubleshoot performance issues. One of the tools in this toolset is specifically designed to assist with capturing traces of boot, shutdown, or reboot cycles, and can provide insight into drivers, services, winlogon, explorer, disk and CPU utilization, and even help with seeing things like disk fragmentation and driver load order.
Installing the tools
Before gathering any data, you will first need to download the installation packages necessary to install the Windows Performance Toolkit on your Windows 7 machine. The Windows Performance Toolkit is a part of the Windows 7 SDK, but you won’t need to install the entire SDK to get the WPT installation files if you follow this guide. First, you need to download the Windows 7 SDK, which is a 500K web installer (click the “Install Now” link). Once you start the installation, you only need to check the “Windows Performance Toolkit” checkbox under the “Redistributable Packages” section – uncheck EVERYTHING else:

After you click next, it will download (only) the installation .MSI packages needed to actually install the WPT. Once the download of the files is complete and you exit the SDK installer, you will need to actually install the version of the WPT that matches the architecture of your OS (the x86 MSI on a 32bit Windows 7 machine, the x64 MSI on a 64bit Windows 7 machine). The downloaded .MSI files will be located (by default) in C:\Program Files\Microsoft SDKs\Windows\v7.1\Redist\Windows Performance Toolkit:

Install the correct installation file that matches the architecture (32bit or 64bit) of your Windows 7 install, taking all the default options and performing a “Complete” installation.
Disable the Paging of the Kernel Executive on x64 Windows
If you have a 64bit installation of Windows, you will need to modify the registry to enable full tracing to work properly. To do this, you will need to open an ELEVATED CMD PROMPT, then type "regedit.exe" from within that command prompt (minus the quotes of course). Once regedit is open, browse to HKEY_LOCAL_MACHINE\System\CurrentControlSet\Control\Session Manager\Memory Management, double-click the "DisablePagingExecutive" value, and change it from "0" to "1". Click "OK" to save the value:

At this point, you *must* reboot for this change to take effect before you start ANY tracing.
Once you've done the above steps, but before you continue, you will need to open an ELEVATED CMD PROMPT to execute any of the trace options described in this guide. Once you've decided which type of trace to take (or which you've been asked to take by a member of this forum), choose the correct trace section below and follow that section only:
Creating a BOOT trace:
First, you will need have that elevated CMD prompt open. Second, to generate a boot trace, you will need to type the following command into the CMD prompt, and press the ENTER key to execute it – note that this command is ALL ONE LINE:
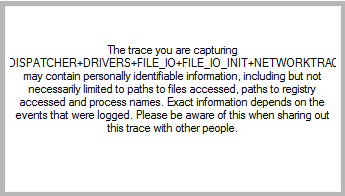
This command will cause your machine to shut down and reboot automatically. Once the system restarts, please log back in (as necessary) as soon as possible to minimize the size of the resulting trace file. Once logged in, the system will present a dialog box letting you know that it is waiting 120 seconds (it will count down) before finishing the trace. DO NOT use your computer to do anything during this time – let the countdown finish and trace files generate:


Once the trace is complete, you will find a large .ETL file and a log file in C:\Boot_Trace. This .ETL file can then be compressed (using 7zip, winrar, winzip, etc.) and uploaded for analysis - however, due to its size, you will need to upload it to a third-party site such as MediaFire,MegaUpload or RapidShare.
Creating a Shutdown trace:
First, you will need have that elevated CMD prompt open. Second, to generate a boot trace, you will need to type the following command into the CMD prompt, and press the ENTER key to execute it – note that this command is ALL ONE LINE:
This command will cause your machine to shut down and reboot automatically. Once the system restarts, please log back in (as necessary) as soon as possible. Once logged in, the system will present a dialog box letting you know that it is waiting 120 seconds (it will count down) before rebooting your machine A SECOND TIME. DO NOT click the countdown dialog, or in any other way utilize your computer to do anything during this time – let the countdown finish and the system restart:

Again, once the system restarts a second time, please log back in (as necessary) as soon as possible. This time, the trace will finalize:
Once the trace is complete, you will find a large .ETL file and a log file in C:\Shutdown_Trace. This .ETL file can then be compressed (using 7zip, winrar, winzip, etc.) and uploaded for analysis - however, due to its size, you will need to upload it to a third-party site such as MediaFire,MegaUpload or RapidShare.
Creating a REBOOT trace:
First, you will need have that elevated CMD prompt open. Second, to generate a boot trace, you will need to type the following command into the CMD prompt, and press the ENTER key to execute it – note that this command is ALL ONE LINE:
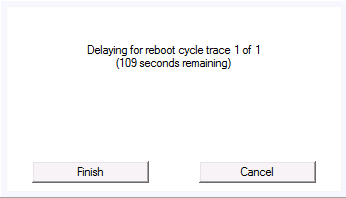
This command will cause your machine to shut down and reboot automatically. Once the system restarts, please log back in (as necessary) as soon as possible. Once logged in, the system will present a dialog box letting you know that it is waiting 120 seconds (it will count down) before rebooting your machine A SECOND TIME. DO NOT click the countdown dialog, or in any other way utilize your computer to do anything during this time – let the countdown finish and the system restart:

Again, once the system restarts a second time, please log back in (as necessary) as soon as possible. This will start another 120 second countdown, and reboot your machine A THIRD TIME. As before, DO NOT utilize your computer during this time – let the countdown finish (again) and the system restart (again):

Once the system restarts a third time, please log back in (as necessary) as soon as possible. This time, the trace will finalize:
Once the trace is complete, you will find a large .ETL file and a log file in C:\Reboot_Trace. This .ETL file can then be compressed (using 7zip, winrar, winzip, etc.) and uploaded for analysis - however, due to its size, you will need to upload it to a third-party site such as MediaFire,MegaUpload or RapidShare.
Installing the tools
Before gathering any data, you will first need to download the installation packages necessary to install the Windows Performance Toolkit on your Windows 7 machine. The Windows Performance Toolkit is a part of the Windows 7 SDK, but you won’t need to install the entire SDK to get the WPT installation files if you follow this guide. First, you need to download the Windows 7 SDK, which is a 500K web installer (click the “Install Now” link). Once you start the installation, you only need to check the “Windows Performance Toolkit” checkbox under the “Redistributable Packages” section – uncheck EVERYTHING else:
After you click next, it will download (only) the installation .MSI packages needed to actually install the WPT. Once the download of the files is complete and you exit the SDK installer, you will need to actually install the version of the WPT that matches the architecture of your OS (the x86 MSI on a 32bit Windows 7 machine, the x64 MSI on a 64bit Windows 7 machine). The downloaded .MSI files will be located (by default) in C:\Program Files\Microsoft SDKs\Windows\v7.1\Redist\Windows Performance Toolkit:
Install the correct installation file that matches the architecture (32bit or 64bit) of your Windows 7 install, taking all the default options and performing a “Complete” installation.
Disable the Paging of the Kernel Executive on x64 Windows
If you have a 64bit installation of Windows, you will need to modify the registry to enable full tracing to work properly. To do this, you will need to open an ELEVATED CMD PROMPT, then type "regedit.exe" from within that command prompt (minus the quotes of course). Once regedit is open, browse to HKEY_LOCAL_MACHINE\System\CurrentControlSet\Control\Session Manager\Memory Management, double-click the "DisablePagingExecutive" value, and change it from "0" to "1". Click "OK" to save the value:
At this point, you *must* reboot for this change to take effect before you start ANY tracing.
Once you've done the above steps, but before you continue, you will need to open an ELEVATED CMD PROMPT to execute any of the trace options described in this guide. Once you've decided which type of trace to take (or which you've been asked to take by a member of this forum), choose the correct trace section below and follow that section only:
Creating a BOOT trace:
First, you will need have that elevated CMD prompt open. Second, to generate a boot trace, you will need to type the following command into the CMD prompt, and press the ENTER key to execute it – note that this command is ALL ONE LINE:
Code:
xbootmgr –trace boot -traceFlags LATENCY+DISPATCHER+DISK_IO_INIT+NETWORKTRACE+MEMINFO+POWER+PERF_COUNTER+PRIORITY+REGISTRY+FILE_IO+FILE_IO_INIT -postBootDelay 300 -stackWalk Profile+ProcessCreate+CSwitch+ReadyThread+Mark+ThreadCreate+DiskReadInit+DiskWriteInit+DiskFlushInit+RegSetValue+RegCreateKey+RegSetInformation -resultPath C:\Boot_TraceOnce the trace is complete, you will find a large .ETL file and a log file in C:\Boot_Trace. This .ETL file can then be compressed (using 7zip, winrar, winzip, etc.) and uploaded for analysis - however, due to its size, you will need to upload it to a third-party site such as MediaFire,
Creating a Shutdown trace:
First, you will need have that elevated CMD prompt open. Second, to generate a boot trace, you will need to type the following command into the CMD prompt, and press the ENTER key to execute it – note that this command is ALL ONE LINE:
Code:
xbootmgr –trace shutdown -traceFlags BASE+LATENCY+DISK_IO_INIT+DISPATCHER+DRIVERS+FILE_IO+FILE_IO_INIT+NETWORKTRACE+PERF_COUNTER+POWER+PRIORITY+REGISTRY -resultPath C:\Shutdown_TraceAgain, once the system restarts a second time, please log back in (as necessary) as soon as possible. This time, the trace will finalize:
Once the trace is complete, you will find a large .ETL file and a log file in C:\Shutdown_Trace. This .ETL file can then be compressed (using 7zip, winrar, winzip, etc.) and uploaded for analysis - however, due to its size, you will need to upload it to a third-party site such as MediaFire,
Creating a REBOOT trace:
First, you will need have that elevated CMD prompt open. Second, to generate a boot trace, you will need to type the following command into the CMD prompt, and press the ENTER key to execute it – note that this command is ALL ONE LINE:
Code:
xbootmgr –trace rebootCycle -traceFlags BASE+LATENCY+DISK_IO_INIT+DISPATCHER+DRIVERS+FILE_IO+FILE_IO_INIT+NETWORKTRACE+PERF_COUNTER+POWER+PRIORITY+REGISTRY -resultPath C:\Reboot_TraceAgain, once the system restarts a second time, please log back in (as necessary) as soon as possible. This will start another 120 second countdown, and reboot your machine A THIRD TIME. As before, DO NOT utilize your computer during this time – let the countdown finish (again) and the system restart (again):
Once the system restarts a third time, please log back in (as necessary) as soon as possible. This time, the trace will finalize:
Once the trace is complete, you will find a large .ETL file and a log file in C:\Reboot_Trace. This .ETL file can then be compressed (using 7zip, winrar, winzip, etc.) and uploaded for analysis - however, due to its size, you will need to upload it to a third-party site such as MediaFire,
Attachments

Last edited by a moderator:

