How to Create a VHD of a Physical Hard Disk in Windows 7
InformationThis will show you how to create a VHD (Virtual Hard Disk) file of a physical hard disk(s) of your choice in Windows 7 to be able to attach (mount) the VHD as a drive, or run the VHD in a virtual machine with the free Windows Virtual PC, VMware Player, VirtualBox, or any other virtual machine program of your choice.
You must be logged in as an administrator to be able to do the steps in this tutorial.
WarningYou will not be able to create a VHD of a hard disk that has been encrypted with BitLocker.
You will have to either suspend or turn off (Windows 7 HDD or internal HDD) BitLocker for the hard disk that you want to create a VHD file of before you will be able to. If you do not, then the program will lock up your system completely after a while of trying to create the VHD.
Here's How:
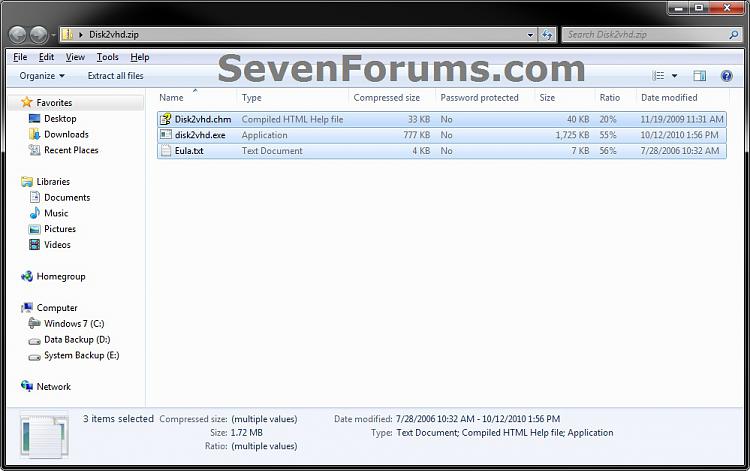
1. If you have not already, download the free Disk2vhd program. Open the downloaded ZIP file, extract (drag and drop) all contents (3 files) together into a same folder on your desktop. (see screenshot below)
2. Run the disk2vhd.exe file.
NOTE: This is a standalone exe file that will only run the program, and not install anything to your computer.
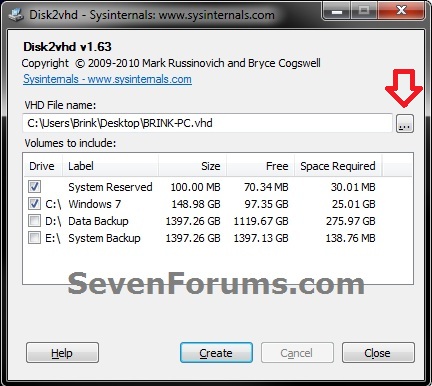
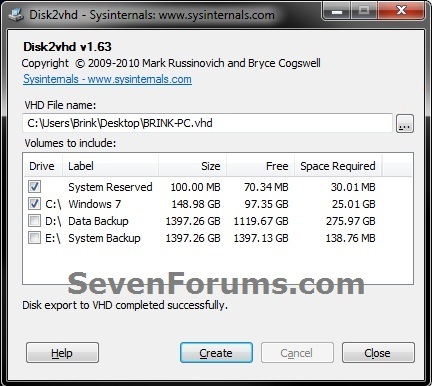
3. Check the boxes of the volumes/partitions (drives) the you want to create a VHD of. (see screenshot below)
NoteDisk2vhd will ony create one VHD for each separate disk on which selected volumes/partitions reside on.
For example, my C:\ Windows 7 drive (partition) and System Reserved (partition) are both on the same physical Disk 2 as seen in Disk Management (diskmgmt.msc). I will only have one VHD file created for these two. I would get separate VHD file(s) created if I were to also select my D:\ Data Backup and/or E:\ System Backup drives since they are both on separate physical disks.
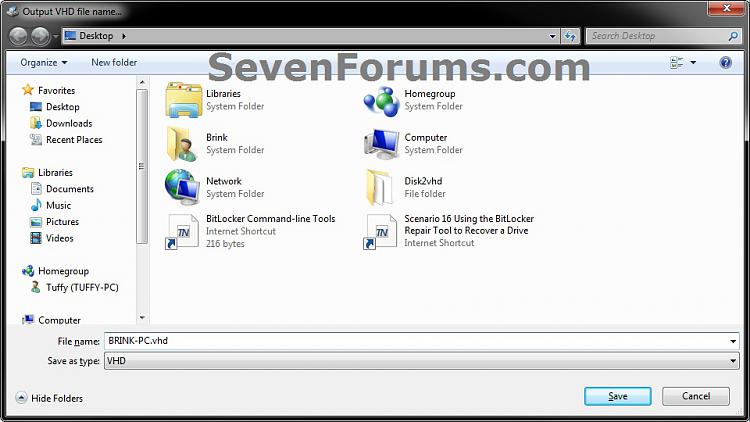
4. Click on the browse button (see screenshot above), navigate to where you would like to save the VHD file(s) to, type in a name (ex: BRINK-PC) for the VHD file, and click on Save. (see screenshot below)
NoteIf more than one VHD file will be created, then you will have 0, 1, 2, etc... added at the end of the name you typed in for each VHD file created.
For example, if I will have 2 VHD files created and I typed in BRINK-PC for the name, I would have the 2 VHD files named like below.
BRINK-PC-0.VHD and BRINK-PC-1. VHD
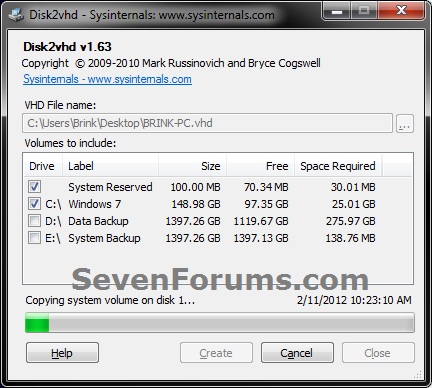
5. When it's finished creating the VHD file(s), close Disk2vhd. (see screenshots below)That's it,
NOTE: This could take a while to finish.
Shawn
VHD - Create of a Physical Hard Disk

VHD - Create of a Physical Hard Disk
How to Create a VHD of a Physical Hard Disk in Windows 7Published by Brink
Related Discussions


