


How to Create a Homegroup in Windows 7
InformationHomeGroup makes it easy to share pictures, music, documents, videos, and printers with other people on your home network. This will show you how to create a homegroup in Windows 7.
Note
- Only computers or virtual machines running Windows 7 or Windows 8 are able to participate in a homegroup.
- You can create or join a Homegroup with a virtual machine in Windows Virtual PC.
- HomeGroup is available in all editions of Windows 7. In the Windows 7 Starter and Windows 7 Home Basic editions, you can join a homegroup, but you cant create one.
- HomeGroup is available in all editions of Windows 8. In the Windows 8 RT edition, you can join a homegroup, but you cant create one.
- The computer must be connected to the same network the homegroup is on. Only computers on the same subnet will be able to connect to the homegroup, so if you have a wireless router, it would only be the computers connected to that router. You can check if your computers are on the same network by verifying that the first 3 parts of their IP addresses are the same. (ex: 192.168.0.189)
- If your computer belongs to a domain network, you can join a homegroup but you can't create one. You can access files and resources on other homegroup computers, but you can't share your own files and resources with the homegroup.
- All computers in the homegroup must have different computer names.
- All computers that will be on the homegroup must have (be on) the same workgroup or domain name.
WarningYou will need to make sure to have these Services set as below. They should be by default.
- DNS Client - Started and Automatic
- Function Discovery Provider Host - Started and Manual
- Function Discovery Resource Publication - Started and Automatic
- HomeGroup Listener - Started and Manual
- HomeGroup Provider - Started and Manual
- Network List Service - Started and Manual
- Peer Networking Grouping - Started and Manual
- Server - Started and Automatic
- SSDP Discovery - Started and Manual
- UPnP Device Host - Started and Manual
TipIf you can't create a Homegroup after all of this, then see the links below for some common troubleshooting ideas to try.
Why can't I create a homegroup?
Here's How:
NOTE: The homegroup created here as an example was done between a laptop (joined homegroup) with a wireless connection through a wireless router and a desktop (created homegroup in) connected to the same router's ethernet port via CAT6 cable.1. Make sure to synchronize the clocks on all computers that will be part of the home network so that they are showing the correct date and time. If the clocks are not synchronized, the HomeGroup feature will not work.That's it,
2. Make sure that the computer is set to have a home network location type. You will not be able to create a homegroup from any other type of network locations.
3. If you are using a wireless network through a wireless router, then check to make sure that say for example WLAN Partition (D-Link) or Enable Wireless Isolation (Netgear) are unchecked in the router's wireless settings. When it is enabled (checked), it prevents wireless devices from being able to see and communicate with each other. (see screenshots below)
NOTE: The screenshots below are from a D-Link DIR-855 (left) and Netgear WNDR3800 (right) wireless router. You will need to look at your router's manual for how with it.4. Open the Control Panel (icons view), and click on the Network and Sharing Center icon.
A) Click on the Change adapter settings link. (see screenshot below)5. In the Network and Sharing Center, click on the Choose homegroup and sharing options link. (see screenshot below)B) Right click on your network connection adapter, and click on Properties. If prompted by UAC, then click on Yes. Make sure that the items below are checked, and click on OK. (see screenshot below)
NoteSometimes the registry setting does not get updated even though you enable IPv6 via the GUI interface here. You can check the setting in the registry (regedit) by going to the key location below:HKEY_LOCAL_MACHINE\SYSTEM\CurrentControlSet\Services\Tcpip6\ParametersIn the right pane, right-click on DisabledComponents and select Modify. Make sure the value is set to 0.
- File and Printer Sharing for Microsoft Networks
- Internet Protocol Version 6 (TCP/IPv6)
- Internet Protocol Version 4 (TCP/IPv4)
C) Click on the back arrow button (left arrow) in Network Connections to return to the Network and Sharing Center. (see screenshot above)
D) Click on the Change advanced sharing settings link. (see screenshot below)E) Make sure that the Home or Work (current profile) settings for network discovery, file sharing, and homegroup connections are set as they are below for the ones pointed out with the red arrows, then click on Save changes. If prompted by UAC, then click on Yes. (see screenshot below) 6. Click on the Create a homegroup button. (see screenshot below)
NOTE: If a homegroup already exists (already created) on your home network, then Windows 7 will ask if you would like to Join Now instead of creating a new one.7. Select (check) what libraries and printers that you want to share from this computer with any other computer that joins this homegroup, then click on Next. (see screenshot below)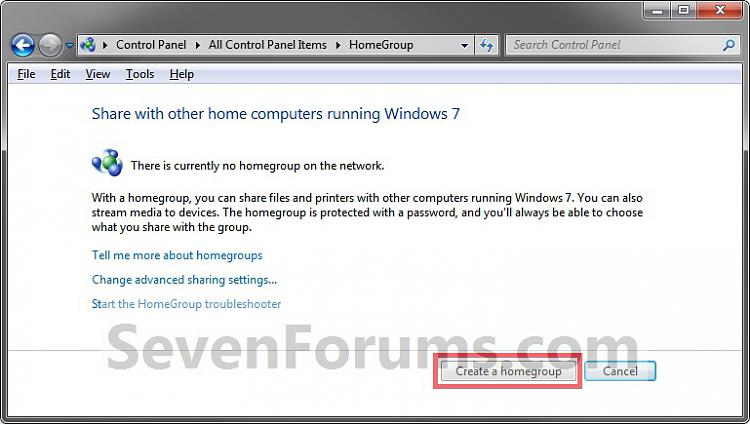 8. Write down and/or print this homegroup password. You will need to have and use this password to join a computer to this homegroup. Click on Finish. (see screenshot below)
NOTE: The password is case sensitive, so it will need to be typed exactly as it appears here when used to join a computer to the homegroup.9. Close the HomeGroup window. (see screenshot below) 10. You will now need to add other computers to the homegroup by joining them so that you can access shared libraries and printers between them.
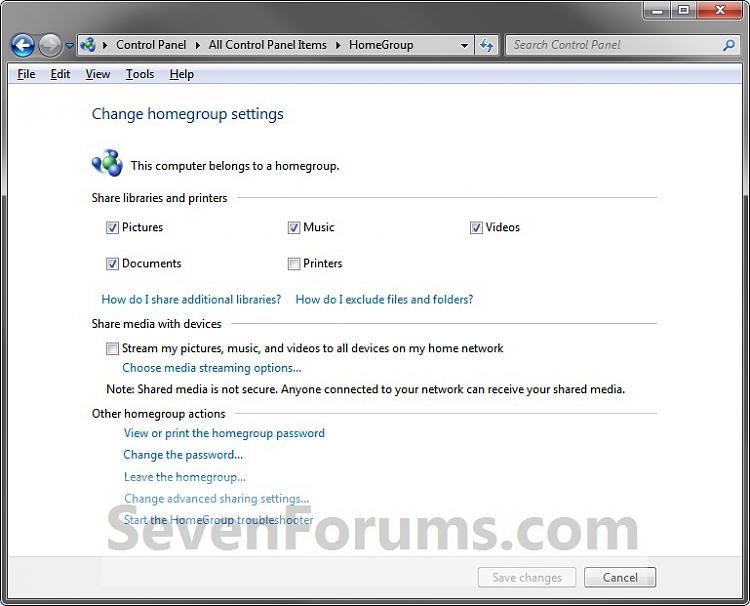
Shawn
Related Tutorials
- How to Create a Homegroup in Windows 8
- How to Link your Live ID and Share Files in Windows 7 HomeGroup
- How to Change the Default HomeGroup Icon in Windows 7
- How to Add or Remove Homegroup from the Windows 7 Navigation Pane
- How to Add or Remove the HomeGroup Desktop Icon in Windows 7
- How to View or Print Your Windows 7 Homegroup Password
- How to Change the Windows 7 Homegroup Password
- How to Join or Add a Computer to a Windows 7 Homegroup
- How to Allow or Prevent your PC to Join a Homegroup in Windows 7 and Windows 8
- How to Leave a Windows 7 Homegroup
- How to Remove Currently Unavailable PC you no longer have from Homegroup in Windows 7 and Windows 8
- How to Change Windows 7 Homegroup File and Folder Sharing Settings
- How to Create a HomeGroup Troubleshoot Shortcut in Windows 7
- How to Create a HomeGroup Settings Shortcut in Windows 7
- How to Create a HomeGroup Folder Shortcut in Windows 7
- How to Turn Network Discovery On or Off in Windows 7
- How to Turn Public Folder Sharing On or Off in Windows 7
- How to Turn Password Protected Sharing On or Off in Windows 7
Homegroup - Create
-
New #1
When you setup Windows 7 and my network is set to Home network, it will bring up HomeGroup window immediately. Or you can skip this and finish installing Windows 7.
I was see the Homegroup window without going to Network and Sharing Center when I install wireless network adapter, connecting to Wi-Fi using WPS and choosing Home network.
-
New #2
Hello Jonathan,
Yes, that would be correct. Anytime you are setting up a network as Home, Windows will allow you to setup the HomeGroup at that time if it detects it.
The tutorial is just for manually setting up a HomeGroup, and to help verify that everything is set properly for it. :)
-
New #3
CAN'T CREATE A WINDOWS 7 COMPUTER'S "HOMEGROUP" OR CHANGE ITS "WORKGRO
Thanks for the advice. I followed it and still can't fix the problem:
The Windows 7 Home Premium 64bit machine is connected to a "Home" (Windows 7 nomenclature)/"Private" (Windows Vista nomenclature) network. Yet, when I try to create a Homegroup (which I'm told in the Network and Sharing Center it is ready to create) I get a message that "a homegroup can only be created on a home network". But the computer IS on a Home network, is discoverable and is sharing everything. Oddly enough, in the Windows Explorer, listed as being on the network, IT IS NOT ACCESSIBLE TO ITSELF!
When I tried to change the computer's Workgroup I get "A general network error".


 Quote
Quote
Related Discussions