

How to install a motherboard in a case
Information
For this you will need:
* A screwdriver
* Some screws which should have come with the case or motherboard to attach the motherboard with
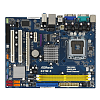
* A motherboard
* A case
Warning
Remember to get the right case for your motherboard! If your motherboard is a mATX (micro ATX) you will need a case that has the holes for that sort of mobo
Remember always to discharge yourself before doing anything like this! This is done by touching the metal inside the case.
Also make the screwdriver touch it as well, so it is discharged as well
Also, use standoffs if necessary. The standoffs insure that the mobo will not touch and short out.
Installing the motherboard
1. Remove the side panel from your case
2. Remove the old silver plate from the back, and put in the one that came with your motherboard
3. Now place the motherboard to match the screw holes in the case, and the silver plate at the back
4. Screw the screws in, but be careful, only screw till you meet a little resistance as you dont want your mobo to crack
5. Thats it. Your done installing the motherboard now, now you need to connect it to the PSU and the rest of your parts (tutorials on how to do this will be available in some months)
Finishing up
1. Put the sidepanel on again
2. Screw the screws in
Thats it, it's that simple.
Good luck to all, if you got any question please do ask them below in this thread
Motherboard - Install in a case
-
-
New #2
-
-
New #4
Cool, Can't wait for the rest of the series. Nice work Sergio.
-
New #5
Thanks guys :)
I'm also looking forward to doing the rest of these series of tutorials. Just need a CPU, PSU and some Ram now and i will tuts for installing those
-
New #6
I had to use metal standoffs when I installed a mobo for a friend. I didn't see this mentioned, but I think it is fairly common.

Excellent Tutorial.
-
New #7
Thank you Thorsen
I dont know about those standoffs tho, i never used them.
-
New #8
Sergio, you can edit it to include something like "use standoffs if necessary". The standoffs insure that the mobo will not touch and short out.
-
New #9
Added, thanks Thorsen and Carl


 Quote
Quote
Related Discussions