

How to Create a "Window Color and Appearance" Shortcut
InformationThis will show you how to create or download a Window Color and Appearance shortcut that opens directly to Advanced appearance settings.
EXAMPLE: Advanced Window Color and Appearance
OPTION ONETo Download the "Window Color and Appearance" Shortcut
1. Click on the Download button below to download the file below.
Advanced_Window_Color_and_Appearance.zip2. Click on Save, and save the .zip file to the desktop.
3. Open the .zip file and extract the Window Color and Appearance shortcut to the desktop.
4. Right click on the Window Color and Appearance shortcut, and click on Properties, General tab, and on the Unblock button. (See screenshot below)
NOTE: If you do not have a Unblock button under the General tab, then the shortcut is already unblocked and you can continue on to step 5.
5. You can now Pin to Taskbar or Pin to Start Menu this shortcut, assign a keyboard shortcut to it, or move it where you like for easy use.
6. When done, you can delete the downloaded .zip file on the desktop if you like, or save it to use again.
OPTION TWOTo Manually Create the "Window Color and Appearance" Shortcut
1. Right click on a empty area on desktop, and click on New and Shortcut.
2. Copy and paste either command below into the location area, and click on the Next button. (See screenshot below)
rundll32.exe shell32.dll,Control_RunDLL desk.cpl,,5ORCode:%windir%\System32\rundll32.exe shell32.dll,Control_RunDLL desk.cpl,Advanced,@Advanced3. Type Window Color and Appearance for the name, and click on the Finish button. (See screenshot below)That's it,
NOTE: You can name this anything you would like though.
4. Right click on the new Window Color and Appearance shortcut on the Desktop and click on Properties.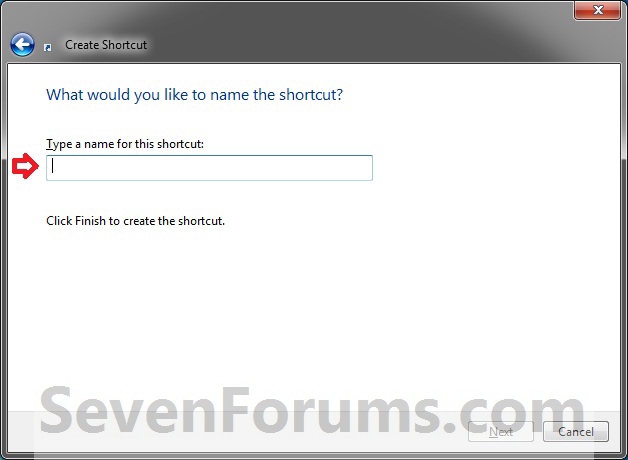
5. Click on the Shortcut tab, then click on the Change Icon button. (See screenshot below)
6. In the line under "Look for icons in this file", copy and paste the location below and press Enter. (See screenshot below)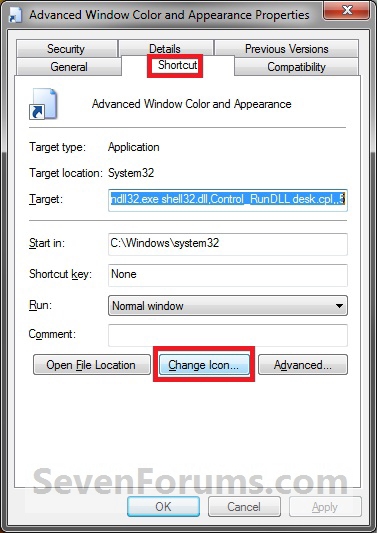
%windir%\System32\themecpl.dll7. Select the icon highlighted in blue above and click on OK. (See screenshot above)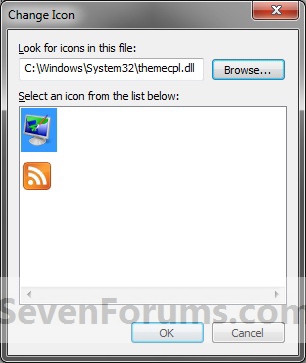
NOTE: You can use any icon that you would like instead though.
8. Click on OK. (See screenshot below)
9. You can now Pin to Taskbar or Pin to Start Menu this shortcut, assign a keyboard shortcut to it, or move it where you like for easy use.
Shawn
Related Tutorials
Window Color and Appearance Shortcut - Create
-
New #1
Wow, your link's string is rather complex. How can anybody remember that.
I did some research for this and found that it is much easier and thought I would share it with you.Code:rundll32.exe shell32.dll,Control_RunDLL desk.cpl,,5
There is an easier version of this command:
Or in Windows | Run, you can just type inCode:c:\windows\system32\desk.cpl ,5
I am not sure how you figured out that big, long, ugly rundll.exe line. While it works, it is not going to be something you will remember very easily.Code:desk.cpl ,5
So I decided to share with the next guy who hits this link the shorter version.
Last edited by Brink; 11 Oct 2010 at 10:34. Reason: Removed your spam link
-
New #2
Hello Rhyous,
Thank you for an alternative option. The only downside to using either of those commands instead of the one in the tutorial is that you do not have a "Pin to taskbar" option in the context menu, and you have to press and hold "Shift" and right click to see the "Pin to Start Menu" option. Another downside is that you cannot drag and drop it on the taskbar as it's own separate pinned icon since it will only be pinned inside the Control Panel icon's jump list instead.
If that is not a need or concern for the user, then it's a great alternative.
Thank you again. :)
-
New #3
That is a good to know. I never really thought about pinning it.
I am more of a fan of launching things from Start | Run or making my own Toolbars than I am a fan of using the pinning feature.
-
-
New #5
Thank you so much! I am constantly needing this desktop shortcut because I am picky about my fonts, and going into the personlization settings constantly is a PITA; especially when you have 100's of pictures set in your wallpaper folder. Why couldn't Windows leave the Desktop settings alone?
BTW, when you first create the shortcut you may not be able to pull up the properties with a right click. I believe this is more Windows security crap. I am always in Admin mode and have no UAC. What I had to do was use "Unlocker" v.1.88 (google it) on it first. (Higher versions don't work for unlocking security.) Install Unlocker, right click the Appearance shortcut and "Unlock" it. Keep "no action" selected and press OK. It simply removes the restriction temporarily. Keep Unlocker around because it's very handy.
I also changed my "Open In" setting to C:\ in stead of C:\Windows\system32 just in case, because Windows really hates it when you mess with system32.
I like the tip about Run>>desk cpl ,5. After the first run, I can just type "d" into the run dialogue and pull the settings right up too!
-
New #6
You're most welcome Melaney. :)
It would be best though to have the "Open In" set as the default C:\Windows\system32 since that is the location of the dll files referenced in the location.
-
New #7
Shawn, although this posting is rather old I do have a quick question. I would like to execute this through the context menu. What data should I input for the command? Thank you very much for your help. I'm sure your a busy busy man, answering all our questions =P Thank You again!
-
New #8
Hello Brandon,
Here you go. Fresh out of the oven. :)
Advanced Window Color and Appearance - Add to Desktop Context Menu
-
New #9
I'm new to this forum.
Over the years I've used all versions of Windows made 3.1/95/98SE/ME/2000/XP/Vista. I'm relatively new to Win7 even though I've used it at work for a couple of years but everything is locked by admin so you can change virtually nothing.
Thanks for the tip on changing Advanced Window Color and Appearance but can get the same option if you Control Panel\Appearance and Personalization\Personalization\Window Color and Appearance and click Advanced Appearance Settings... and it shows the same options as the downloaded shortcut.
There are alot of annoying features of Win7 which I hate. I will search this forum for solutions and if nothing if found I'm afraid I will be putting my Vista Home Premium 32bit back even though there are annoying features on there but all the thing I use on Windows still work on it.
Window Color and Appearance Shortcut - Create
How to Create a "Window Color and Appearance" ShortcutPublished by Brink


 Quote
Quote
Related Discussions