


How to Create a System Recovery Shortcut in Windows 7
InformationRecovery in Control Panel includes several options that can help you recover your computer from a serious error. For example, System Restore. Recovery also contains two advanced recovery methods that you can use if Windows is badly damaged or otherwise unusable. The first method replaces everything on your computer, including Windows and all of your personal files, with a backup or a recovery image. The second method reinstalls Windows in its entirety. Either method might delete any programs that you have installed.
This will show you how to create or download a System Recovery shortcut. You can also Pin to Taskbar or Pin to Start Menu this shortcut, or move where you like in Windows 7 for easy use.
EXAMPLE: Recovery
OPTION ONETo Download the "Recovery" Shortcut
1. Click on the download button below to download the Recovery.zip file.
2. Click on Save, and save the .zip file to the desktop.
3. Open the .zip file and extract the Recovery shortcut to the desktop.
4. Right click on the Recovery shortcut, and click on Properties, General tab, and on the Unblock button. (See screenshot below)
NOTE: If you do not have a Unblock button under the General tab, then the shortcut is already unblocked and you can continue on to step 5.
5. Move the shortcut to where you like for easy use.
6. When done, you can delete the downloaded .zip file on the desktop if you like, or save it to use again.
OPTION TWOTo Manually Create the "Recovery" Shortcut
1. Right click on a empty area on desktop, and click on New and Shortcut.
2. Copy and paste the location below into the location area, and click on the Next button. (See screenshot below)
Code:%windir%\explorer.exe shell:::{9FE63AFD-59CF-4419-9775-ABCC3849F861}3. Type Recovery for the name, and click on the Finish button. (See screenshot below)That's it,
NOTE: You can name this anything you would like though.
4. Right click on the new Recovery shortcut on the Desktop and click on Properties.
5. Click on the Shortcut tab, then click on the Change Icon button. (See screenshot below)
6. In the line under "Look for icons in this file", copy and paste the location below and press Enter. (See screenshot below)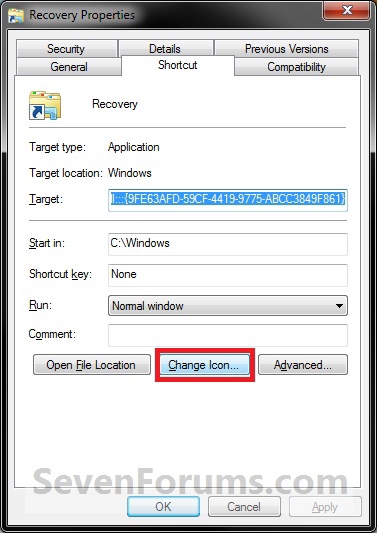
%SystemRoot%\System32\imageres.dll7. Select the icon highlighted in blue above and click on OK. (See screenshot above)
NOTE: You can use any icon that you would like instead though.
8. Click on OK. (See screenshot below)
9. Move the shortcut to where you like for easy use.
Shawn
Related Tutorials
- How to Do a System Restore in Windows 7
- How to Do a Repair Install to Fix Windows 7
- How to Do a System Image Recovery in Windows 7
- How to Restore Backup User and System Files in Windows 7
- How to Create a Windows 7 System Repair Disc
- How to Make a "Create System Restore Point" Shortcut in XP, Vista, Windows 7, and Windows 8
- How to Add "Create Restore Point" to Context Menu in XP, Vista, Windows 7, and Windows 8
- How to Create a Windows 7 System Protection Properties Shortcut
- How to Boot to the System Recovery Options in Windows 7
- How to Run a Startup Repair in Windows 7
- How to Boot to the Advanced Boot Options in Windows 7
- How to Delete Windows 7 User Data and System Image Backup Files
Recovery Shortcut - Create
-
New #1
I tried both methods, the shortcut from the download doesn't do anything when I double click it. The shortcut that I manually created opens up My Documents folder.
Any advice?
-
New #2
Hello Jiamin, and welcome to Seven Forums.
Try downloading the shortcut again to see if this one will work for you. :)
-
New #3
I am just wondering how you exactly got the shortcut. I tried to find it under a .cpl but couldn't. I also dragged it out of the search box in the start menu and onto my desktop. I right-clicked it and went to properties, but couldn't copy the target location.
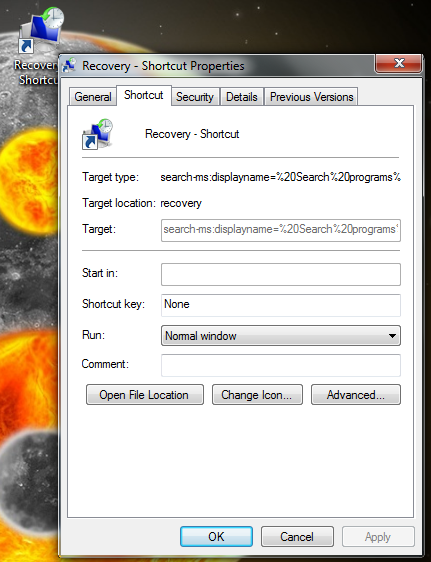
Last edited by Brink; 05 Aug 2011 at 03:22. Reason: fixed image
-
New #4
Hello Lol Froob, and welcome to Seven Forums.
There's not a .cpl file for this shortcut. Did you try either option in the tutorial to have the shortcut?
-
New #5
Yes the shortcut download works and I can go to the Recovery menu with it. I actually had no doubts it would work, I was just wondering how you got the shortcut because I tried and couldn't find it.
-
New #6
I got the GUID number {long number} that opens to this Recovery location when used in the target location like in step 2 in OPTION TWO from in the HKEY_CURRENT_USER\CLSID key in the registry. :)


 Quote
Quote
Related Discussions