

How to Export and Import User Disk Quota Entries in Windows
InformationThis tutorial will show you how to export and import user Quota Entries for a selected NTFS hard disk to make it easier to add or restore in Vista, Windows 7, or Windows 8.
You must be logged in as an administrator to be able to do the steps in this tutorial.
Note
Here's How:
1. Open the Computer window, right click or press and hold on the NTFS formatted hard disk (ex: my F drive) that you want to export it's quota entries for, and click/tap on Properties. (see screenshot below)That's it,
2. Click/tap on the Quota tab, and click/tap on the Show Quota Settings button. (see screenshot below)
3. If prompted by UAC, click/tap on Yes (Windows 7/8) or Continue (Vista).
4. Click/tap on the Quota Entries button. (see screenshot below)
5. To Export Quota Entries for this Disk
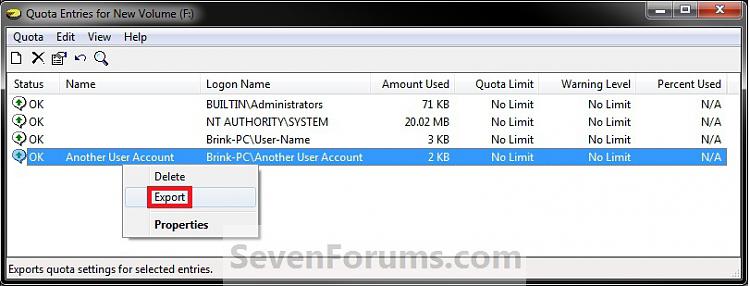
A) Select the quota entry for the user that you want to export. (see screenshot below)6. To Import Quota Entries for this Disk
B) Either click/tap on Quote (menu bar) and Export, OR right click or press and hold on the selected user and click/tap on Export. (see screenshots below)
C) Navigate to where you want to save this exported file to, type in a name you would like for this exported file, and click/tap on Save. (see screenshot below)
D) Be sure to keep this file somewhere safe. This is the file that is needed to be imported (step 6) to add or restore the selected user's quota entry for this disk.
E) Go to step 7.
A) Click/tap on Quote (menu bar) and Import. (see screenshot below)7. Repeat step 5 or 6 for any other quota entries that you would like to export or import for this selected disk.
B) Navigate to where you saved the exported file to in step 5, and click/tap on Open. (see screenshot below)
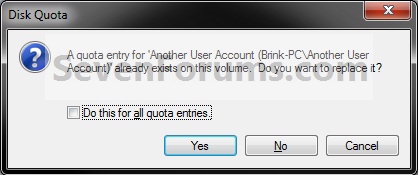
C) If you already have a quota entry for this user for this disk, then you will need to click/tap on Yes to replace the current one with the imported one. (see screenshot below)
NOTE: If you wanted to do this for another disk, then you must start over at step 1 to select another NTFS disk.
8. Close the Quota Entries window. (see screenshot below step 5A or 6A)
9. Click/tap on OK. (see screenshot below step 4)
10. Click/tap on OK. (see screenshot below step 2)
11. When finished, close the Computer window.
Shawn
Disk Quota Entries - Export and Import
-
New #1
Great
thank you vert very very much the best teacher
-

Disk Quota Entries - Export and Import
How to Export and Import User Disk Quota Entries in WindowsPublished by Brink


 Quote
Quote
Related Discussions