How to Change Workgroup in Windows 7 and Windows 8
InformationWhen you set up a network, Windows automatically creates a workgroup and gives it a default name of WORKGROUP. You can join an existing workgroup on a network or create a new workgroup by changing your workgroup name.
This tutorial will show you how to change workgroups on your computer in Windows 7 and Windows 8.
You must be logged in as an administrator to be able to change your workgroup name.
NoteWorkgroups provide a basis for file and printer sharing, but do not actually set up sharing for you. In contrast, in Windows 7 and Windows 8 you can create or join a homegroup, which automatically turns on file and printer sharing on home networks. If you have a home network of only Windows 7 and Windows 8 computers, it is recommend to create or join a homegroup instead.
Warning
- If your computer was a member of a domain before you joined the workgroup, it will be removed from the domain and your computer account on that domain will be disabled.
- Computers on a workgroup must have a unique computer name of their own so they can be identified by and communicate with each other.
- If your network includes computers running Windows XP, you might need to change the workgroup name on those computers to match the workgroup name on the computers running this version of Windows 7 or Windows Vista so that you can see and connect to all computers on your network.
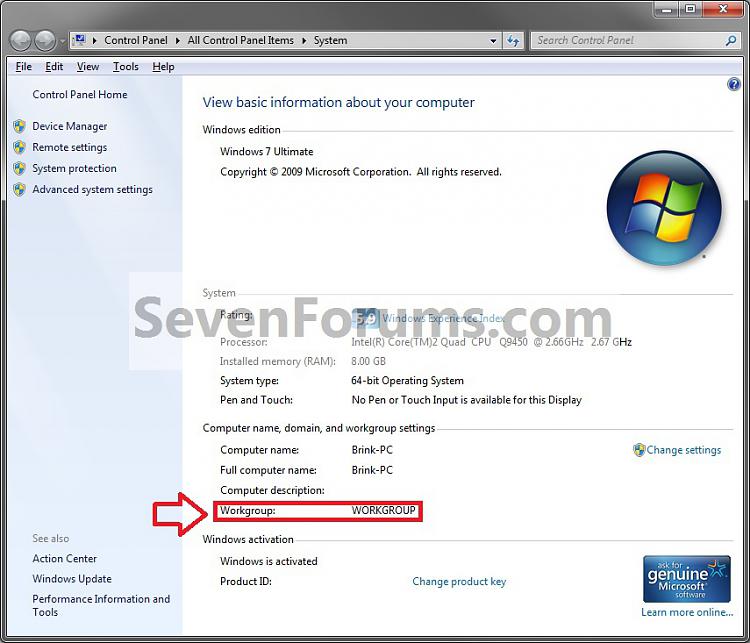
EXAMPLE: Workgroup Name
NOTE: This is in the System window from the Control Panel.
OPTION ONETo Change Workgroup in System Properties
1. Do step 2, 3, or 4 below for how you would like to open the System window.
2. In Windows 7, open the Start menu, right click on the Computer button, click on Properties, and go to step 5 below.
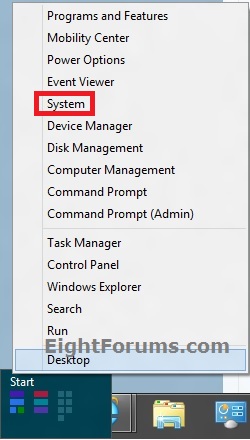
3. In Windows 8, open the (Win+X) Power Users Tasks Menu, click/tap on System, and go to step 5 below. (see screenshot below)
4. Open the Control Panel (icons view), and click/tap on the System icon.
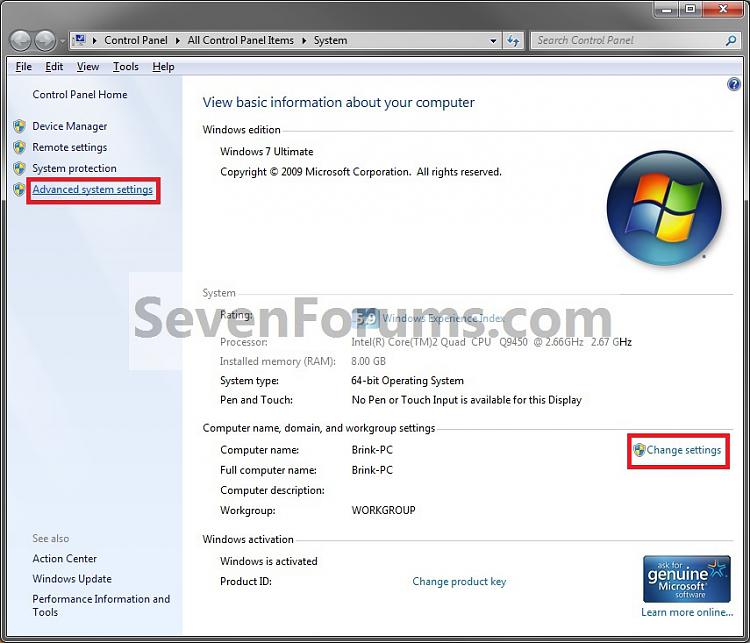
5. Click/tap on either Advanced System Settings in the left column, or Change settings link. (see screenshot below)
6. If prompted by UAC, then click/tap on Yes.
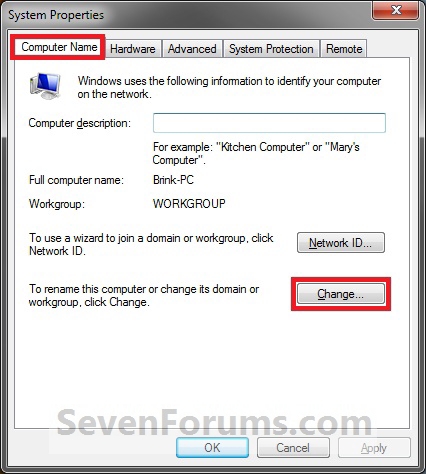
7. Click/tap on the Computer Name tab, then click/tap on the Change button. (see screenshot below)
8. Select (dot) Workgroup under Member of. (see screenshot below)
9. To Join an Existing Workgroup
A) Type the name of the workgroup that you want to join, and then click/tap OK. (see screenshot above)10. To Create a New Workgroup
NoteMake sure the workgroup name is not more than 15 characters, and do not use characters like these:
` ~ @ # $ % ^ & ( ) = + [ ] { } | ; : , ‘ “ . < > / ?
A) Type the name of the workgroup that you want to create, and then click/tap OK. (see screenshot above)11. Click/tap on OK. (see screenshot below)
NoteMake sure the workgroup name is not more than 15 characters, and do not use characters like these:
` ~ @ # $ % ^ & ( ) = + [ ] { } | ; : , ‘ “ . < > / ?
NOTE: Notice the new workgroup name.
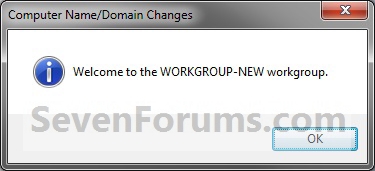
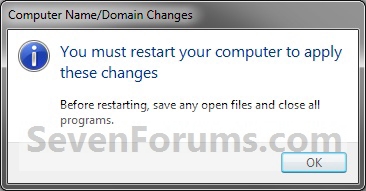
12. Click/tap on OK. (see screenshot below)
NOTE: This does not restart the computer yet.
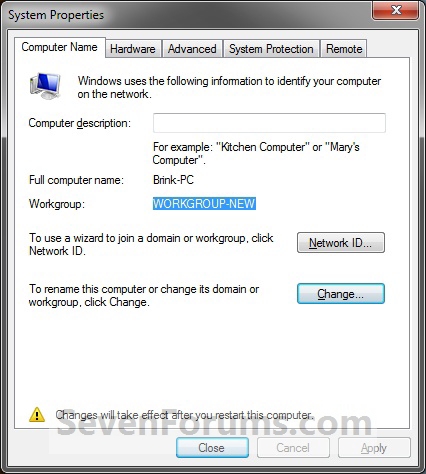
13. Click/tap on Close. (see screenshot below)
NOTE: Notice the new workgroup name.
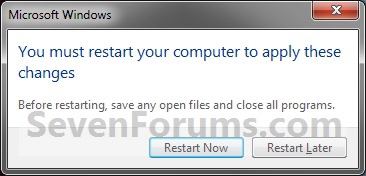
14. Click/tap on Restart Now. (see screenshot below)
WARNING: This will restart the computer immediately. Be sure that you save and close anything you have open first.
15. After the restart, verify the new workgroup name.
OPTION TWOTo Change Workgroup in Command Prompt
1. Open an elevated command prompt in Windows 7 or Windows 8/8.1.
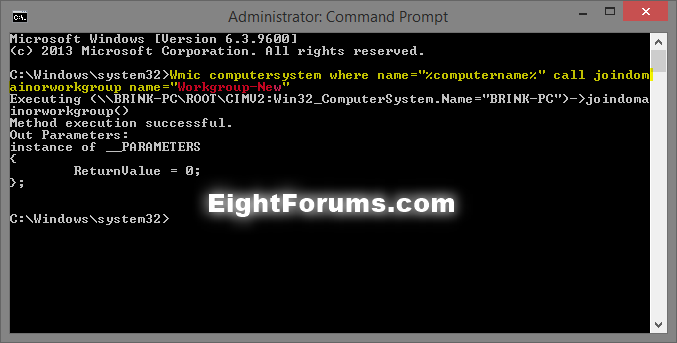
2. In the elevated command prompt, type the command below, and press Enter. (see screenshot below)
Code:wmic computersystem where name="%computername%" call joindomainorworkgroup name="Workgroup-Name"NoteSubstitute Workgroup-Name in the command below with the actual name of the workgroup you want to join or create within quotes.
Make sure the workgroup name is not more than 15 characters, and do not use characters like these:
` ~ @ # $ % ^ & ( ) = + [ ] { } | ; : , ‘ “ . < > / ?
3. When successfully finished, close the command prompt, and restart the computer to apply.
That's it,
Shawn
Related Tutorials
- How to Set the Windows 7 Network Location Type
- How to Set Unidentified Networks to be a Private or Public Network Location
- How to View and Change the Computer Name in Windows 7
- How to Change your PC Name in Windows 8 and 8.1
- How to Change the Network Name and Icon in Windows 7
- How to Join or Add a Computer to a Windows 7 Homegroup
- How to Find the MAC Address of Your Computer
- How to Find the IP Address of Your Computer
- How to Change Network Name in Windows 8
- How to Rename a Network Connection in Windows 8
Workgroup Name - View and Change
-
New #1
Brink
Thank you for another excellent tutorial!!
What then would be the proper way to configure a Vista laptop to join the workgroup created on the W7 PC?
-
New #2
You're most welcome Provlima, and thank you. :)
That question should be asked in the Network & Sharing forum area to get the best help on though.

Workgroup Name - View and Change
How to Change Workgroup in Windows 7 and Windows 8Published by Brink
Related Discussions




 Quote
Quote