
New
#11
Help with dual boot system.
-
-
New #12
Looking at your screenshots in post 9, you may have done the instructions out of order.
Take a look at this tutorial:
Partition : Recover Space Used by an Older OS
-
New #13
That's OK, Vista went Inactuve when Win7 was marked Active on the same HD.
The only reason Rebuild MBR would not be available on an OS HD is because you didn't follow the step to click on the HD to highlight it first.
To remove Vista, follow the final steps to delete it and Resize Win7 into that space - to also take advantage of faster reads of OS in the lower (left hand) HD address. It should delete the Boot Menu along with Vista. If not delete it in msconfig>Boot tab.
-
New #14
Two More Things
Thanks to everyone, I am about to mark this thread as solved.
Only two small issues to solve. Probably not worth mentioning but, hey I am that kind of guy. Must know everything, drives my wife crazy.
Unallocated space still exist, I think I can fix this because of what I have learned over the last few day.

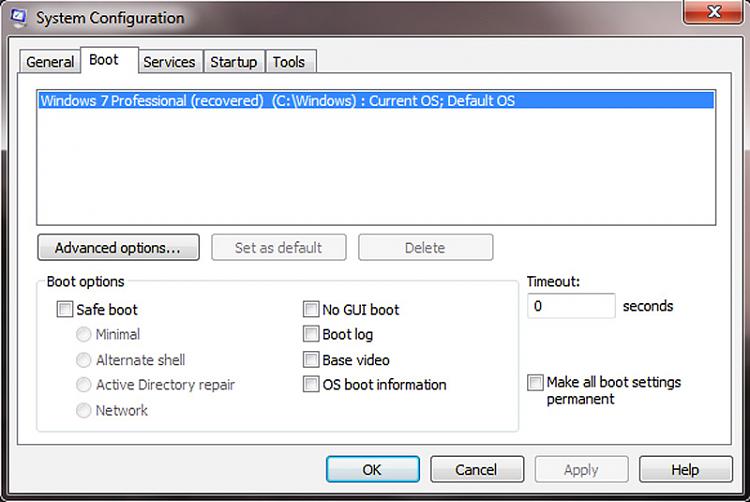
Why is my OS now know as (recovered) and do I care and could I change it back the way it used to be?

Floyd...
-
New #15
Unallocated Space Not Gone
O.K., I seem to be able to follow instruction, however the unallocated space is not gone.


The amount of unallocated space changed, I was expecting not to have any.
Floyd...
-
New #16
Strange that it will not Resize into the 31mb since it is already Unallocated and therefore can't be deleted any further.
Perhaps after trying again with the PW boot Cd you'll have to wait til time to reinstall or reimage and then wipe the HD with Diskpart Clean All to vanquish it.
-
New #17
Ran Partition Wizard.exe from Windows 7 and with one try no more unallocated space.
What about (recovered) added to Windows 7, can I change it back?
-
New #18
I'm assuming all you want to do now is edit the Windows 7 boot entry, which can be done from a command prompt, thus:
Boot into Windows then click Start and type cmd in the Search field.
Right-click cmd under the Programs list and choose Run as Administrator to open the command shell.
Type bcdedit then press Enter.
Look in the Windows Boot Loader section where you'll see the name Windows 7 Professional (recovered).
To edit this name go to the C: prompt at the bottom of the Boot Loader Section and type this command:
bcdedit /set description "Windows 7 Professional" then press Enter again. (Don't forget to include the inverted commas).
You should see a message that reads The operation completed successfully.
Type Exit and press Enter to close the command shell and reboot your computer.
-
New #19
I've only used EasyBCD to change the name back in the past. But I avoid CMD's if there's alternatives.
First I'd check if it will let you set a new label at Computer>rightclick C>Properties in the box at top, or on PW by rightclicking the HD.
-
New #20
Thanks to everyone I have no more issues as noted in this thread.
Problems solved.

 Quote
Quote


Related Discussions