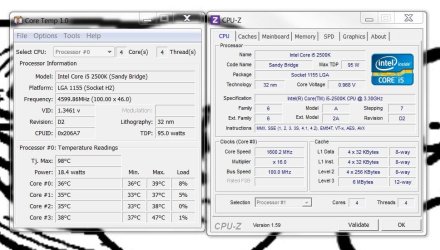
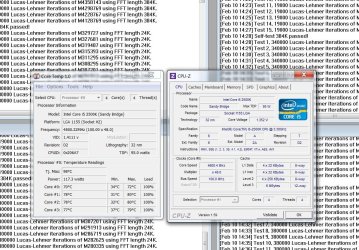
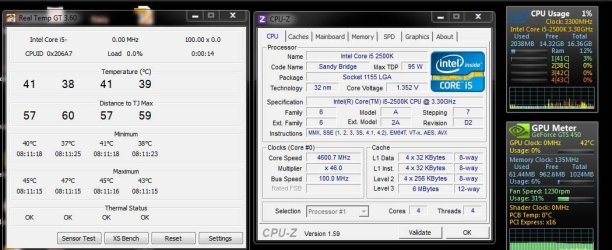
All my previous settings were set to auto. Maybe this case would be much differently.
That's your first step - get things off Auto

Auto loves to overvolt, particularly the vcore.
Have a read through this to familiarize yourself with the new terms:
Official ASUS P8P67 Series Overclocking Guide and Information - [H]ard|Forum
This guide is aimed at more of a max overclock, than an average one. But it will give you an idea of what NOT to overshoot.
Since no two CPU's are equal, use some of the settings a guide only.
And another:
P67 Sandy Bridge Overclocking Guide For Beginners
There are plenty of other guides out there as well.
A quick start checklist:
► Don't go straight for a high over clock, ie 4.8ghz-5.0ghz. Keep it basic like 4.2ghz-4.6ghz.
► Leave the TPU switch on the board alone.
► Overclock through the BIOS, don't bother with the ASUS OCing software.
► Don't be tempted to simply adjust the Multiplier and leave everything on Auto. It will work, but it'll pump more volts than are needed.
► Leave Speedstep/EIST, C1E etc enabled.
Sandy Bridge scales nicely with the power saving options Enabled. Unlike previous generations, it's actually recommended to leave these enabled instead of disabling when overclocking.
► Disable Turbo
► Disable CPU PLL Overdrive (only needed for 4.8ghz and above)
► Enter the vcore settings manually.
Even if you leave everything else on Auto, at the very least get this one off Auto.
During testing, use a manual, fixed vcore to find the volts you are aiming for for your target clock speed. Once you have that, switch to using the offset function. This will allow Speedstep/Power Saving features to function properly, lowering the voltage and clockspeed when idle.
► Enter the DRAM voltage manually (if you aren't using the RAMs X.M.P profile. Should be 1.5v)
► Leave the BCLK at 100.00, otherwise it affects the RAM speed.
Max Safe Limits:
► On air, the max vcore you want to see is 1.38v-1.4v, temps permitting.
Depending on your desired clock speed, you will need far less than that.
► During testing aim for less than 90c on the core temps. 90c is the absolute limit you'd want to see. 65c-85c is a more realistic temp when stress testing.
For stress testing, use a combination of IBT and Prime 95. IBT hammers the chip hard, so watch the temps with this one. It'll add 5-10c more than P95
Core Temp for temp monitoring and CPU-Z for voltage monitoring.
Use IBT for quick vcore testing. 10 runs on maximum is enough. Use P95's Blend Mode for the extended stability test for 8-12hrs.
My Computer
At a glance
8 Pro x64i7 3770K 4.6GHz16GB G.Skill Trident X 2666mhzx2 EVGA 780 Ti Superclocked SLI
- Computer type
- PC/Desktop
- Computer Manufacturer/Model Number
- Systems by SmartEyeball
- OS
- 8 Pro x64
- CPU
- i7 3770K 4.6GHz
- Motherboard
- ASUS P8Z77 WS
- Memory
- 16GB G.Skill Trident X 2666mhz
- Graphics Card(s)
- x2 EVGA 780 Ti Superclocked SLI
- Sound Card
- SB X-FI Surround 5.1 PRO USB / ATH-AD900 Headphones
- Monitor(s) Displays
- x3 Dell U2410 / 58" Samsung
- Screen Resolution
- 5760*1200/ 1920*1200
- Hard Drives
- 2x Intel 520 240GB (RAID 0) * 2x WD Caviar Blacks 2TB (RAID 0) * 2TB WD Caviar Black * Sony Optirac DVD
- PSU
- Silverstone Strider Evolution 1200W
- Case
- Thermaltake Level 10 GT Snow Edition
- Cooling
- Noctua NH-D14
- Keyboard
- Topre Realforce // Ducky Shine MX Black // Filco Ninja TKL
- Mouse
- Thermaltake Theron (Highly Recommended) + Razer Imperator
- Antivirus
- MSE
- Browser
- IE, FF, WaterFox
- Other Info
- GT Extreme V2 Sim Racing Cockpit + 40" LCD and K/B Mouse stand ▼
Fanatec CSR Elite Wheel + Clubsport V1 Pedals + CSR shifter/7G-H ▼Saitek X52 Pro ▼ TrackIR 5 Pro
Buttkicker v2 Seat Rumbler with Dedicated 5.1 and Sub Woofer attached to frame ▼
=
Bloody Big Grin