Problem Solved - With Instructions.
I have scoured the internet for examples on how to do just this…
I have multiple Domain Users logging into the Same Windows 7 Pro 64 machine and I too wanted them to all access and use the SAME XP Mode Virtual Machine.
So I set about figuring it out on my own, and was highly successful. It is actually MUCH, MUCH easier than it sounds.
I have tried all the steps of all the posts from multiple different sites, and while they were good and worked well for some instances, just did not allow for everything I needed.
The biggest problem I was having was that I am required to Audit each VM as if it were Standard machine in the Domain, so I did not want to have to audit several iterations of the same system, just because Microsoft wants to create a separate VM for each user logging in.
If the following scenario fits your needs then below are the steps I used to accomplish it.
I needed ONE XP Mode VM to Share between Multiple Domain Users after the XP Mode VM is brought into the AD Domain. I needed this because I wanted to keep the VM Machine Name the same in AD and only have to Audit any Domain User that accessed it. Sounds tough, but not really.
After much trial and error and effort I have devised the following procedures that I have tested to work on 3 systems so far. I have on average of 3 Domain Users per Windows 7 system, on any given day.
Step-By-Step:
1. You need to install both XP Mode and MS Virtual PC into a public folder that all your Domain Users can access and you can control the permissions to. (I used C:\Public_VM)
2. Log into XP Mode with the default XPMUser and perform all necessary updates.
3. While logged in as XPMUser, Disable Integration Features and change the Networking Adapter to the Host PCs network adapter. This is done by selecting Tools > Disable Integration Features and Tools > Settings > Network Adapter, respectively.
4. You will need to configure the XP VM Network adapter to your Domain numbering system. (IP, Subnet, Gateway, DNS, etc…)
5. Go to Start > Right-Click My Computer > Properties > Change, and change the name of the XP Mode VM to something that matches your Domain Naming structure, but add ”-XP” to the end of it. (example: PC Name = PC12, XP Mode Name = PC12-XP) Allows you to keep track of your VMs in the Audit Trails.
6. While still in Start > My Computer > Properties > Change, join the XP Mode system to your AD Domain.
7. Restart Required.
8. Once name is set and VM is joined to Domain, log into VM with Domain Admin account and proceed to setup and configure any and all applications you need setup in XP Mode.
9. Ensure that Domain Users is added to the XP VM Remote Desktop Users and local Users groups.
10. Ensure that Domain Admins have Full Control and Domain Users have Modify privileges to C:\Public_VM\.
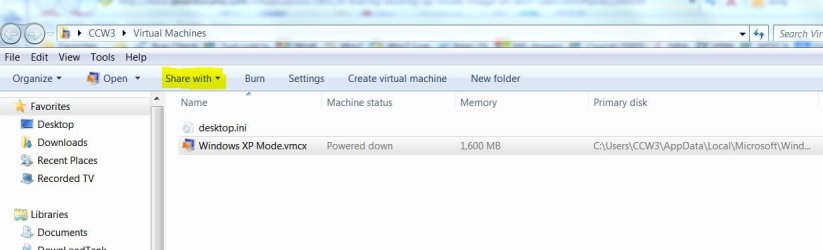
11. After all setup, Printers, and configurations are complete, COPY just the Windows XP Mode.vmcx file from your Admin directory (C:\Users\<Administrator_Account>\Windows Virtual Machine\) to the public folder you installed the VM to. (C:\Public_VM\).
12. Go to C:\Public_VM and create a Shortcut, in there, of the newly copied .vmcx file from your Admin account.
13. Copy the shortcut to C:\Users\All Users\Desktop. (This will ensure ALL Domain Users are using the same link script.)
14. Either Rename or Delete the reference to Windows XP Mode from Start > All Programs > Windows Virtual Machine, as you do not want your users trying to use that one. It will try to create a new / individual VM for that user.
15. If your Domain does not allow for extra Admin accounts, with group passwords enabled, then Disable the XPMUser account, since you should no longer need it.
16. Log out and log back in with a regular Domain User account and verify the Shortcut is on your desktop and that it points to the Public folder.
17. Double-Clicking the Shortcut should now open the XP Mode Virtual Machine your Admin created and configured.
Important Note: Any changes performed to the XP Mode Configuration needs to be done from the original Domain Admin account you initially configured the VM with, then Copy that new configured .vmcx file back to the Public Folder. The Shortcut will continue to work as long as you do not change the name of the .vmcx file.
Its as easy as that.
As I have said this has been working for me on several PC migrations, so I know it works. Hopefully someone else can find this information helpful too.
Folkrm
Principle Network Engineer