How to Enable or Disable Driver Verifier in Windows 7
Contents
InformationDriver Verifier runs in the background, "testing" drivers for bugs. If it finds one, a Blue Screen of Death (BSOD) will result; the corresponding dump file will hopefully show the faulty driver.
OPTION ONETo Enable Driver Verifier
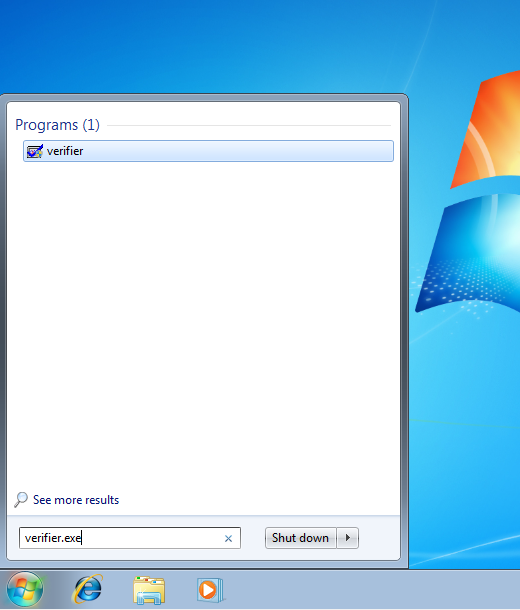
1. Start typing verifier.exe into the start menu, and open Verifier.
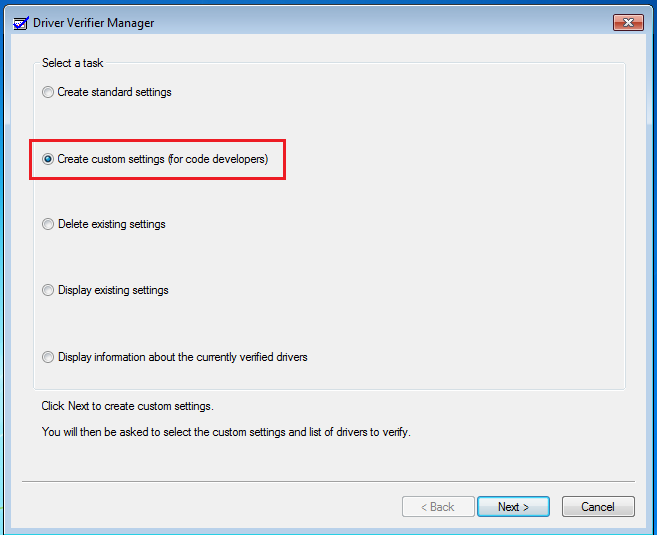
2. Select "Create custom settings (for code developers)", and hit Next.
3. Make sure Standard settings, Force pending I/O requests, and IRP Logging are selected, and hit Next.
4. Select "Select driver names From a list", and hit Next.
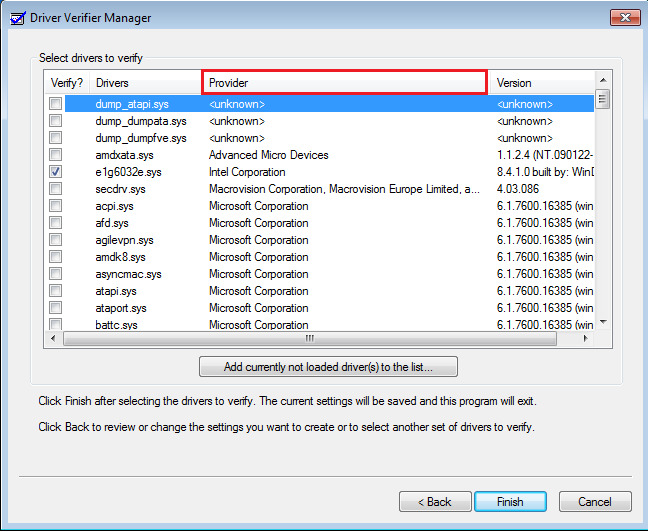
5. Click on "Provider" at the top to sort the list by manufacturer; select all drivers not provided by Microsoft Corporation.
6. Press Next, and OK to the resulting window.
After a reboot, driver verifier should be enabled. Use your computer as you normally would, although expect frequent BSODs if there are driver issues. If the system doesn't crash after 24 hours, disable driver verifier.
OPTION TWOTo Disable Driver Verifier
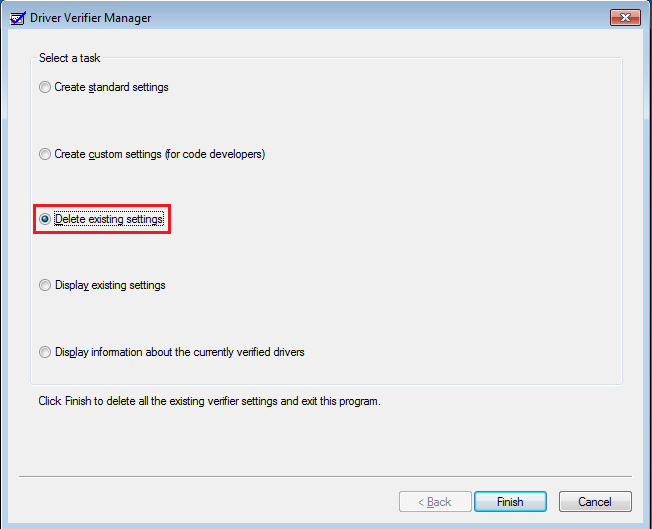
2. Select "Delete existing settings"
If you cannot get into Windows to turn off Verifier, try using Safe Mode.
Driver Verifier - Enable and Disable
-
-
-
-
-
-
New #6
This didn't work for me. I applied all settings as described, it said I needed to restart so I told it "OK" and nothing happened. I manually restarted, and it just booted up normally without any special screen or status report for the verification... I'm having BSODs though so that could be it.
What should I do to try and force this to work?
-
-
New #8
HI JK! UMMM should i verify this drivers too? )= kinda need some help here x.x
-

Driver Verifier - Enable and Disable
How to Enable or Disable Driver Verifier in Windows 7Published by Jonathan_King
Related Discussions


 Quote
Quote