Use the Bootable Partition Wizard CD to Make Changes to the Windows Partition Structure
This outlines several uses for the Partition Wizard Bootable Disk (PWBD) some of which Windows is not able to do natively, to include converting an Extended partition / Logical drive to a Primary partition, to wipe secure erase a single partition and how to Shrink/Resize the left side of a Windows partition.Information
Partition Wizard is a very reliable tool for your tool kit and it's a free download for home / personal use, first download the PWBD ISO file to the desktop, be sure to get the PWBD and not the installed version; scroll down to see the download link for the Bootable CD ISO file at this link below.
Partition Wizard Free Bootable CD
Then you will need to burn the ISO to a CD, it was designed for use and works best from a CD rather than a DVD; it doesn't take any input at all from the user for Partition Wizard CD to setup, just relax and let it load all on its own.
Warning
As with anything that makes changes to the Windows structure there is always the chance for an error to occur, it would be advisable to make reliable backups to the external media of your choice of any important data, i.e. pictures, music or documents, that you would not want to lose before you make any changes to your system.
Let's get started!To boot the disk, in the BIOS set the PC boot order to boot first from the CD/DVD drive, insert the PWBD and restart the PC, it'll take a few minutes for it to setup with no input from the user needed.
Once the program has started you can remove the CD from the drive if you like.
Option OneConvert Extended / Logical to Primary
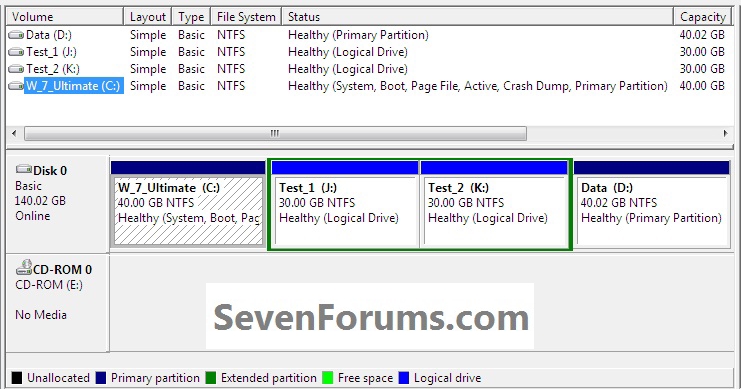
There are many reasons one may want to convert an Extended partition / Logical drive to a Primary partition, though I'm just going to show how here without going into why; this first snip below shows the partition structure I'm starting with.
Have a look at Method Two in this tutorial for a totally different type option.
Partition / Extended : Logical Drives
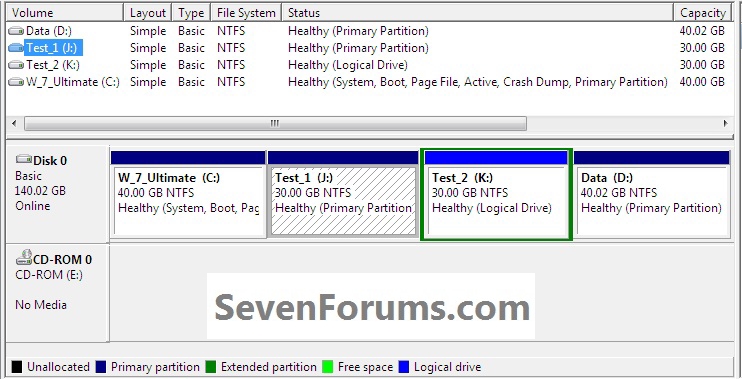
1) In the PW program right click the Extended / Logical to be converted and click Modify then click Set as Primary.
2) At the top left in the action bar click Apply then click Yes for the "Apply Changes" conformation dialog box; the whole process only takes seconds.
3) Then OK for the "Successful" dialog box and this is what you will have.
That's all, you're finished; remove the CD from the drive, at the upper left corner click General then Exit to close the Partition Wizard program and restart Windows.
Option TwoWipe a Partition
Warning
This method will completely overwrite any Partition or entire Hard Disk Drive / Solid State Drive that it's pointed at, it's known as a secure erase and after it finishes any and all data will not be recoverable at all, even by the best data recovery software so copy out or backup anything you don't want to lose before you start this procedure.
To be sure you have the correct partition for the wipe, type diskmgmt.msc into the Windows start menu start search box to view Windows disk management.
To boot the disk, in the BIOS set the PC boot order to boot first from the CD/DVD drive, insert the PWBD and restart the PC, it'll take a few minutes for it to setup with no input from the user needed.
Once the program has started you can remove the CD from the drive if you like.
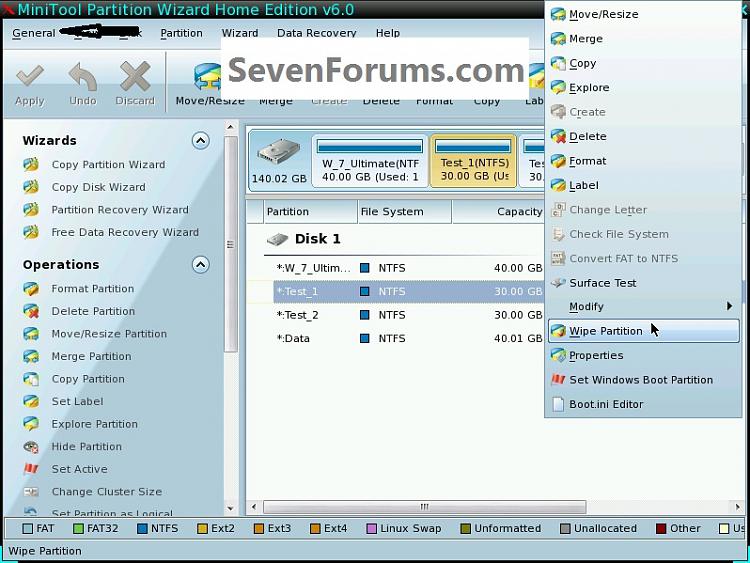
1) In Partition Wizard right click the partition you want to wipe secure erase and click Wipe Partition.
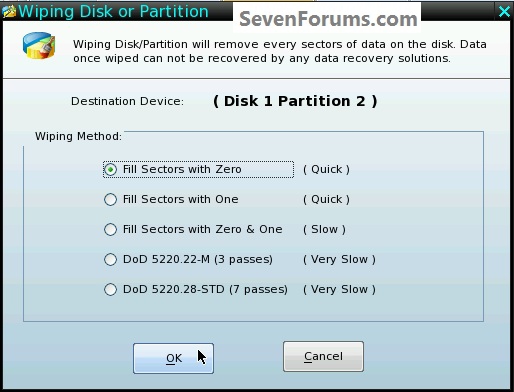
2) Select the type wipe you want in the dialog box that opens and click OK.
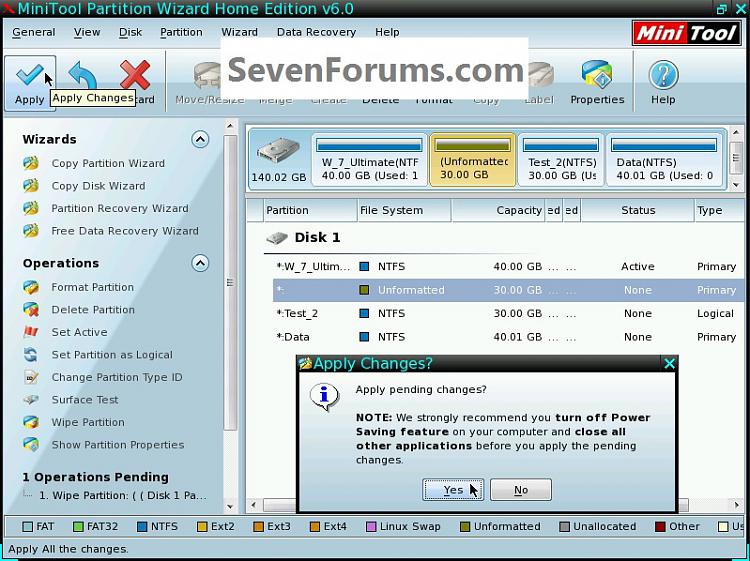
3) At the top left in the action bar click Apply; then for the "Apply Changes" dialog box click Yes to start the wipe.
4) You will get a Pending box during the wipe; to do this 30GB took less than 20 minutes, on average they take about 1 hour per 300GB to complete; when it finishes click OK for the "Successful" dialog box.
That's all, you're finished; remove the CD from the drive, at the upper left corner click General then Exit to close the Partition Wizard program and restart Windows.
Option ThreeShrink the Left Side of a Windows Partition
The issue here is that Windows disk management will only shrink a partition from the right side, it will not natively shrink the left side of a partition and Partition Wizard will; this is useful in this type situation where you need to add space to the Windows C: partition and there is an existing data partition in the way and nowhere to move the data.
To boot the disk, in the BIOS set the PC boot order to boot first from the CD/DVD drive, insert the PWBD and restart the PC, it'll take a few minutes for it to setup with no input from the user needed.
Once the program has started you can remove the CD from the drive if you like.
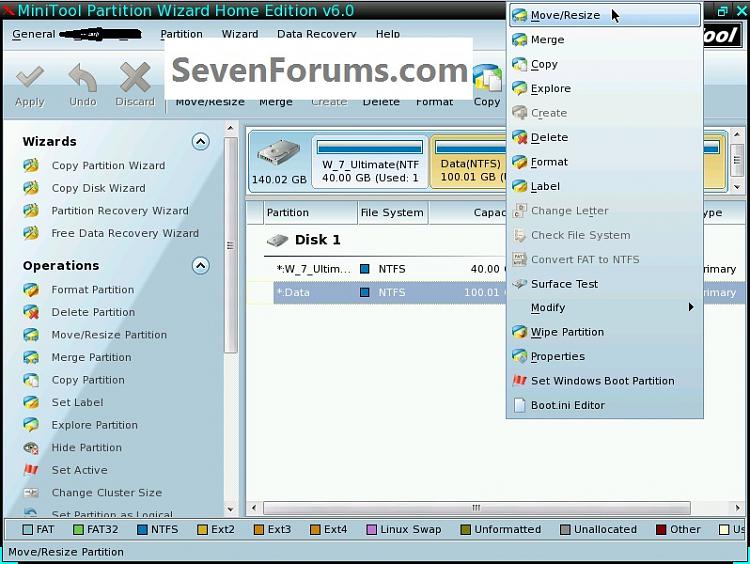
1) In the Partition Wizard program right click the partition you want to shrink and at the very top of the drop down menu that opens click Move/Resize.
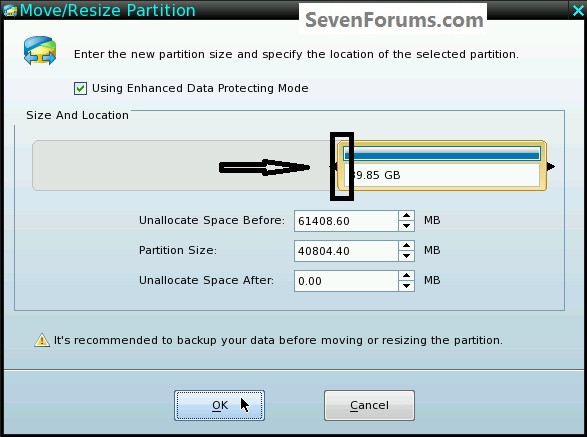
2) In the Move/Resize box click to hold and drag the left side of the border / slider and drag it to the size you want to shrink the partition and click OK.
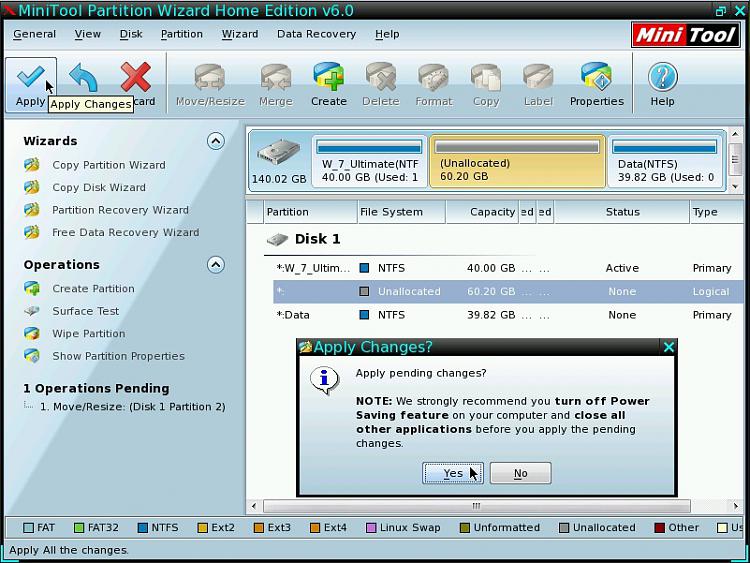
3) At the top left in the action bar click Apply then click Yes for the "Apply Changes" conformation dialog box.
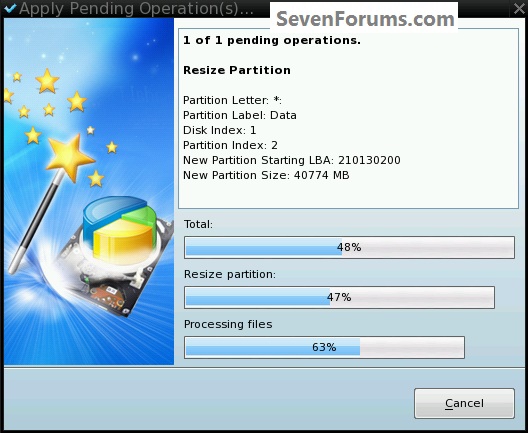
4) You will get a "Pending" graph but it depends how much data that has to be moved to know how long it will take, just relax and let it work without interruption; when it finishes click OK for the "Successful" dialog box.
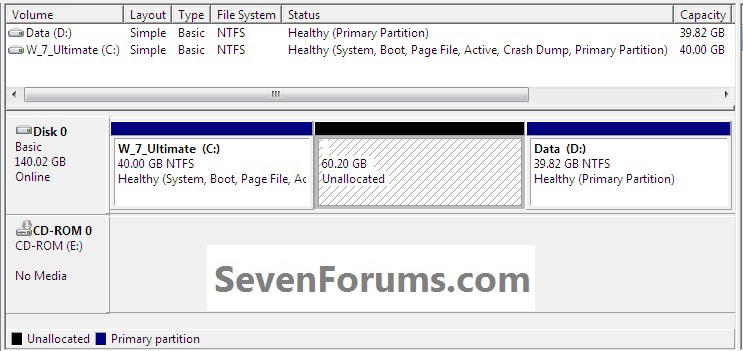
This will give you unallocated space in Windows disk management that can be created into a completely new partition or the Windows C: partition can be extended into the created unallocated space so the C: partition can be expanded; see the second snip down.
That's all, you're finished; remove the CD from the drive, at the upper left corner click General then Exit to close the Partition Wizard program and restart Windows.
Enjoy! :)
Partition Wizard : Use the Bootable CD
-
-
-
New #3
It looks perfect to me.
I'll keep it at the top of my Bookmarks and refer Users to Options 1-3 to see how they get on.
(You should be repped for your hard work by everyone who uses this, by clicking the scales in your posts above and saying thanks! )
-
-
New #5
Note you can also wipe the entire HD from the Disk tab. It offers various levels of zeroing (one is enough) up to 3 passes which is the DOD standard.
-
-
New #7
Thanks a lot BFK, for this very helpful and informative post.
-
New #8
Hello Chris H, welcome to Seven Forums!
I'm very glad it was a help to you, thanks for the feedback.
-
New #9
Barefoot, I believe that running Startup Repair to repair the MBR is a critical enough step that it should have an illustrated Step 4 in Option One, rather than just a note that might be missed.

Partition Wizard : Use the Bootable CD
Use the Free Partition Wizard Bootable CDPublished by Bare Foot Kid
Related Discussions







 Quote
Quote