Wireless printer installed and functioning normally.

First off, I would like to thank Kari for preparing all of the groundwork that enabled this install to work. My abbreviated install procedure follows, much of which was shamelessly copied from Kari's and Brink's previous posts. Their install procedures are more detailed, show additional options, have pretty screen shots and it will likely be of benefit to view them before following my procedure. Needless to say, every install will be different, but this may help those trying to install HP printers.
The links used for reference are:
http://www.sevenforums.com/virtualization/245072-xp-vm-does-not-connect-wirelessly-home-network-wirelessprinter.html
http://www.sevenforums.com/tutorials/96184-windows-virtual-pc-connect-virtual-machine-network.html
http://www.sevenforums.com/tutorials/43629-network-location-set-home-work-public-network.html
Suggestions or error correction appreciated
********************************************************************************
How it all works:
Windows XP Mode [MS Virtual Machine] sees your host system [Win 7 Pro]) as a repeater. A virtual machine does not care how this repeater is connected to the router or the network. To connect to a network, Windows XP Mode uses an emulated LAN (Ethernet) connection. It has its own emulated software LAN adapter and the connection between the guest and the host is therefore always a LAN (Ethernet) connection. Hence, Windows XP Mode will connect via a router to a wireless printer in the same way the Windows 7 host does, presuming the proper printer software is installed on each machine.
The key to the installation of an HP wireless printer is the proper connection of Windows XP Mode to your network
before beginning printer installation. The following install sequence was used to install an HP LaserJet Pro 400 color M51nw printer [wireless connection] in Windows XP Mode. This particular printer was already installed as a wireless connection on the Windows 7 host. That configuration remained unchanged. HP's printer installation software sees the Virtual Machine as a stand-alone XP installation and acts accordingly, performing a normal installation using the HP software in the printer's memory. No need to hunt for or install drivers separately.
The actual installation:
1. In Windows 7 host - install and Configure XP Mode [MS Virtual Machine] and the router:
1.1 Virtual Machine installed with integration features enabled;
1.2 router MAC filtering disabled.
2. In Windows 7 host - Open the Virtual Machine - but
NOT in full screen.
3. In the virtual machine - in the menu bar, click on Tools and verify integration is enabled.
4. In Windows 7 host - to enable the Virtual PC Network Filter Driver:
4.1 Open the Control Panel (icons view), then click on the Network and Sharing Center icon;
4.2 In the Network and Sharing Center, click on the Change adapter settings link on the left side;
4.3 Right click on your internet network connection, and click on Properties;
4.4 make note of the network adapter name (ex: MyAdapter....). You will need this in 5.2;
4.4 verify that the Virtual PC Network Filter Driver box is checked;
4.5 click on OK.
5. In Virtual Machine - set the Network Settings:
5.1 On the virtual machine's menu bar, click on Tools and Settings;
5.2 In the left pane, select Networking;
5.3 Select your network adapter name from the drop down box;
5.4 click OK.
6. In Windows 7 host - Select the Network location type:
6.1 Open the Control Panel (icons view), and click on the Network and Sharing Center icon;
6.2 Under Network, click on what you currently have selected as your network location;
6.3 Select a location that fits your network location needs;
6.4 The network location will be changed to what you selected;
6.5 Click Close;
6.6 Close the Network and Sharing Center.
7. The virtual machine should now be able to connect to your network and access the internet from it.
8. HP Printer installation on the Virtual Machine:
8.1 Open Virtual Machine;
8.2 In Virtual Machine - set the OS to the desired regional settings -
printer software will default to the language of the selected region;
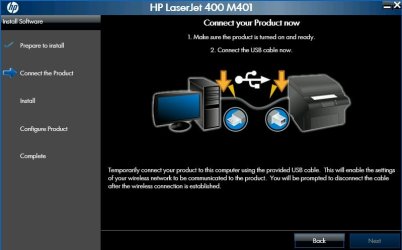
8.3 Power up the printer;
8.4 Plug in USB cable;
8.5 In Virtual Machine -
in full screen - select USB in the taskbar and attach the printer;
8.6 Allow the device to be recognized and begin the install procedure -
HP loads appropriate data and creates a virtual CD with HP Smart Install;
8.7 Double click the Virtual CD and run HP Smart Install
8.8 Select desired software to install;
8.9 Accept agreements and proceed;
8.10 Select - connect through wireless network - allow the software to discover;
8.11 Printer will be displayed - click next;
8.12 Disconnect the USB cable when requested;
8.13 When the USB cable is disconnected, the drivers and full program will install;
8.14 When offered, set printer as default and print a test page;
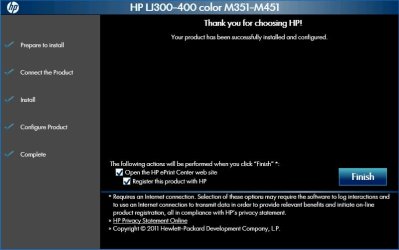
8.15 HP Smart Install then completes the install;
8.16 Make final selections that are offered;
8.17 Click Finish;
8.18 If regional settings were changed for install - reconfigure as necessary.
When installation on the virtual machine is completed, the HP printer will have a wireless connection to both the Windows 7 host and the Virtual machine. There will be no need to attach or enable the printer when using either system. Simply open the machine you want to use and print.
HTH


") .
.