By all means, avoid using a "Homegroup". That has never worked reliably. It requires one computer to be the Homegroup administrator, and computers will frequently fight with each other over who gets that honor.
There are many different ways to achieve the same results, but I'll lay out a quick tutorial of the method I have used for 10 years for configuring bidirectional sharing. If you only intend to share in one direction, you should be able to figure out which steps aren't relevant for your situation.
Step 1:
Make sure both computers are on the same LAN subnet.
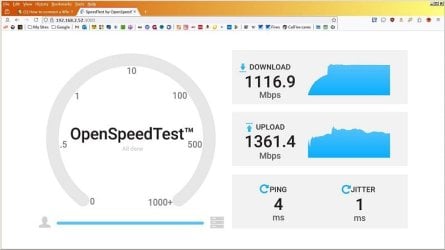
If both are connected to the same router, chances are they're likely already on the same subnet, but it never hurts to make sure before proceeding. Open a command prompt and enter "ipconfig", then check the response to see what IP address each computer is using. (In the illustration I created below, networking two virtual machines, one is assigned 192.168.2.52 and the other is 192.168.2.60.)
(Beware: the "ping" command from a command prompt won't be reliable until Step 2 is completed.)
Step 2:
Make sure both Windows installations are configured for sharing.
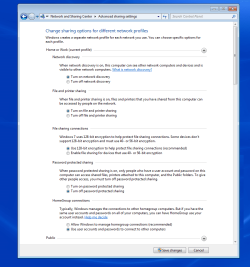
Find the link to "advanced sharing settings" in "Network and Sharing Center". Note that the dopey menus in Win 10 make it hard to get to, so it's simpler to just type "advanced sharing" in the Win 10 search box to find it.
There are lots of other settings here, but these are the relevant options:
View attachment 424948
Step 3:
Create a shared folder on each computer.
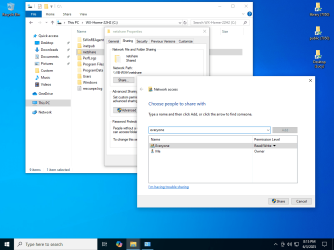
You can name the folder anything you want, but in the illustration below I named the folder "netshare". Then right-click the folder and select "Properties" -> [Sharing] tab -> and click the [Share...] button.
This may be optional for you, but I'm sharing folders with the family so rather than choosing names I just add "Everyone" to the list and set the permission level to "Read/Write".
Finish by clicking the [Share] button.
View attachment 424949
Warning: Do not try to share the root directory of a drive! It can be done, but it's difficult and you'll just make more headaches for yourself.
Warning: You can share a folder or a subfolder, but try to avoid sharing any folders in the "C:\Users\{name}" folder because different Windows versions impose extra restrictions on that directory tree. Sometimes it works, sometimes it doesn't.
Step 4:
MAKE SURE YOU LOGIN TO BOTH COMPUTERS WITH A PASSWORD!
This is the step that trips up most people. It's possible to setup anonymous access, but it's unreliable. Save yourself the headaches and just use a Windows password to login to each computer. When you get to Step 5, Windows will ask you for your password, and it gets finicky if you don't have one.
When you get this far, you should have access to the other computer via "Network" in Windows Explorer. To make access easier, though, I add one additional step:
Step 5:
Create a shortcut on each computer to the shared folder on the other.
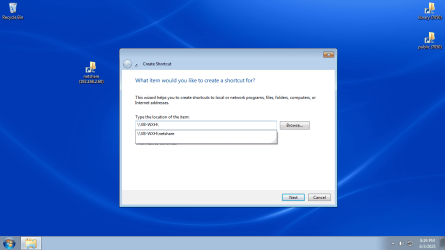
Right-click on your desktop and select "New/Shortcut". Starting with two backslashes, type the name of the network share on the other computer. Note you can use either the machine name or the IP address.
View attachment 424950
Now you should be able to double-click the shortcut and see the contents of the shared folder on the other computer.