How to Create an Internet Explorer "InPrivate Browsing" Shortcut
Information
InPrivate Browsing enables you to surf the web without leaving a trail in Internet Explorer. This includes cookies, temporary Internet files, history, and other data. Toolbars and extensions are disabled by default. This helps prevent anyone else who might be using your computer from seeing where you visited and what you looked at on the web.
This tutorial will help show you how create a shortcut to open a Internet Explorer InPrivate Browsing window in Windows 7.
This tutorial will help show you how create a shortcut to open a Internet Explorer InPrivate Browsing window in Windows 7.
Note
For more information about InPrivate Browsing, see the information in this tutorial.
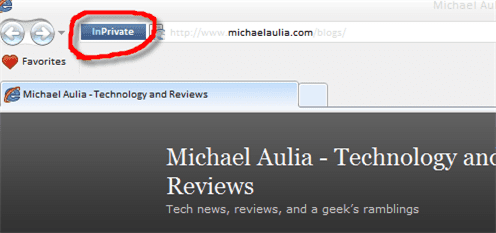
EXAMPLE: Internet Explorer InPrivate Browsing Window
NOTE: This is the default window you will see when you open a InPrivate Browsing window. Notice how you will have a InPrivate indicator to the left of the address bar to let you know that you have InPrivate Browsing turned on.

OPTION ONE
To Download the "InPrivate Browsing" Shortcut
NOTE: For how to tell if Windows is a 32-bit or 64-bit System Type.
1. For a 32-bit Windows
A) Click on the Download button below to download the file below.
32-bit_W7_32-bit_IE_(InPrivate Browsing).zip
Download
B) Go to step 4.
2. For a 64-bit Windows
A) To use the 32-bit Internet Explorer, click on the Download button below to download the file below.
64-bit_W7_32-bit_IE_(InPrivate Browsing).zip
Download
B) To use the 64-bit Internet Explorer, click on the Download button below to download the file below.
64-bit_W7_64bit_IE_(InPrivate Browsing).zip
Download
4. Click on Save and save the .zip file to the Desktop.
5. Right click on the downloaded .zip file and click on Open.
6. If prompted, click on Allow in the UAC prompt.
7. Select and extract (drag and drop) the IE (InPrivate Browsing) shortcut to the desktop.
8. Right click on the extracted IE (InPrivate Browsing) shortcut and click on Properties, General tab, and the Unblock button. (See screenshot below)
NOTE: If the Unblock button is not there, then the shortcut is already unblocked. Continue on to step 8.

9. You can now Pin to Taskbar or Pin to Start Menu this shortcut, assign a keyboard shortcut to it, or move it where you like for easy use.
10. You can now delete the downloaded .zip file (on desktop) if you would like to.
OPTION TWO
To Manually Create the "InPrivate Browsing" Shortcut
NOTE: For how to tell if Windows is a 32-bit or 64-bit System Type.
1. Right click on a empty space on your desktop, and click on New and Shortcut.
2. For a 32-bit Windows
A) Type this for the location: (See screenshot below step 4)
"%ProgramFiles%\Internet Explorer\iexplore.exe" -private
Tip
To have a Inprivate shortcut that opens directly to a specific website, you can add the website's address after -private. For example, to have it open to Seven Forums, I would use this location:
Code:
"%ProgramFiles%\Internet Explorer\iexplore.exe" -private [URL]http://www.sevenforums.com/[/URL]B) Go to step 4.
3. For a 64-bit Windows
A) To use the 32-bit Internet Explorer, type this for the location: (See screenshot below step 4)
"%ProgramFiles(x86)%\Internet Explorer\iexplore.exe" -private
Tip
To have a Inprivate shortcut that opens directly to a specific website, you can add the website's address after -private. For example, to have it open to Seven Forums, I would use this location:
Code:
"%ProgramFiles(x86)%\Internet Explorer\iexplore.exe" -private [URL]http://www.sevenforums.com/[/URL]B) To use the 64-bit Internet Explorer, type this for the location: (See screenshot below step 4)
"%ProgramFiles%\Internet Explorer\iexplore.exe" -private
Tip
To have a Inprivate shortcut that opens directly to a specific website, you can add the website's address after -private. For example, to have it open to Seven Forums, I would use this location:
Code:
"%ProgramFiles%\Internet Explorer\iexplore.exe" -private [URL]http://www.sevenforums.com/[/URL]

5. Type Internet Explorer (InPrivate Browsing) for the name, and click on the Finish button. (See screenshot below)
NOTE: You can type any name you would like for the shortcut though.

6. You can now Pin to Taskbar or Pin to Start Menu this shortcut, assign a keyboard shortcut to it, or move it where you like for easy use.
That's it,
Shawn
Related Tutorials
- How to Open a Internet Explorer InPrivate Browsing Window
- How to Enable or Disable Internet Explorer InPrivate Browsing
- How to Create a "Internet Explorer" Desktop Icon in Windows 7
- How to Create a Windows 7 Internet Explorer No Add-ons Shortcut
- How to Create a Internet Website Shortcut in Windows 7
Attachments
Last edited:
")