How to Create a Shortcut to Change Power Plans in Windows 7 and Windows 8
Information
This tutorial will show you how to create or download shortcuts that will allow you to change or switch to the High Performance, Balanced, Power Saver, or a custom power plan instantly without having to go through Power Options in the Control Panel in Windows 7 and Windows 8.
EXAMPLE: Power Plans
NOTE: These shortcuts will allow you to toggle between your power plans here automatically.

OPTION ONE
To Download Shortcuts to Change Default Power Plan
NOTE: If you would like to have a shortcut to change to a custom power plan, then you will need to manually create one for it in OPTION TWO below.
1. Shortcut to Change to the High Performance Power Plan
A) Click/tap on the download button below to download the file below, and go to step 4 below.
High_Performance_Power_Plan.zip
Download
2. Shortcut to Change to the Balanced Power Plan
A) Click/tap on the download button below to download the file below, and go to step 4 below.
Balanced_Power_Plan.zip
Download
3. Shortcut to Change to the Power Saver Power Plan
A) Click/tap on the download button below to download the file below, and go to step 4 below.
Power_Saver_Power_Plan.zip
Download
4. Save the downloaded .zip file to your desktop.
5. Open the .zip file and extract (drag and drop) the power plan shortcut to your desktop.
6. Right click or press and hold on the power plan shortcut, and click/tap on Properties, General tab, and on the Unblock button. (See screenshot below)
NOTE: If you do not have a Unblock button under the General tab, then the shortcut is already unblocked and you can continue on to step 7.

7. In Windows 7, you can now Pin to Taskbar or Pin to Start Menu, add to Quick Launch, assign a keyboard shortcut to it, or move this shortcut to where you like for easy use.
8. In Windows 8, you can Pin to Taskbar on desktop, Pin to Start screen, add to Quick Launch, assign a keyboard shortcut to it, or move this shortcut to where you like for easy use.
9. When finished, you can delete the downloaded .zip file if you like, or save it to use again.
OPTION TWO
To Manually Create the Shortcuts to Change Default Power Plan
1. Open a command prompt, type powercfg -list at the prompt, and press enter. (See screenshots below)


2. Make note of the GUID number for the power plan (name at far right) that you want to create a shortcut for. (See screenshots above)
NOTE: You will need to enter this GUID number in step 4 below. You can Copy to Clipboard the GUID number from within the command prompt for step 4 to make this easier for a custom power plan.
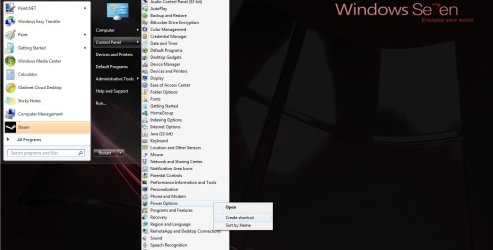
3. Right click or press and hold on an empty area on your desktop, and click/tap on New and Shortcut.
4. Type powercfg.exe /setactive GUID number into the location area, and click/tap on the Next button. (See screenshot below)
NOTE: For a custom power plan, substitute GUID number in the command with the actual GUID number displayed from step 2 above instead. You can copy the complete command in bold below for the default power plans to make this easy.
- High Performance
Code:powercfg.exe /setactive 8c5e7fda-e8bf-4a96-9a85-a6e23a8c635c - Balanced
Code:powercfg.exe /setactive 381b4222-f694-41f0-9685-ff5bb260df2e - Power Saver
Code:powercfg.exe /setactive a1841308-3541-4fab-bc81-f71556f20b4a

5. Type the power plan name (ex: High Performance), and click/tap on the Finish button. (See screenshot below)
NOTE: You can name this shortcut anything you would like though.

6. Right click or press and hold on the new power plan shortcut, and click/tap on Properties.
7. Click/tap on the Shortcut tab, and click/tap on the Change Icon button. (See screenshot below)

8. Click/tap on OK. (See screenshot below)

9. In the line under "Look for icons in this file", type in the location below, and press Enter. (See screenshot below)
%SystemRoot%\System32\powercpl.dll

10. Select the Power Options icon highlighted in blue above, and click/tap on OK. (See screenshot above)
11. Click/tap on Apply, then to the right of Run, click/tap on the drop down menu, select Minimized, and click/tap on OK. (See screenshot below)
NOTE: This is so the command window will not be seen flashing quickly open and closed when you use the power plan shortcut to change power plans. If you would like to see the command prompt flash to help see that the shortcut was used, then you can leave this set to Normal window.

12. In Windows 7, you can now Pin to Taskbar or Pin to Start Menu, add to Quick Launch, assign a keyboard shortcut to it, or move this shortcut to where you like for easy use.
13. In Windows 8, you can Pin to Taskbar on desktop, Pin to Start screen, add to Quick Launch, assign a keyboard shortcut to it, or move this shortcut to where you like for easy use.
That's it,
Shawn
Related Tutorials
- How to Add "Choose Power Plan" to Desktop Context Menu in Windows 7 and Windows 8
- How to Select a Power Plan Scheme in Windows 7 and Windows 8
- How to Change the Power Plan Settings in Windows 7
- How to Change Power Plan Settings in Windows 8
- How to Create or Delete a Custom Power Plan in Windows 7
- How to Restore Default Power Plan Settings in Windows 7 and Windows 8
- How to Run a Windows 7 Power Efficiency Diagnostics Report
- How to Change the Return to Sleep Timeout for a Unattended Wake Up in Windows 7
- How to Create a Power Options Shortcut in Windows 7
- How to Create a "Advanced Power Options" Shortcut in Windows 7
- How to Create a Power Troubleshoot Shortcut in Windows 7
- How to Export and Import Power Plans in Windows 7
- How to Rename a Power Plan Name in Windows 7
- How to Specify Default Power Plan for All Users in Vista, Windows 7, and Windows 8
Attachments
Last edited:


")
")