So, I just wrote this up for all the people Googling around in the future. Anyways, I believe that this is the way I could install a dual-boot, I believe:
This was created by a user and not a moderator or staff member of Seven Forums.
NOTE: This process will probably not work on an OS older than Windows Vista. The OS also must be 64-bit.
To all the people looking to dual boot a preinstalled
Windows 8 installation with Windows 7 on an Acer Aspire V5-571P, you may have some problems. The process will be destructive.
In order to install Windows 7 on your machine, you must transfer all the files you want to keep on an external device. Also, make a list of all of the programs on your hard drive. This process may take between 4 to 7 hours.
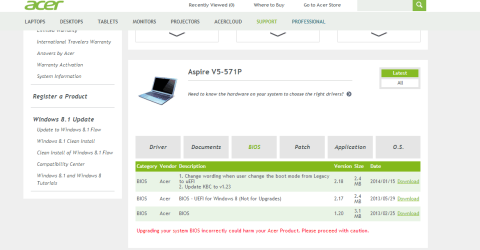
Prerequisites) Back up all your files, as mentioned above. As well as that, go to Acer Recovery Management and create a Drivers and Applications Backup just in case. You will need one DVD or one flash drive larger than 1.92 GB to store the backup on. Also, make sure you have a Windows 8 OEM DVD. You can get one by calling Acer Support. You may also want to find our your Windows 8 or 8.1 product key by using a third-party program.
Step 1) Once you have completed and backed up all the files you want to keep, restart your computer. Insert the Windows 7 SP1 x64 DVD now. The ISO is available for download at:
Official Windows 7 SP1 ISO Image Downloads | Windows 7 Forums. Also, once you download the DVD, use the Windows 7 ISO to USB/DVD Tool (
Microsoft Store)
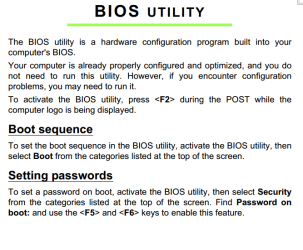
Step 2) Press F2 repetitively once your computer starts. You will now see your BIOS settings. Navigate to the [Boot] Tab, which should be the second to the last.
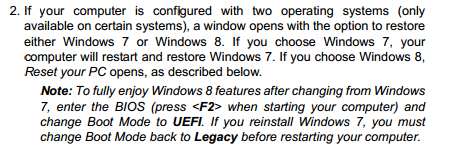
Step 3) Change the Boot Mode to 'Legacy BIOS' and disable secure boot. After you have done this, move over to your [Main] Tab. Go down to 'F12 Boot Menu' and Enable it. This will allow you to select which device to boot from. Go to the [Exit] Tab on the BIOS and press 'Save Changes'
Step 4) Your computer will now restart now. Press F12 when the Acer logo appears. Once the boot menu is seen, select the DVD Drive. If you missed F12, you will still see 'Press any key to boot to CD/DVD'
Step 5) Wait for Windows 7 setup to load. Once Windows gets to whether you should do an upgrade or a Clean Install, press Clean Install. Once you are here, you should see a list of all the partitions on your computer.
WARNING: Beyond this point, Windows 8.1 will be deleted and will NOT be recoverable. Drivers for graphics may not work, and continue with caution.
Step 6) Delete the partition Windows 8.1 is installed on. It is usually the largest partition on the computer.
Step 7) Press Next and wait for Windows 7 to install. Wait for one hour and enter the information needed to install.
NOTE: You may want to do a keyless install of Windows 7 in case anything goes wrong. If you do this, Windows will not bug you if your key is genuine or not if you decide to install Windows 7 again.
Step 8) Once you are at the Windows 7 desktop and have installed all the drivers needed from your flash drive or DVD, press <Personalization> and select a Windows Aero theme. This will make the styles of Windows 7 (which you may have wanted) to appear.
Step 9) Install all the programs you had on Windows 8 if you want to.
9a) If you did a keyless install, continue on prompt 9b. If not go to step 10.
9b) Press Start and right click on Computer and press properties.
9c) Scroll down to Windows activation and press the blue text that says 'Windows will automatically activate in X days' or similar.
9d) Input your product key and press next.
9e) Windows will activate and now you have a genuine copy of Windows.
9f) Continue to Step 10.
Step 10) Go to start search for Windows Update and update your computer.
NOTE: This is the end of installing Windows 7. This will continue to create a dual-boot with Windows 8 or 8.1
Step 11) Go to start and search for 'partition.' Go to 'Create and format hard disk partitions.' Once there, right click on the largest partition (which should be the boot or Windows 7 partition) and press 'Shrink Volume.'
Step 12) Input a value larger than 40GB (40960 MB) to install Windows 8 on. I recommend leaving Windows 8 with 120GB (122800 MB) at least.
Step 13) Right click on the Unallocated space, which should be black in Disk Management and press Create new Simple Volume. Input all the information needed and provide a label that can be clearly identified, like 'Windows 8.'
Step 14) Insert your Windows 8 DVD and restart your computer.
Step 15) Press F12 and boot onto your DVD. Let Windows 8 or 8.1 Setup go until you reach the screen that says to 'Upgrade' or 'Clean Install.'
Step 16) Click on the volume you created earlier that is labeled as 'Windows 8' or similar. Click next and wait for Windows 8 to install.
Step 17) Input the Windows 8 product key provided on your packaging or from the program mentioned in the prerequisites. If your product key doesn't work, contact OEM or Microsoft support and explain your situation.
Step 18) Once you are at the desktop install the drivers off of your USB device.
18a) If you have Windows 8, continue to step 18b. If you have Windows 8.1, go to step 19.
18b) Go to the Windows store by going to the Charms bar and clicking 'Start.'
18c) Click the store icon and click the largest icon, which should say 'Update to Windows 8.1.'
18d) Wait a few hours for Windows 8.1 to download and complete the on screen prompts. Whenever Windows restarts, make sure to select Windows Setup, not Windows 8 or 7. If Windows Setup doesn't appear, click Windows 8.
18e) Once done, go to the desktop and go to Windows Update.
18f) Look for KB2919355 and install it.
18g) Once KB2919355, or Windows 8.1 Update 1 is installed, continue to Step 19.
Step 19) Go to Windows Update and install all Windows Updates. Install the programs that you want to install and continue.
NOTE: The dual boot setup is now complete and you may stop here. If you would like to learn about how to rename the 'Earlier Version of Windows' entry to 'Windows 7', continue.
Step 20) Install EasyBCD. (
EasyBCD - NeoSmart Technologies)
Step 21) Click Edit Boot Menu in the left hand pane. Select the Earlier Version of Windows entry and rename it to whatever you want.
Step 22) On the right hand side of the right pane, select the OS you want to be default. You may want Windows 8.1 to be default since the bootloader can see both Windows 8.1 and 7.
Step 23) Press Save Settings.