How to Delete Fonts in Windows 7 and Windows 8
Information
A font is a collection of numbers, symbols, and characters. A font describes a certain typeface, along with other qualities, such as size, spacing, and pitch.
This tutorial will show you how to delete fonts of your choice that are installed in Windows 7 and Windows 8.
For a list of all default fonts that come supplied with Windows 7, see: Fonts supplied with Windows 7
For a list of all default fonts that come supplied with Windows 8, see: Fonts supplied with Windows 8
Warning
You do not want to delete a font that is being used by Windows. Typically the fonts that are not in use and safe to delete are the default fonts set to Hide in the Details Pane, and the fonts installed by you.

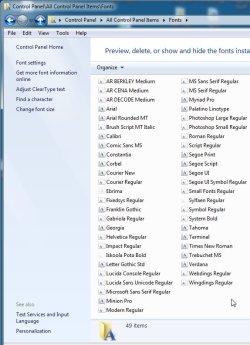
EXAMPLE: Default Fonts in Windows 7
NOTE: This was from a English Windows 7 Ultimate with Office installed to compare with your fonts to help know which ones are the default ones.


OPTION ONE
To Delete Fonts in the Fonts Folder
1. Open the Control Panel (icons view) in Windows 7 or Windows 8.
2. Click/tap on the Fonts icon.
3. Select a individual font or font family that you want to delete. (See screenshots below)
TIP: To select more than one font at a time, press and hold down the Ctrl key while you click on each font.
NOTE: A individual font only has a single page on it's icon. A font family has more than one page stacked on it's icon. It means that it has more individual fonts included in that font family. If you wanted to only delete a individual font in the font family, you will need to click on the font family to see the individual fonts inside the font family first.


4. Click/tap on the Delete button on the toolbar. (See screenshots above)
NOTE: You can also right click on the font and click on Delete. If delete a font family, then it will delete all of the individual fonts in the font family as well.
5. Click/tap on Yes to confrim the deletion. (See screenshots below)
NOTE: The left screenshot is for a individual font, and the right screenshot is for a font family.


OPTION TWO
To Manually Delete Fonts in Registry Editor
1. Press the Windows + R keys to open the Run dialog, type regedit, and click/tap on OK.
2. If prompted by UAC, then click/tap on Yes (if in adminsitrator account) or type in the administrator's password (if in standard account).
3. In regedit, navigate to the location below. (see screenshot below)
Code:
HKEY_LOCAL_MACHINE\SOFTWARE\Microsoft\Windows NT\CurrentVersion\Fonts
4. In the right pane of Fonts, right click on the font name that you want to delete and click on Delete.
5. Click/tap on Yes to approve the deletion.
6. If you have 64-bit Windows Installed
Note
To also delete the font as well in 64-bit Windows, you will also need to do this step.
If you have a 32-bit Windows installed, then skip this step since doing steps 1 to 5 will delete the font in it.
If you have a 32-bit Windows installed, then skip this step since doing steps 1 to 5 will delete the font in it.
A) In regedit, navigate to the location below. (see screenshot below)
Code:
HKEY_LOCAL_MACHINE\SOFTWARE\Wow6432Node\Microsoft\Windows NT\CurrentVersion\Fonts7. Repeat steps 4 to 6 for any other font you would like to delete
8. When finished, restart the computer to apply.
That's it,
Shawn
Attachments

Last edited:

")