How to Remove a Wireless Network in Windows 7
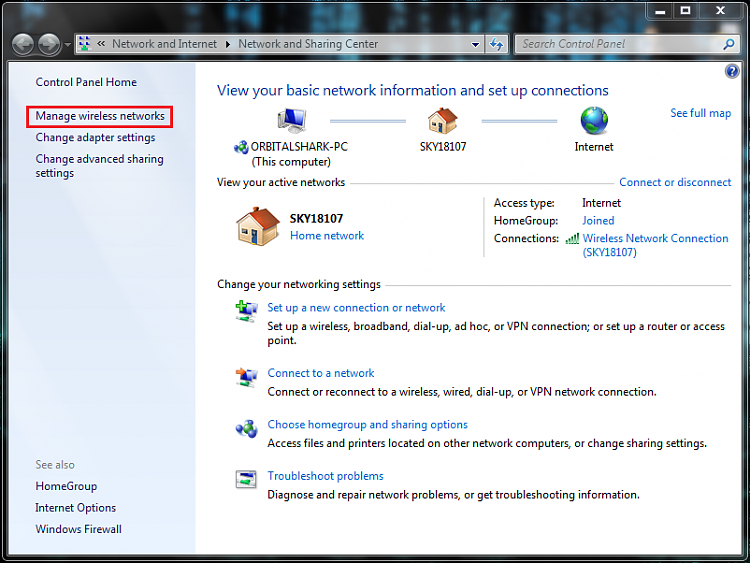
InformationThis tutorial can be used to show you how to remove a wireless network from within the Network and Sharing Center.
This can prove handy if you are having internet connectivity issues whereby you can connect to the network but it has limited access.
Here's How:
1, Right-click the network icon on the taskbar.
NoteYou can also access it through Control panel 'Network and Internet' followed by 'Network and Sharing center'
2, Once open, click 'Manage Advanced Networks' in the left hand panel
3, Left-click the wireless network you wish to remove, then click 'Remove' from the panel above
NoteYou can also right-click the network and select remove from the context menu
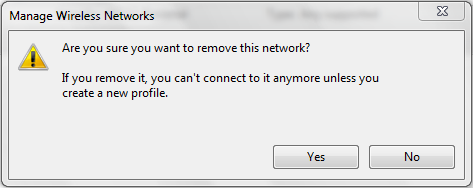
4, Confirm deletion by clicking 'Yes' on the confirmation box
Related Tutorials
- How to Workaround the Wireless Connection Issue in Standby
- Wireless Security: How To Protect Your Network
- How to Remove or Add a Network Connection to a Network Bridge
- How to Backup and Restore Wireless Network Profiles in Windows
- How to Create a "Set up a Network" Wizard Shortcut in Windows 7
- How to Change the Priority of Wireless Networks in Vista and Windows 7
- How to Add or Remove Wireless Networks from Allowed or Blocked Filter List in Windows
Wireless Network - Remove
Related Discussions


 Quote
Quote