How to Use SyncToy for Data Backups
InformationSyncToy is a FREE application for synchronising file and folders between different data locations/devices. It has a simple graphical interface and logic that makes it very easy to implement a robust backup routine for everyday data files (e.g. documents, music, photo's etc.).
This tutorial will show you how to:
- Create simple backups from your computer to an external USB device
- Execute the backup manually
- Optionally execute the backup automatically using Windows Task Scheduler
SyncToy is probably the easiest way to ensure your important data files are backed up. It caters for the simple needs of novices or less experienced computer users, but also has some powerful features that more experienced users will appreciate.
You will firstly need to to download and install SyncToy. The current version is SyncToy 2.1.
Download SyncToy:
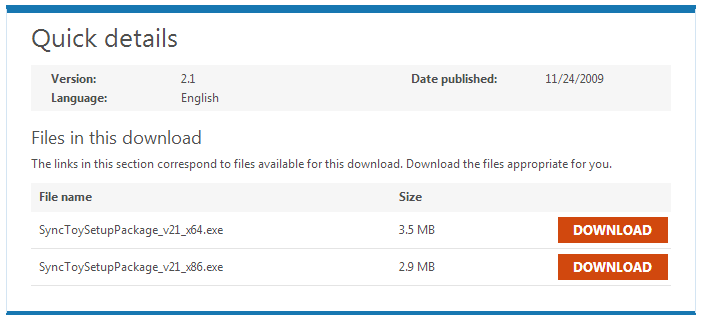
For 32-bit versions of Windows 7:For 64-bit versions of Windows 7:If you prefer, you can navigate to the Microsoft Download Centre and can choose the download from there:Choose:
- SyncToySetupPackage_v21_x86.exe download for 32-bit versions of Windows 7
- SyncToySetupPackage_v21_x64.exe download for 64-bit versions of Windows 7
NoteIf you currently use an earlier version of SyncToy, it is strongly recommended that you complete any existing folder synchronisation prior to installing SyncToy 2.1.
In order to run, SyncToy requires Microsoft Sync Framework 2.0 components. These are included in the SyncToy installation executable download.
Installing SyncToy:
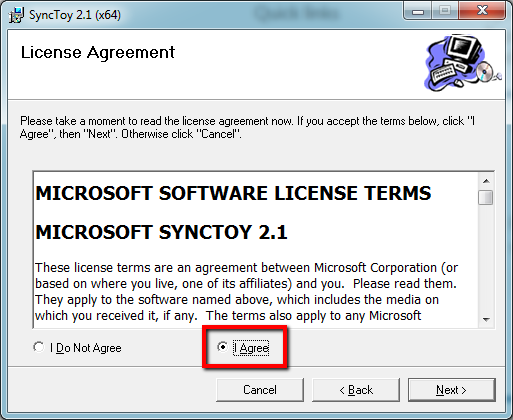
Install SyncToy by double-clicking the downloaded executable file.
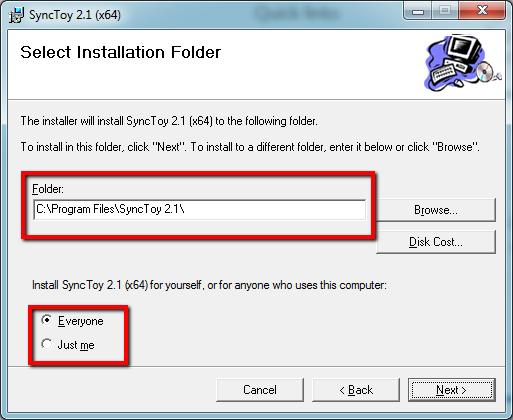
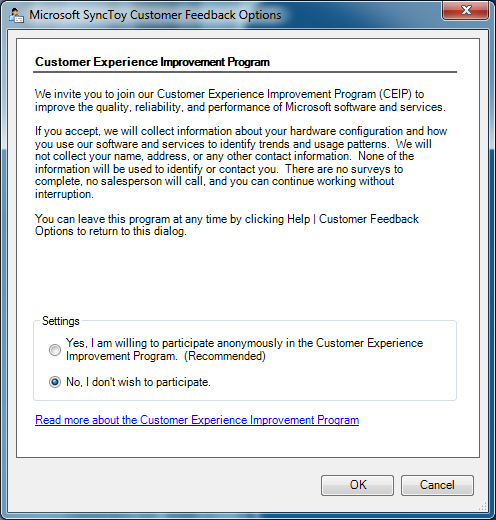
Take note of the important message on the first panel if you are currently using an earlier version of SyncToy. If this is your first installation of SyncToy, you can ignore the message.Now finalise the installation by completing the remaining panels as shown below. Once installed, SyncToy only occupies about 1.46 MB of disk space.
Understanding the SyncToy Concepts:
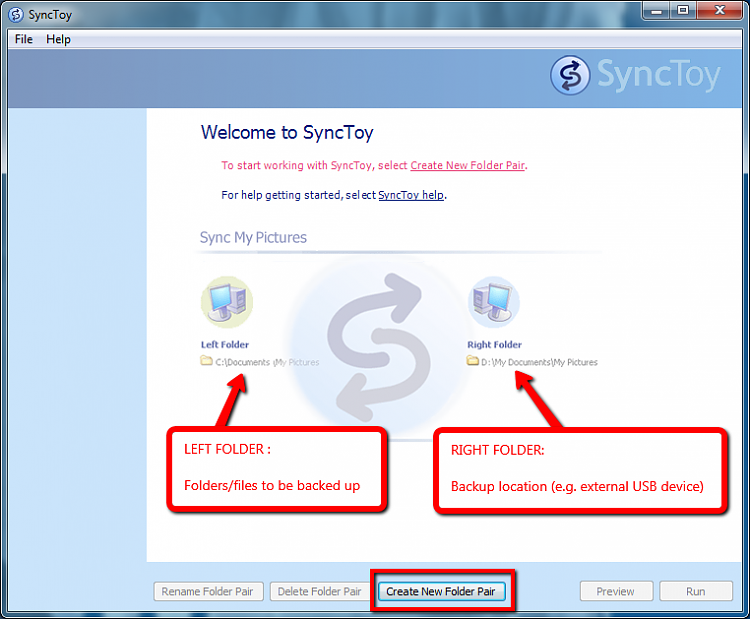
When you first open SyncToy, you will be presented with the main panel, as shown below.SyncToy employs simple logic to make effective backups. To use SyncToy you need to understand 3 key concepts:
- the LEFT folder - the location of the folder you want to backup (e.g. My Music)
- the RIGHT folder - the location to which the backup is to be made (e.g. external USB drive)
- the Folder PAIR - the rule describing the backup between the LEFT and RIGHT folder
TipAlthough SyncToy also allows for synchronisation from the RIGHT to LEFT folder if required, the easiest way to understand SyncToy is to remember the basic rule : LEFT folder to RIGHT folder using a FOLDER PAIR.
Using SyncToy:
Backing-up or synchronising data using SyncToy involves creating, and then running, one or more folder pairs.
Step 1 - Creating a FOLDER PAIR:
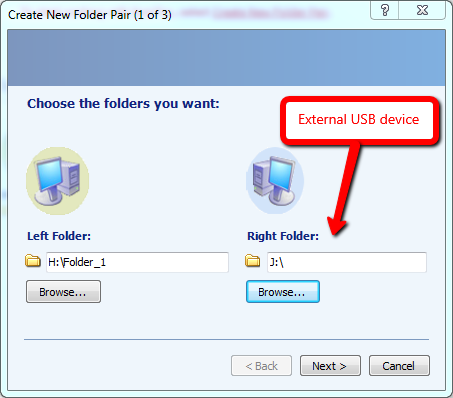
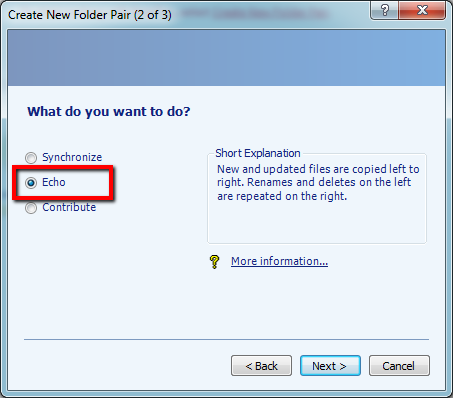
From the SyncToy main panel, select the button Create New Folder Pair. Select the LEFT and RIGHT folders using the browsing feature.After clicking Next, you will be prompted to select the sychronisation method on the next panel. There are three choices:
- Echo
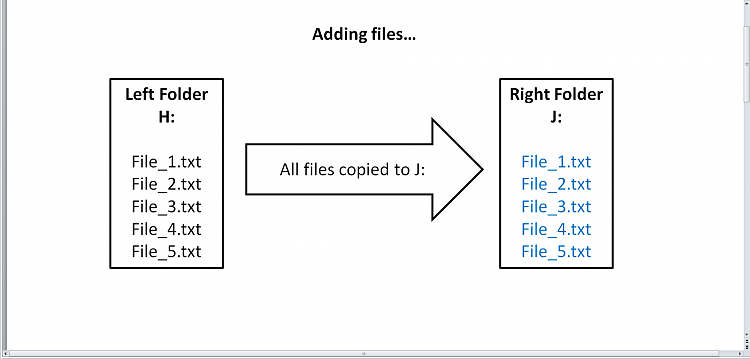
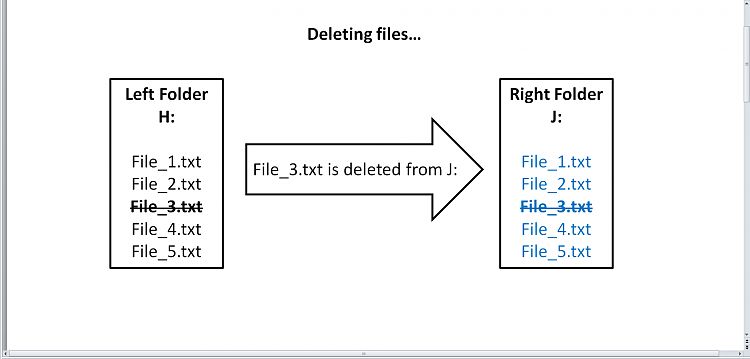
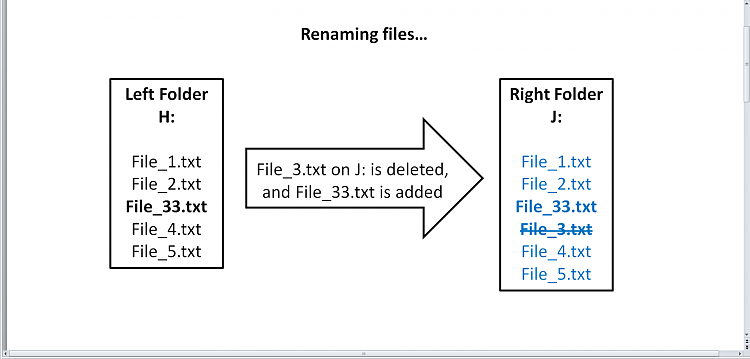
- New and updated (renamed and deleted) files are copied LEFT to RIGHT only
- Use this option if you want to backup data files one-way, from your computer to an external drive.
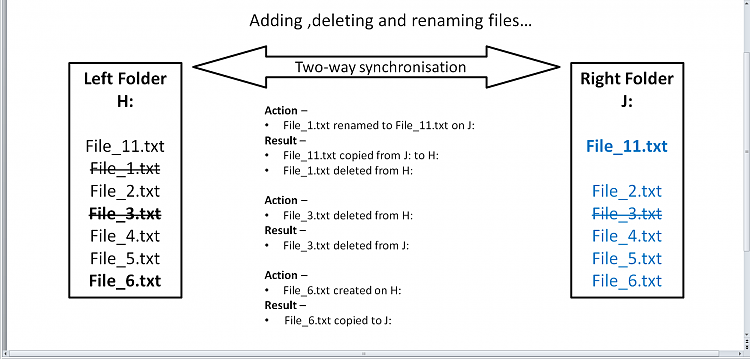
- Synchronize
- New and updated (renamed and deleted) files are copied BOTH ways
- Use this option if you want to synchronise data files between two computers, or your computer and an external drive.
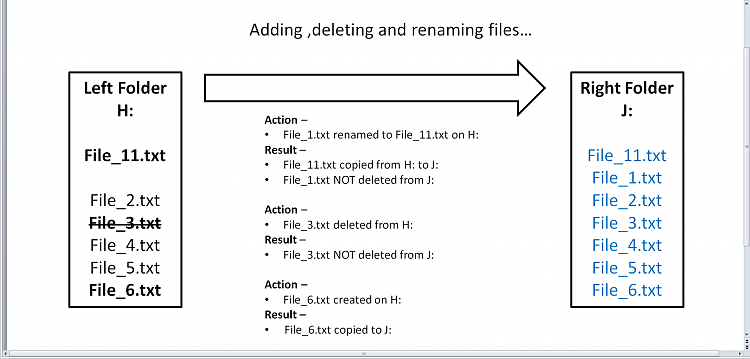
- Contribute
- New and updated (renamed) files are copied LEFT to RIGHT only. Deleted files are not mirrored.
- Use this option if you want to backup data files one-way, with the exception of deleted files.
TipThe Echo option is the easiest method to achieve complete backups, especially for novices. It always follows the basic LEFT to RIGHT SyncToy copy rule.
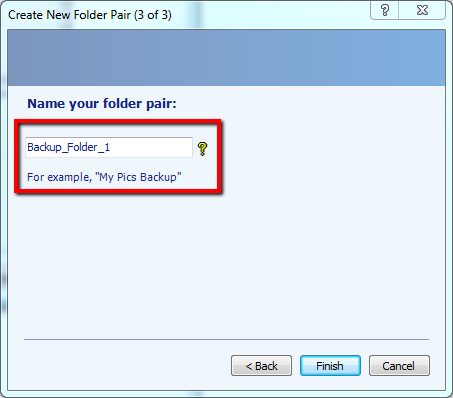
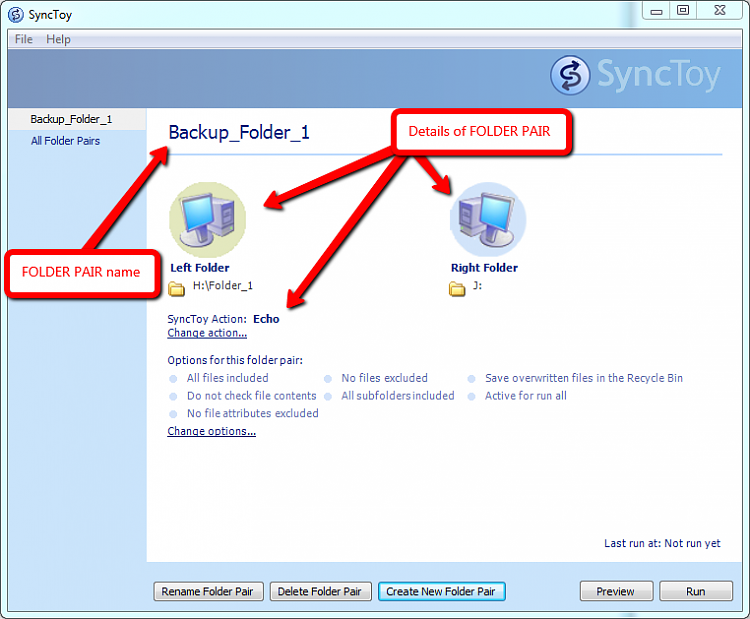
Select the Echo option.Now provide a name for the FOLDER PAIR.Click Finish to save the folder pair name. The FOLDER PAIR and its details will be shown on the main SyncToy panel.You can place additional conditions, such as wildcards to determine which files should be included or excluded from the folder pair once it is run. By default, all files are included for processing by SyncToy when the folder pair is run.
NoteFolder pair information is saved to C:\{User}\AppData\Local\Microsoft\SyncToy\2.0 as shown below:In order to maintain the folder pair link, a file withe name convention SyncToy_{number}.dat is saved in the root of each folder in the pair.If you delete this file, you will be unable to run the folder pair.
Step 2 - Running a FOLDER PAIR:
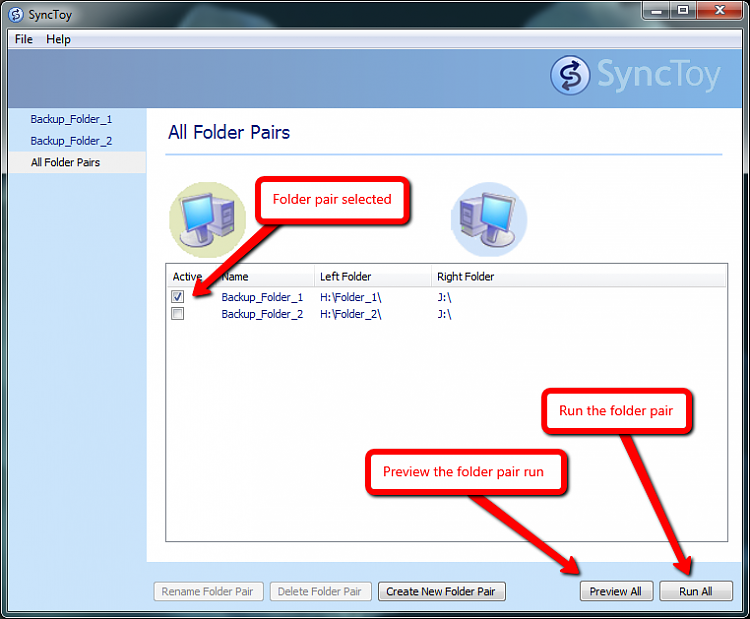
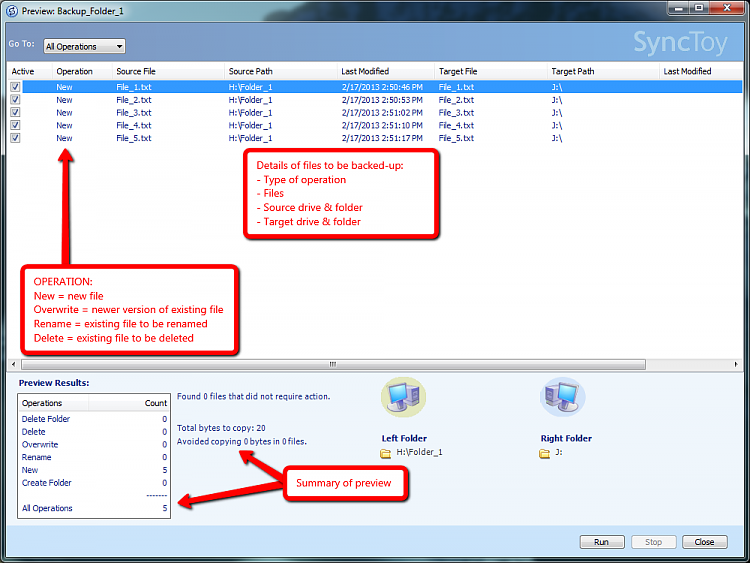
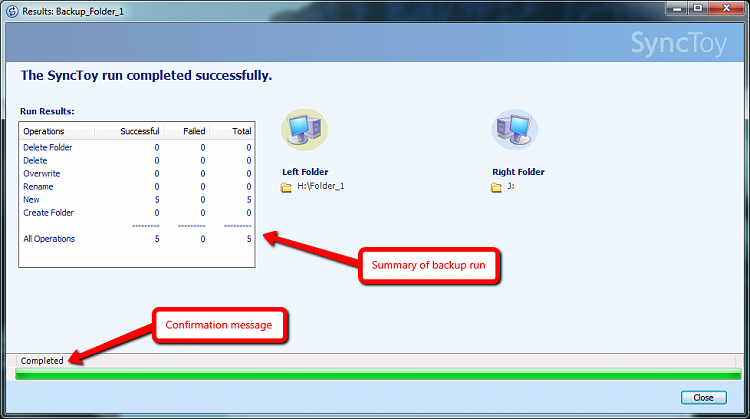
From the SyncToy main panel, select the folder pair you wish to run. The example below shows two folder pairs. The can select as many pairs as are available, or select individual pairs as required.You can use the Preview All option to preview the actions of the selected folder pair.You Run All option will execute the folder pair to create the backup.TipSyncToy actions are saved to SyncToyLog.txt in C:\{User}\AppData\Local\Microsoft\SyncToy\2.0
Running SyncToy from Windows Task Scheduler:
SyncToy backups can be automated by adding it as a task to the Windows Task Scheduler.
Step 1 - Create the SyncToy FOLDER PAIR/S:
If you haven't already done so, use SyncToy to create the folder pair/s you wish to use to backup your data.
Step 2 - Add SyncToy as a Task to Windows Task Scheduler:
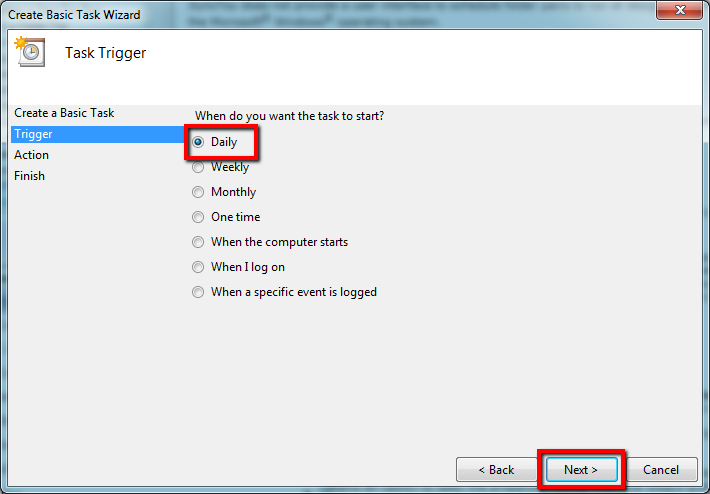
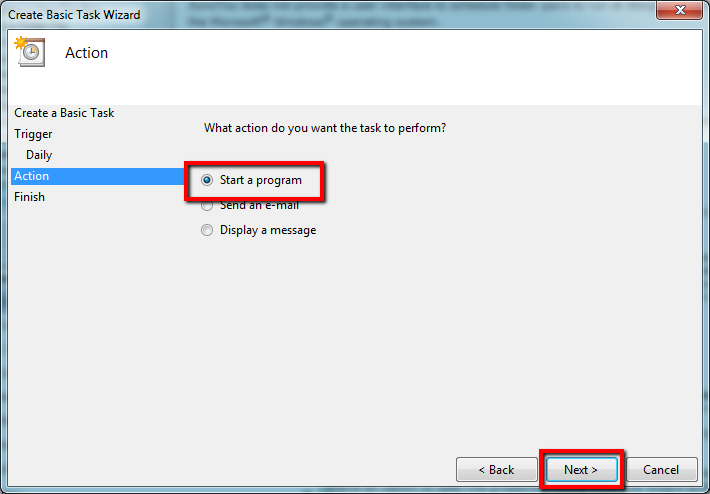
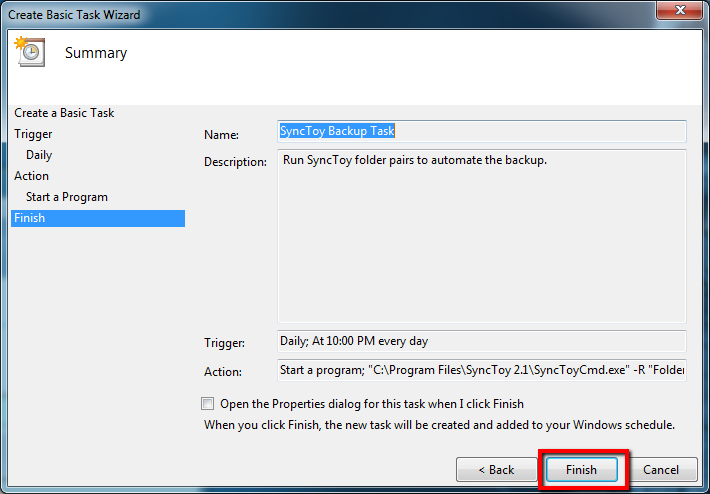
Click theorb, and then browse to All Programs > Accessories > System Tools and click Task Scheduler. From the main panel, click Create Basic Task as shown below.Provide a name and optional description for the task, and click Next.Now select the trigger that causes Task Scheduler to run the SyncToy backup - I use a Daily trigger.Specify the start date and time, and recurrence of the task, then click Next.The action Task Scheduler should perform is to open a program - select that, and click Next.Browse to the SyncToyCmd application.
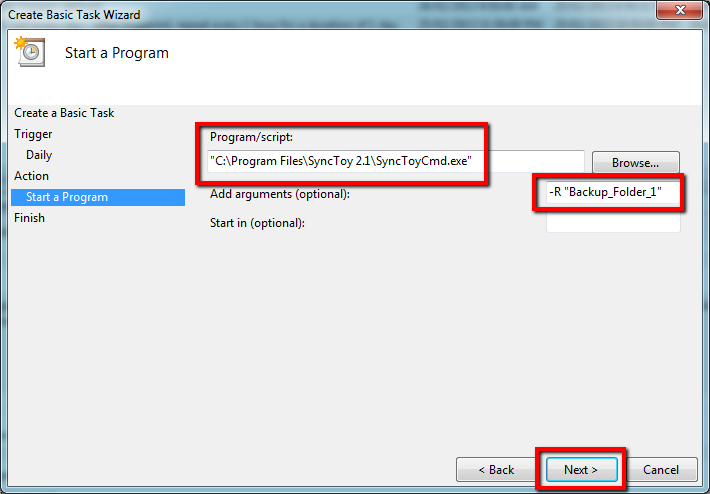
TipFor 32-bit installations the default path is C:\Program Files (x86)\Synctoy2.1
For 64-bit installations the default path is C:\Program Files\Synctoy2.1
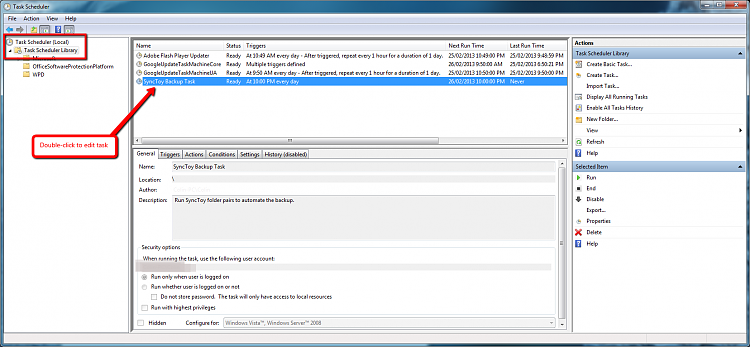
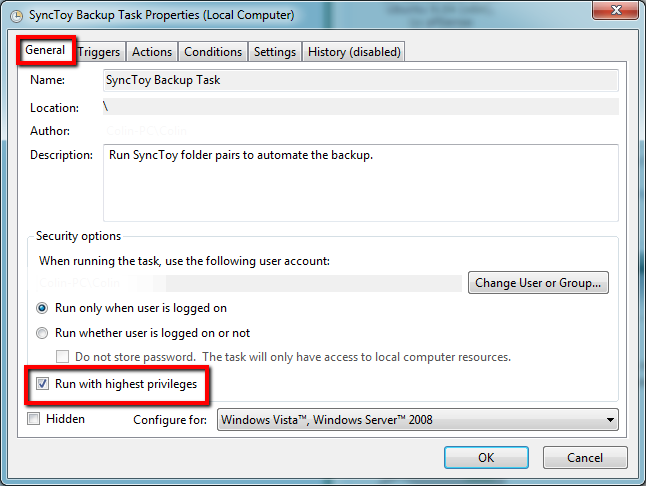
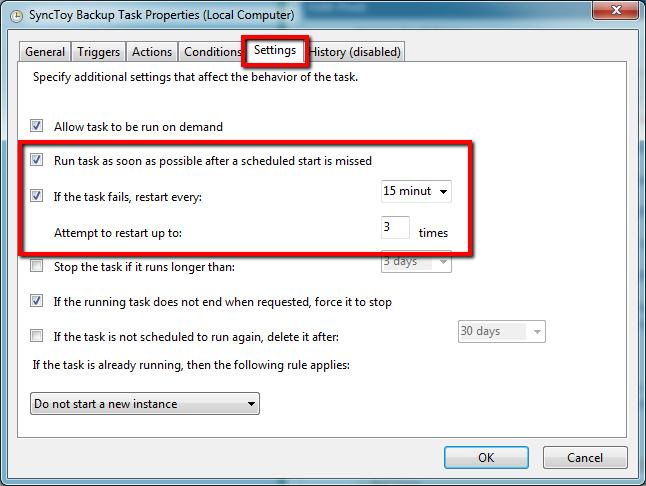
To have Task Scheduler run every folder pair, add -R in the Add arguments box. To run only a single folder pair, use -R and the folder pair name enclosed in double quotes, as shown in the example below. Click Next to proceed.Click Finish to finalise the basic parameters of the task.To specify additional parameters for the task, locate and double-click the task you just created.In the General tab, add a check mark in the Run with highest privileges option to force the task to run with administrator rights.In the Settings tab, use the options shown below to ensure the task runs if the schedule is missed (e.g. the computer is turned off at the time the task is scheduled to run), or if the task fails to start.
That's all there is to SyncToy - if you don't already have a data file backup strategy, then I hope you find this useful.
Regards,
Golden
SyncToy - Backup User Data
-
-
-
New #3
Nice work Colin.
It's some time since I used Synctoy and had forgotten how simple it is to set up.
-
-
-
-
New #7
Really good tutorial, Colin. I've referenced it in my mini-tute Sync, Backup and Store your Files to the Cloud with Skydrive - Windows 7 Forums
-
-
New #9
WoW Great Tut Golden,,It doesnt get better than Step by Step Configs..Thanks A Bunch to u & all the Amazeing Finds!
Related Discussions








 Quote
Quote