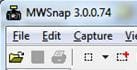
Screenshot using MWSnap
Downloading and Installing MWSnap
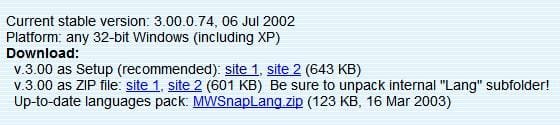
1) Go to the above link, and download the tool. you may choose to download it in .exe or .zip format.

2) Once download, installation is just doubling clicking (.exe). You will be prompted with a UAC message. Click yes, and follow the onscreen instructions. Very Simple!
Using MWSnap
3) Once installation is complete, to launch the tool, just go to Start > and click on MWSnap 3.
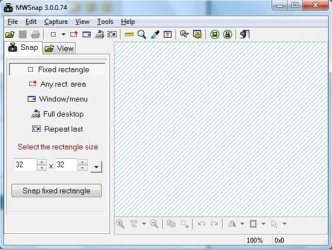
4) A box will open for language choice. I didn't think this is neccessasy, i just click OK without selecting. The tool is openned (second image).


5) All there is to do now, is to begin the snapping. From your chosen image, eg the image of this page i'm type, from the tool bar: click on the sith icon (icon with the + symbol on the corner or square).

Go to the image you want to take a snap, click at the point where you want and mouse drag the broken box area to the size of choice. Stop where you want and do a left mouse click.
Once the snap is captured into the tool as this.

Saving the snap
Save it to where ever you want by clicking File > Save As. From there just browse to the location where you saved the image when you do your uploading of attachments.
Very easy isn't it?
Information
This is a tool i have been using to take a snapshot of images of any size, and anytime. Alt+PrtScn or other key combos, are a thing of the past with this tool. The tool is call MWSnap, a freeware downloadable from Mirek's Free Windows Software and elsewhere.
Note
The version in this tutorial is version 3.00.
Downloading and Installing MWSnap
1) Go to the above link, and download the tool. you may choose to download it in .exe or .zip format.
2) Once download, installation is just doubling clicking (.exe). You will be prompted with a UAC message. Click yes, and follow the onscreen instructions. Very Simple!
Using MWSnap
3) Once installation is complete, to launch the tool, just go to Start > and click on MWSnap 3.
4) A box will open for language choice. I didn't think this is neccessasy, i just click OK without selecting. The tool is openned (second image).
5) All there is to do now, is to begin the snapping. From your chosen image, eg the image of this page i'm type, from the tool bar: click on the sith icon (icon with the + symbol on the corner or square).
Go to the image you want to take a snap, click at the point where you want and mouse drag the broken box area to the size of choice. Stop where you want and do a left mouse click.
Once the snap is captured into the tool as this.
Saving the snap
Save it to where ever you want by clicking File > Save As. From there just browse to the location where you saved the image when you do your uploading of attachments.
Note
There are a variety of extensions to choose from....jpg, .gif, .png and .tif
Very easy isn't it?
Related Tutorials
Attachments


Last edited by a moderator: