

How to Turn Windows Defender Real-Time Protection On or Off in Windows 7
InformationWindows Defender real-time spyware protection runs in the background and alerts you when spyware and other potentially unwanted software attempts to install itself or run on your computer.
This will show you how to turn real-time protection on or off in Windows 7. By default, real-time protection is turned on in Windows 7 Windows Defender.NoteIf you installed Microsoft Security Essentials (MSE), then it will disable Window Defender and MSE will be used by default instead.
The release of the Microsoft Safety Scanner has resulted in confusion about the available anti-malware tools provided by Microsoft and questions about when they should be used.
Read more at: Understanding Microsoft Anti-Malware Software ~ Security Garden
WarningTo help prevent spyware and other potentially unwanted software from running on your computer, it is recommended that you turn on Windows Defender real-time protection and select all real-time protection options.
Here's How:
1. If not already, turn Windows Defender on.That's it,
2. Open the Control Panel (icons view), and click on the Windows Defender icon.
3. Click on Tools on the toolbar at the top. (See screenshot below)
4. Under Settings, click on Options. (See screenshot below)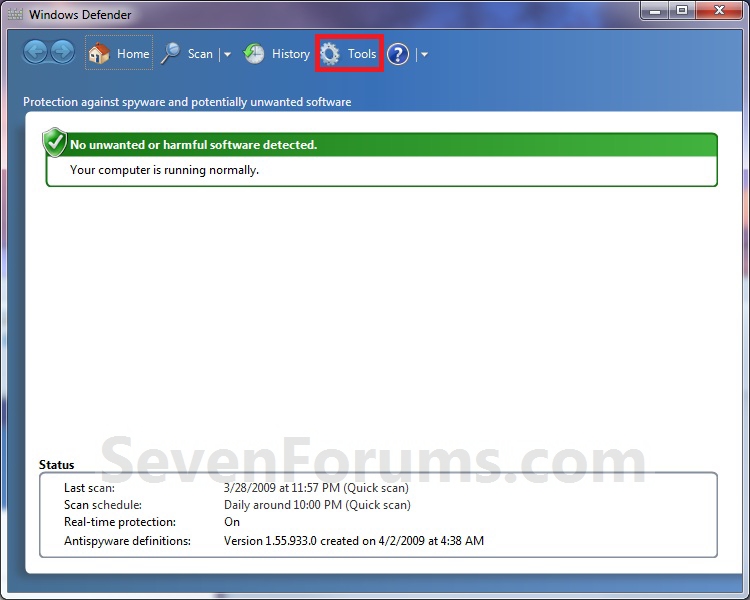
5. In the left pane, click on Real-time protection. (See screenshot below)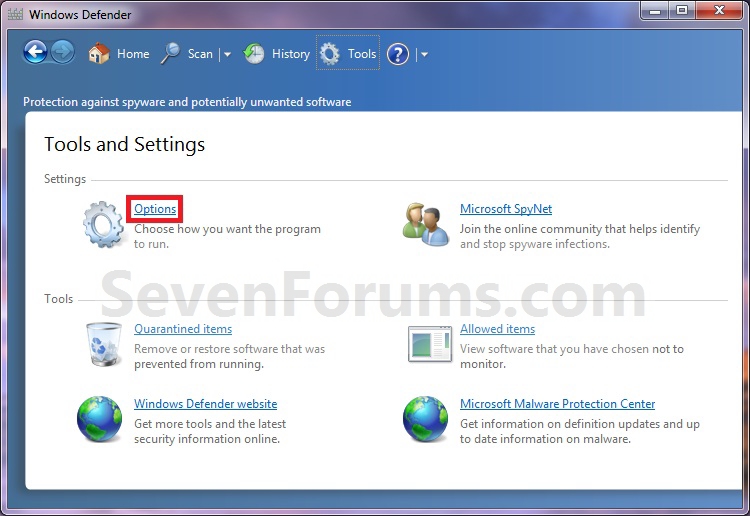
6. To Turn Off Real-time Protection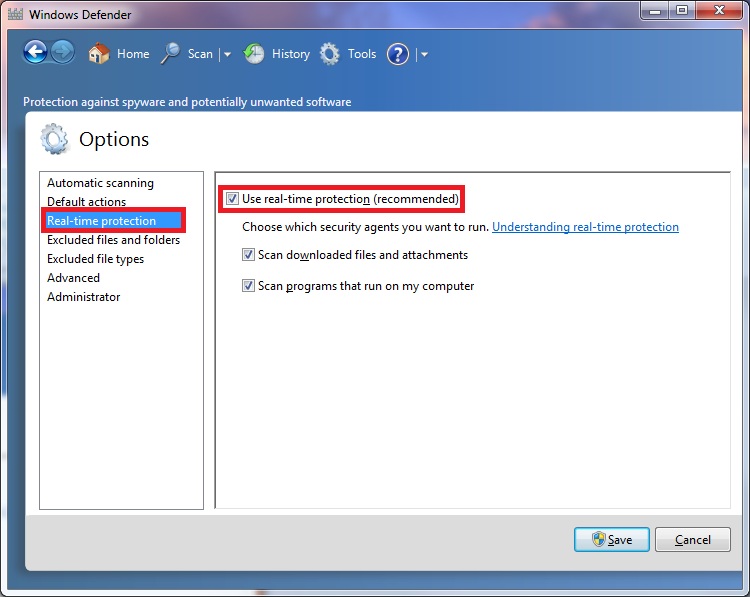
A) Uncheck the Use real-time protection box. (See screenshot above)7. To Turn On Real-time Protection
B) Go to step 8.
A) Check the Use real-time protection box. (See screenshot below step 5)8. Click on the Save button. (See screenshot below step 4)
B) Check the other real-time protection options that you would like to use. (See screenshot below step 5)
NOTE: To help protect your privacy and your computer, it is recommended that you select all of the real-time protection options.
- Scan downloaded files and attachments - Monitors files and programs that are designed to work with web browsers. These files can be downloaded, installed, or run by the browser itself. Spyware and other potentially unwanted software can be included with these files and installed without your knowledge.
- Scan programs that run on your computer - Monitors when programs start and any operations they perform while running. Spyware and other potentially unwanted software can use vulnerabilities in programs that you have installed to run malicious or unwanted software without your knowledge.
9. If prompted by UAC, then click on Yes.
10. When finished, close the Windows Defender window. (See screenshot below step 3)
Shawn
Windows Defender Real-Time Protection - Turn On or Off
-
New #1
Using the registry of Windows 7 SP1, how do I completely disable the real-time protection of Windows Defender?
Thanks
Bye
-
New #2
Stop posting the same question in multiple locations. Already answered here:
Windows Defender - Turn On or Off
-
-
-
-

Windows Defender Real-Time Protection - Turn On or Off
How to Turn Windows Defender Real-Time Protection On or Off in Windows 7Published by Brink


 Quote
Quote
Related Discussions